INTERIOR PANELS / TRIM UPPER INSTRUMENT PANEL REASSEMBLY
PROCEDURE

 55358K
1.INSTALL NO. 4 INSTRUMENT PANEL CUSHION
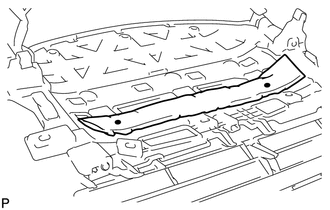
Using hot-melt glue, install a new No. 4 instrument panel cushion as shown in the illustration.
55357B
2.INSTALL NO. 3 INSTRUMENT PANEL CUSHION
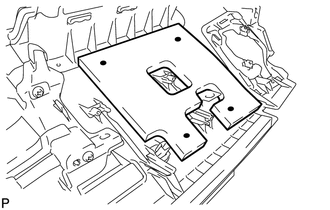
Using hot-melt glue, install a new No. 3 instrument panel cushion as shown in the illustration.
55356C
3.INSTALL NO. 2 INSTRUMENT PANEL CUSHION
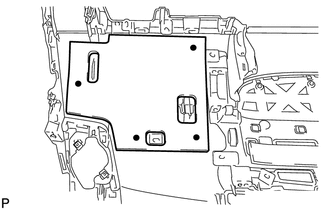
Using hot-melt glue, install a new No. 2 instrument panel cushion as shown in the illustration.
55349A
4.INSTALL INSTRUMENT PANEL CUSHION
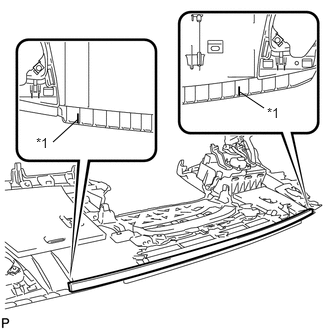
Align the marking lines on the upper instrument panel with the ends of the instrument panel cushion and install a new instrument panel cushion as shown in the illustration.
| *1 | Marking Line |
55355
5.INSTALL NO. 1 INSTRUMENT PANEL CUSHION
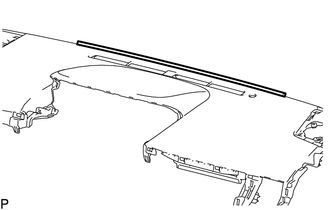
Install a new No. 1 instrument panel cushion.
55466A
6.INSTALL INSTRUMENT PANEL SAFETY PAD RETAINER
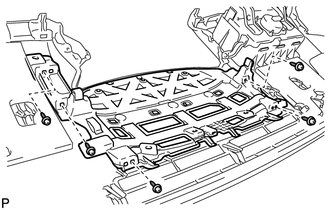
Install the instrument panel safety pad retainer with the 5 screws <D>.
73960A
7.INSTALL INSTRUMENT PANEL PASSENGER AIRBAG ASSEMBLY
82142
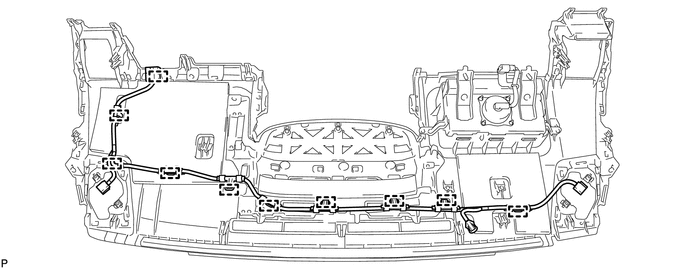
8.INSTALL NO. 2 INSTRUMENT PANEL WIRE
Engage each clamp to install the No. 2 instrument panel wire.
55086
9.INSTALL NO. 3 HEATER TO REGISTER DUCT SUB-ASSEMBLY
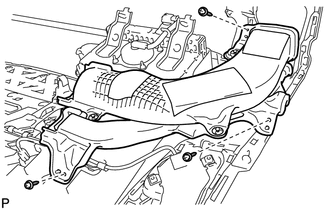
Install the No. 3 heater to register duct sub-assembly with the 3 screws <D>.
55084E
10.INSTALL NO. 1 HEATER TO REGISTER DUCT SUB-ASSEMBLY
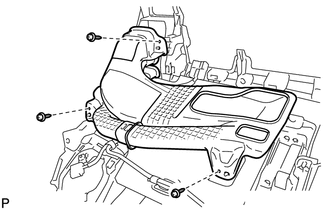
Install the No. 1 heater to register duct sub-assembly with the 3 screws <D>.
89120A
11.INSTALL AUTOMATIC LIGHT CONTROL SENSOR