 |
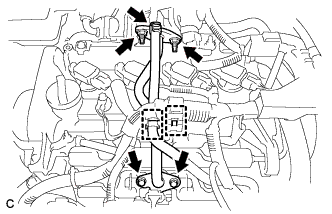
Disconnect the wire harness clamp.
OIL PUMP > REMOVAL |
| 1. INSTALL ENGINE STAND |
| 2. REMOVE NO. 2 EGR PIPE |
|
Disconnect the wire harness clamp.
Disengage the clamp and disconnect the No. 2 water by-pass hose.
Remove the 2 bolts and 2 nuts.
Remove the No. 2 EGR pipe and 2 gaskets.
| 3. REMOVE EGR VALVE WITH COOLER ASSEMBLY |
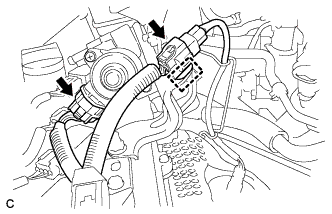 |
Disconnect the 2 connectors and wire harness clamp.
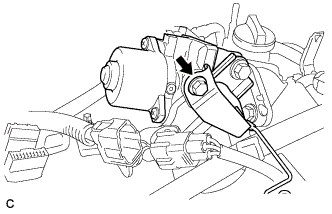 |
Remove the bolt and wire harness clamp bracket.
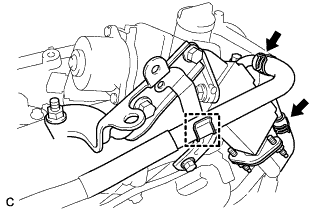 |
Disconnect the clamp, No. 4 water by-pass hose and No. 5 water by-pass hose.
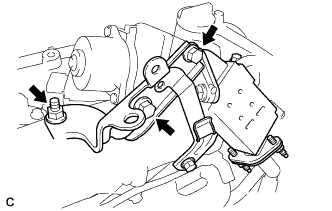 |
Remove the 2 bolts, nut and EGR valve bracket.
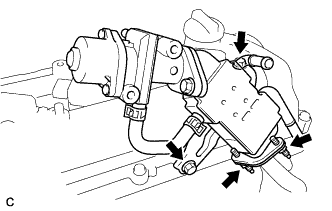 |
Remove the 2 bolts, 2 nuts and EGR valve with cooler assembly.
Remove the gasket.
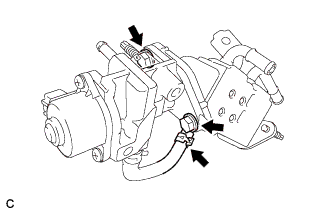 |
Disconnect the No. 1 water by-pass hose.
Remove the 2 bolts, EGR valve assembly and gasket.
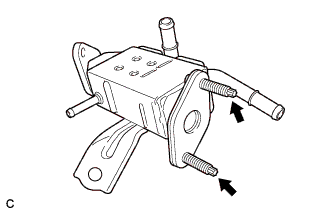 |
Using an E8 "TORX" socket wrench, remove the 2 stud bolts.
| 4. REMOVE IGNITION COIL ASSEMBLY |
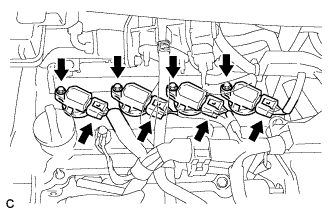 |
Disconnect the 4 No. 1 ignition coil connectors.
Remove the 4 bolts and 4 No. 1 ignition coils.
| 5. SEPARATE ENGINE WIRE |
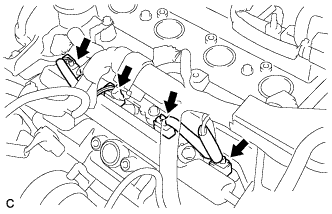 |
Disconnect the 4 injector connectors.
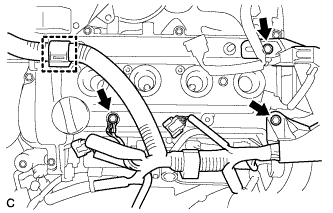 |
Disconnect the wire harness clamp.
Remove the 3 bolts and separate the engine wire.
| 6. REMOVE CYLINDER HEAD COVER SUB-ASSEMBLY |
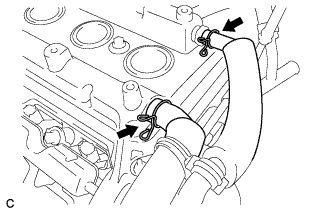 |
Disconnect the No. 1 ventilation hose and No. 2 ventilation hose.
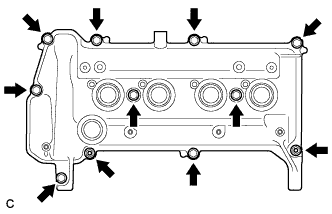 |
Remove the 9 bolts, 2 seal washers, 2 nuts and cylinder head cover sub-assembly.
Remove the gasket from the cylinder head cover sub-assembly.
| 7. REMOVE CRANKSHAFT POSITION SENSOR |
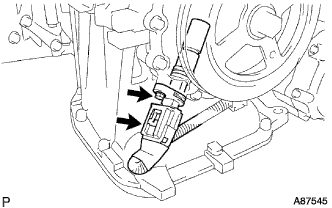 |
Disconnect the crank position sensor connector.
Remove the bolt and crank position sensor.
| 8. REMOVE CRANKSHAFT DAMPER SUB-ASSEMBLY |
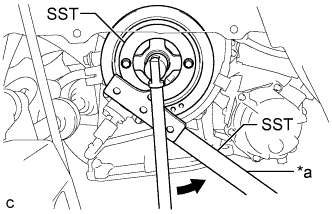 |
Using SST, hold the crankshaft damper sub-assembly in place and loosen the bolt.
| *a | Hold |
 | Turn |
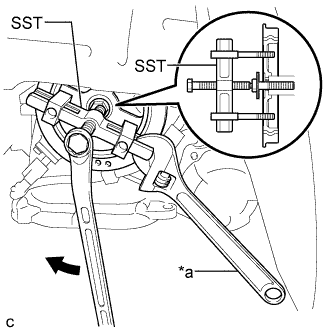 |
Using SST, remove the crankshaft damper sub-assembly and bolt.
| *a | Hold |
| Turn |
| 9. REMOVE ENGINE OIL LEVEL DIPSTICK |
Remove the engine oil level dipstick.
| 10. REMOVE ENGINE OIL LEVEL DIPSTICK GUIDE |
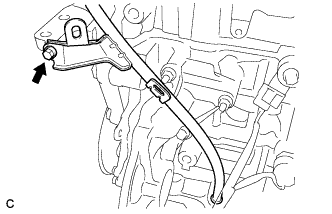 |
Remove the bolt and engine oil level dipstick guide.
Remove the O-ring from the engine oil level dipstick guide.
| 11. REMOVE ENGINE MOUNTING BRACKET RH |
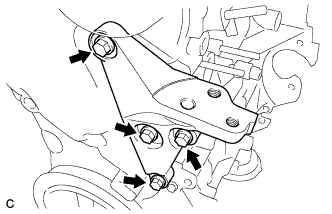 |
Remove the 4 bolts and engine mounting bracket RH.
| 12. REMOVE SCREW PLUG |
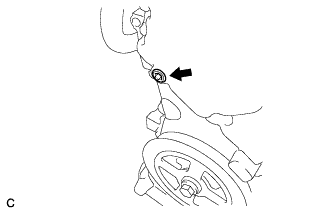 |
Using a 8 mm hexagon socket wrench, remove the screw plug.
| 13. REMOVE TIMING CHAIN COVER |
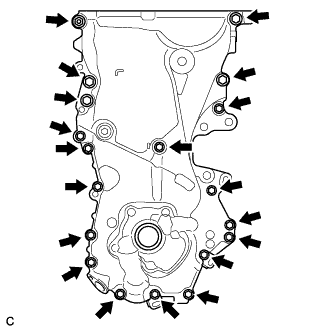 |
Remove the 18 bolts, nut and 2 wire harness clamp brackets.
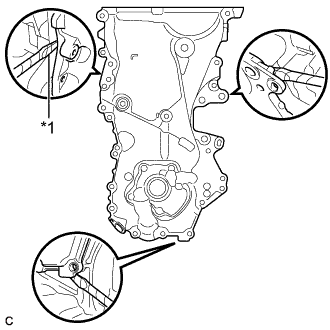 |
Remove the timing chain cover by prying between the timing chain cover and oil pan, cylinder head or cylinder block with a screwdriver.
| *1 | Protective Tape |
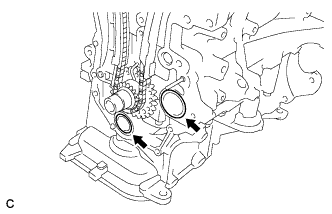 |
Remove the 2 O-rings from the cylinder block and oil pan.
| 14. REMOVE OIL PUMP SEAL |
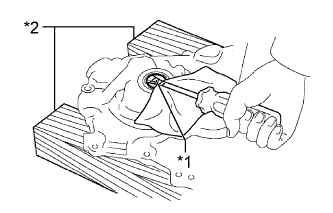 |
Using a screwdriver and wooden block, remove the oil pump seal.
| *1 | Protective Tape |
| *2 | Wooden Block |