 |
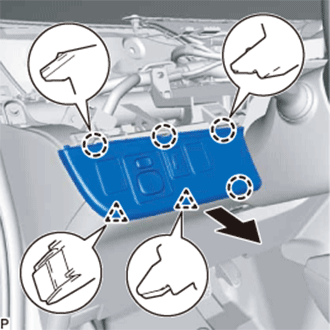
Disengage the 4 claws and 2 clips as shown in the illustration.
LIGHT CONTROL RHEOSTAT > REMOVAL |
| 1. REMOVE UPPER INSTRUMENT PANEL ASSEMBLY |
| 2. REMOVE NO. 1 SWITCH HOLE BASE |
|
Disengage the 4 claws and 2 clips as shown in the illustration.
Disconnect each connector and remove the No. 1 switch hole base.
| 3. REMOVE LIGHT CONTROL RHEOSTAT |
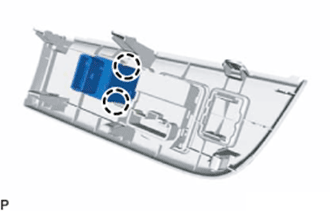 |
Disengage the 2 claws and remove the light control rheostat.