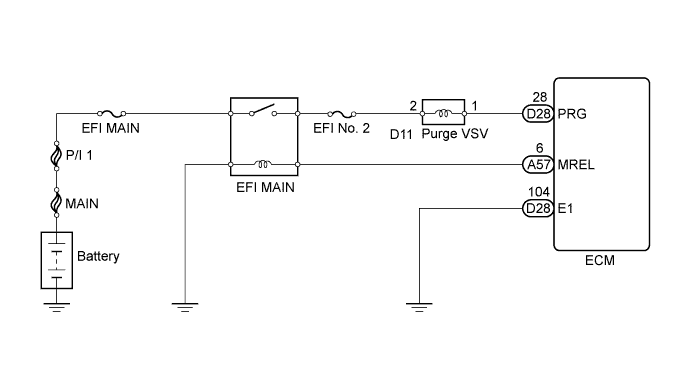
DTC P0443 Evaporative Emission Control System Purge Control Valve Circuit |
| DTC No. | DTC Detection Condition | Trouble Area |
| P0443 | All of the following conditions (a) and (b) are met (1 trip detection logic) (a) The target control value and actual control value do not match for 10 seconds or more. (b) The target control value and actual control value is detected 80 times or more |
|
| 1.PERFORM ACTIVE TEST USING INTELLIGENT TESTER (PURGE VSV) |
 |
Connect the intelligent tester to the DLC3.
Remove the canister side vacuum hose from the purge VSV.
Turn the power switch on (IG) and turn the tester on.
Put the engine in inspection mode (Click here).
Start the engine.
Enter the following menus: Powertrain / Engine and ECT / Active Test / Activate the VSV for Evp Control.
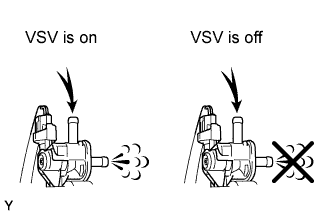
Check if air is sucked into the port when operating the purge VSV using the tester.
| Tester Operation | Specified Condition |
| Purge VSV is on | Suction of air |
| Purge VSV is off | No suction of air |
|
| ||||
| OK | ||
 | ||
| ||
| 2.INSPECT PURGE VSV |
Inspect the purge VSV (Click here).
|
| ||||
| OK | |
 |
| 3.INSPECT PURGE VSV (POWER SOURCE) |
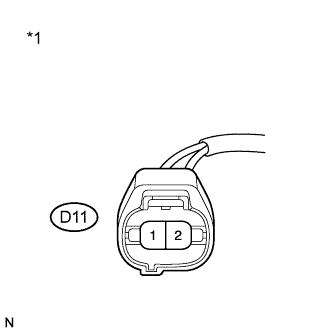 |
Disconnect the purge VSV connector.
Turn the power switch on (IG).
Measure the voltage according to the value(s) in the table below.
| Tester Connection | Switch Condition | Specified Condition |
| D11-2 - Body ground | Power switch on (IG) | 11 to 14 V |
| *1 | Front view of wire harness connector (to Purge VSV) |
Reconnect the purge VSV connector.
|
| ||||
| OK | |
|
| 4.CHECK HARNESS AND CONNECTOR (PURGE VSV - ECM) |
Disconnect the purge VSV connector.
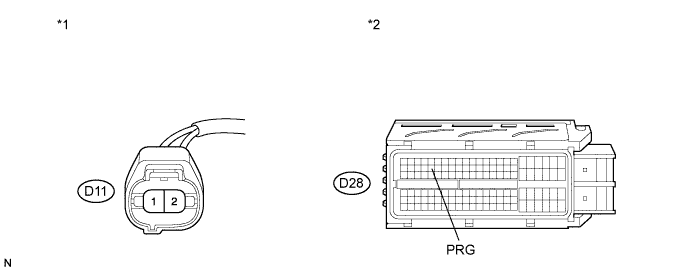
Disconnect the ECM connector.
Measure the resistance according to the value(s) in the table below.
| Tester Connection | Condition | Specified Condition |
| D11-1 (Purge VSV) - D28-28 (PRG) | Always | Below 1 Ω |
| Tester Connection | Condition | Specified Condition |
| D11-1 (Purge VSV) or D28-28 (PRG) - Body ground | Always | 10 kΩ or higher |
| *1 | Front view of wire harness connector (to Purge VSV) | *2 | Front view of wire harness connector (to ECM) |
Reconnect the purge VSV connector.
Reconnect the ECM connector.
|
| ||||
| OK | ||
| ||
| ||

