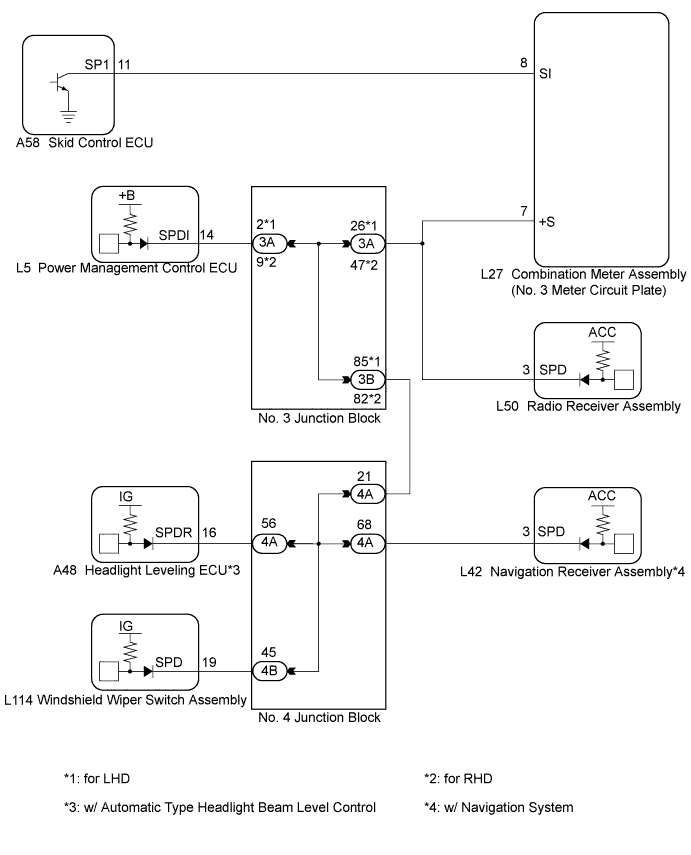
DTC B15C2 Speed Signal Malfunction |
| DTC No. | DTC Detection Condition | Trouble Area |
| B15C2 | A difference between the GPS speed and SPD pulse is detected. |
|
| 1.CHECK VEHICLE SENSOR (OPERATION CHECK) |
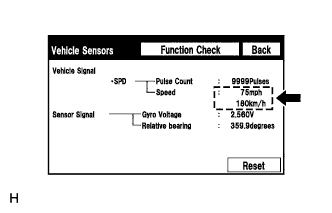 |
Enter the "Vehicle Sensors" screen. Refer to Check GPS & Vehicle Sensors in Operation Check (Click here).
While driving the vehicle, compare the "SPD" indicator to the reading on the speedometer. Check if these readings are almost equal.
|
| ||||
| OK | ||
 | ||
| ||
| 2.INSPECT COMBINATION METER ASSEMBLY (NO.3 METER CIRCUIT PLATE OUTPUT WAVEFORM) |
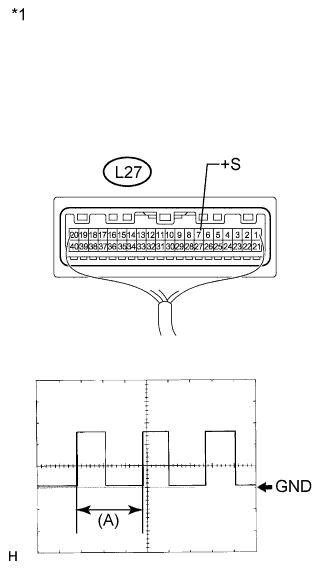 |
Check the input waveform.
Remove the combination meter assembly with the connector(s) still connected.
Connect an oscilloscope to terminal L27-7 (+S) and body ground.
Turn the power switch on (IG).
Turn the wheel slowly.
Check the signal waveform according to the condition(s) in the table below.
| Item | Condition |
| Measurement terminal | L27-7 (+S) - Body ground |
| Tool setting | 5 V/DIV., 20 ms./DIV. |
| Vehicle condition | Driving at approx. 20 km/h (12 mph) |
| *1 | Component with harness connected (Combination Meter Assembly) |
|
| ||||
| OK | |
 |
| 3.CHECK HARNESS AND CONNECTOR (NAVIGATION RECEIVER ASSEMBLY - COMBINATION METER ASSEMBLY) |
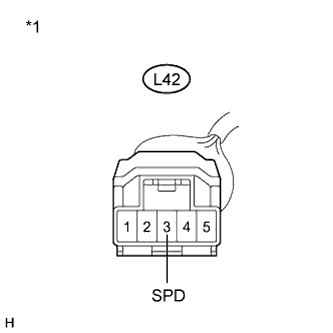 |
Disconnect the L42 navigation receiver assembly connector.
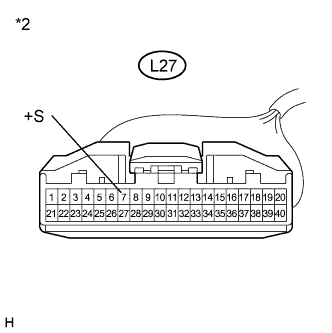 |
Disconnect the L27 combination meter assembly connector.
Measure the resistance according to the value(s) in the table below.
| Tester Connection | Condition | Specified Condition |
| L42-3 (SPD) - L27-7 (+S) | Always | Below 1 Ω |
| *1 | Front view of wire harness connector (to Navigation Receiver Assembly) |
| *2 | Front view of wire harness connector (to Combination Meter Assembly) |
|
| ||||
| OK | ||
| ||
| ||
| 4.CHECK HARNESS AND CONNECTOR (NAVIGATION RECEIVER ASSEMBLY - NO. 4 JUNCTION CONNECTOR) |
|
Disconnect the L42 navigation receiver assembly connector.
Disconnect the 4A No. 4 junction block connector.
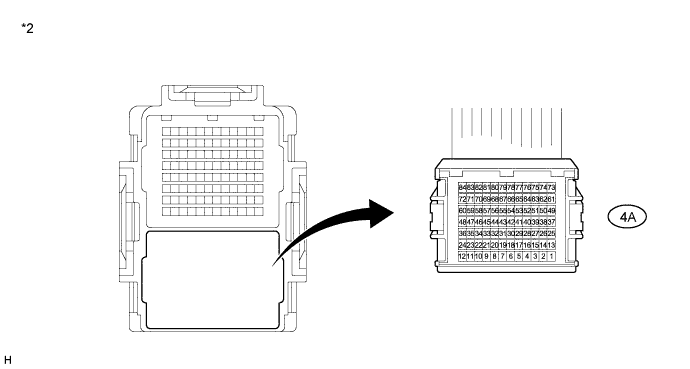
Measure the resistance according to the value(s) in the table below.
| Tester Connection | Condition | Specified Condition |
| L42-3 (SPD) - 4A-68 | Always | Below 1 Ω |
| *1 | Front view of wire harness connector (to Navigation Receiver Assembly) |
| *2 | Front view of wire harness connector (to No. 4 Junction Block) |
|
| ||||
| OK | |
|
| 5.CHECK HARNESS AND CONNECTOR (No. 4 JUNCTION CONNECTOR - NO. 3 JUNCTION CONNECTOR) |
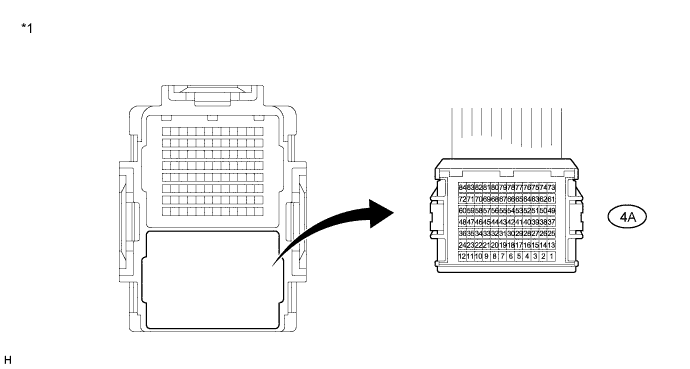
Disconnect the 4A No. 4 junction block connector.
Disconnect the 3B No. 3 junction block connector.
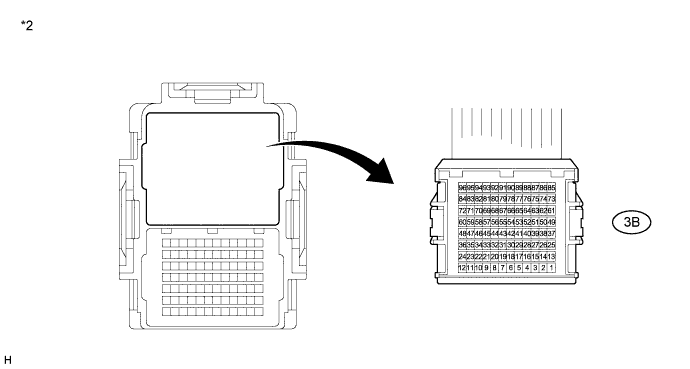
Measure the resistance according to the value(s) in the table below.
| Tester Connection | Condition | Specified Condition |
| 4A-21 - 3B-82 | Always | Below 1 Ω |
| *1 | Front view of wire harness connector (to No. 4 Junction Block) | *2 | Front view of wire harness connector (to No. 3 Junction Block) |
|
| ||||
| OK | |
|
| 6.CHECK HARNESS AND CONNECTOR (NO. 3 JUNCTION CONNECTOR - COMBINATION METER ASSEMBLY) |
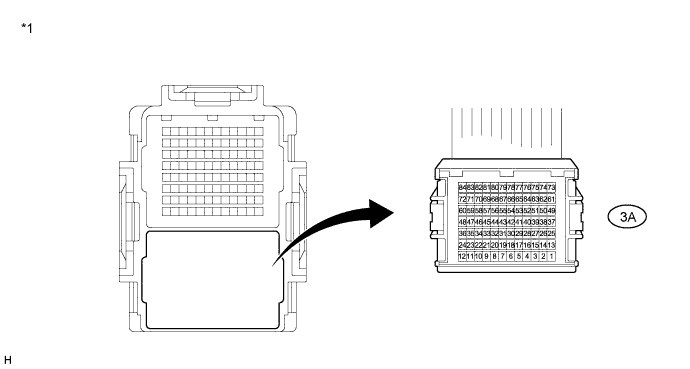
Disconnect the 3A No. 3 junction block connector.
|
Disconnect the L27 combination meter assembly connector.
Measure the resistance according to the value(s) in the table below.
| Tester Connection | Condition | Specified Condition |
| 3A-47 - L27-7 (+S) | Always | Below 1 Ω |
| *1 | Front view of wire harness connector (to No. 3 Junction Block) |
| *2 | Front view of wire harness connector (to Combination Meter Assembly) |
|
| ||||
| OK | |
|
| 7.INSPECT NO. 4 JUNCTION BLOCK |
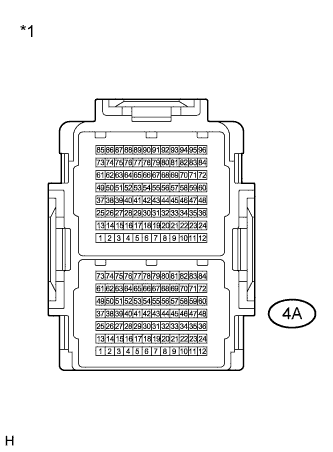 |
Measure the resistance according to the value(s) in the table below.
| Tester Connection | Condition | Specified Condition |
| 4A-68 - 4A-21 | Always | Below 1 Ω |
| *1 | No. 4 Junction Block |
|
| ||||
| OK | |
|
| 8.INSPECT NO. 3 JUNCTION BLOCK |
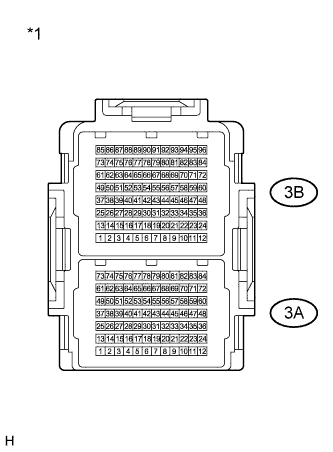 |
Measure the resistance according to the value(s) in the table below.
| Tester Connection | Condition | Specified Condition |
| 3A-47 - 3B-82 | Always | Below 1 Ω |
| *1 | No. 3 Junction Block |
|
| ||||
| OK | ||
| ||
| ||

