BRAKE BOOSTER (for RHD) > INSTALLATION |
| 1. INSTALL BRAKE BOOSTER GASKET |
Install a new brake booster gasket to the brake booster with master cylinder assembly.
| 2. INSTALL BRAKE BOOSTER WITH MASTER CYLINDER ASSEMBLY |
![]() |
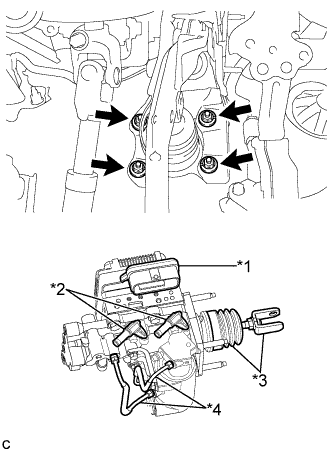
Install the brake booster with master cylinder assembly with the 4 nuts.
| *1 | Connector Portion |
| *2 | Union |
| *3 | Push Rod Clevis and Boot |
| *4 | Front No. 2 Brake Tube |
![]() |
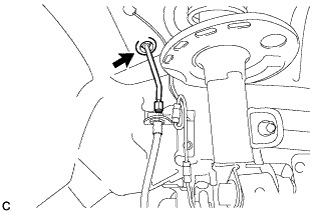
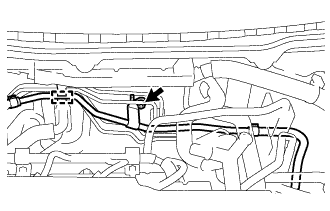
Engage the grommet of the brake line.
![]() |
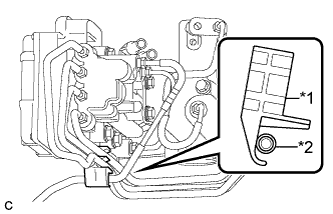
Set the brake line to the clamp as shown in the illustration.
| *1 | Clamp |
| *2 | Brake Line |
![]() |
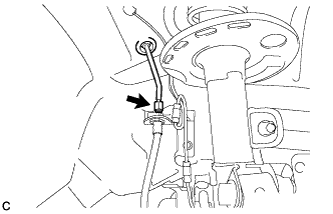
Using a union nut wrench, connect the brake line to the front flexible hose RH.
![]() |
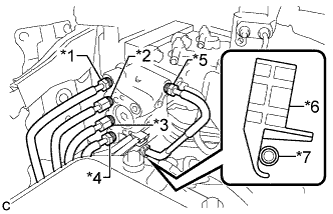
Using a union nut wrench, connect each brake line to the brake booster with master cylinder assembly as shown in the illustration.
| *1 | to Front Wheel Cylinder LH |
| *2 | to Rear Wheel Cylinder RH |
| *3 | to Brake Booster Pump Assembly |
| *4 | to Rear Wheel Cylinder LH |
| *5 | to Front Wheel Cylinder RH |
| *6 | Clamp |
| *7 | Brake Line |
![]() |
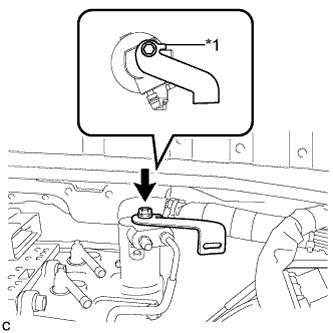
Install the wire harness clamp bracket to the brake booster with master cylinder assembly with the bolt.
| *1 | Stopper |
![]() |
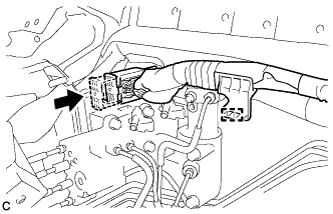
Connect the connector.
Engage the clamp.
| 3. CONNECT NO. 1 RESERVOIR HOSE |
![]() |
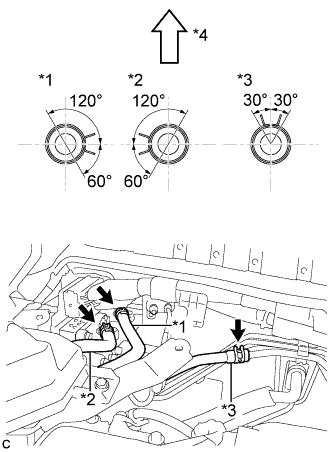
Connect the No. 1 reservoir hose, No. 2 reservoir hose and No. 2 brake actuator hose with the clips.
| *1 | No. 1 Reservoir Hose |
| *2 | No. 2 Reservoir Hose |
| *3 | No. 2 Brake Actuator Hose |
| *4 | Top of Vehicle |
| Identification Mark Color | Connection Color | |
| No. 1 Reservoir Hose | White | White (Unpainted) |
| No. 2 Reservoir Hose | Green | Green |
| No. 2 Brake Actuator Hose | Yellow | Yellow |
| 4. CONNECT NO. 2 RESERVOIR HOSE |
| 5. CONNECT NO. 2 BRAKE ACTUATOR HOSE |
| 6. BLEED BRAKE ACTUATOR TUBE |
Remove the brake master cylinder reservoir filler cap assembly.
Add brake fluid into the reservoir between the MAX and MIN level on the brake fluid reservoir.
Install the brake master cylinder reservoir filler cap assembly.
![]() |
Remove the nut, disengage the clamp and separate the No. 1 brake actuator tube from the vehicle body.
![]() |
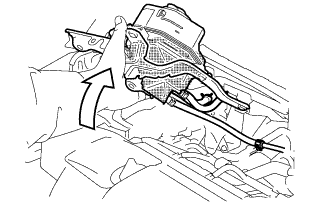
Lift up the brake master cylinder reservoir with bracket as far as possible.
![]() |
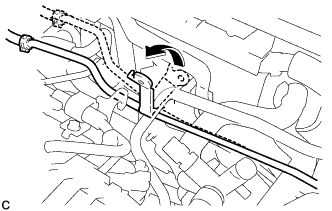
While holding the brake master cylinder reservoir with bracket, twist and hold the No. 1 brake actuator tube 90° toward the vehicle front, and wait at 5 seconds.*1
Return the No. 1 brake actuator tube to its original state.
![]() |
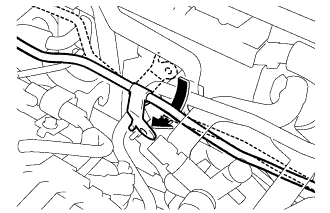
While holding the brake master cylinder reservoir with bracket, twist and hold the No. 1 brake actuator tube 90° toward the vehicle rear, and wait at 5 seconds.
Return the No. 1 brake actuator tube to its original state.*2
Repeat steps *1 to *2, 5 times.
![]() |
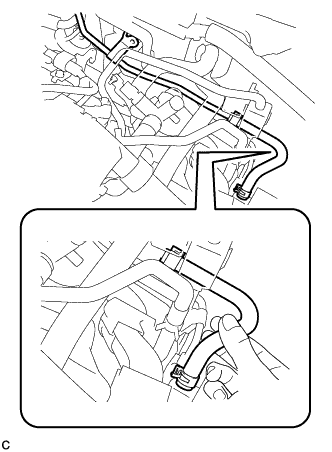
While holding the brake master cylinder reservoir with bracket, pinch the brake actuator hose 10 times with your fingers.
Repeat steps *1 to *2, 5 times again, and check that air is not expelled from the No. 1 brake actuator tube.
![]() |
Engage the clamp and install the No. 1 brake actuator tube with the nut.
| 7. INSTALL BRAKE MASTER CYLINDER RESERVOIR WITH BRACKET |
![]() |
Install the brake master cylinder reservoir with bracket with the 2 nuts.
Engage the clamp.
| 8. INSTALL PUSH ROD PIN |
Apply lithium soap base glycol grease to the push rod pin and installation hole of the brake pedal support assembly.
![]() |
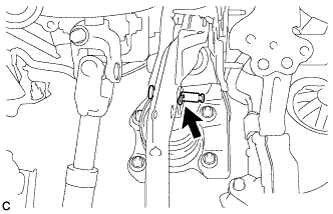
Install the push rod pin and a new clip to connect the push rod clevis to the brake pedal support assembly.
| 9. INSTALL BRAKE PEDAL RETURN SPRING |
![]() |
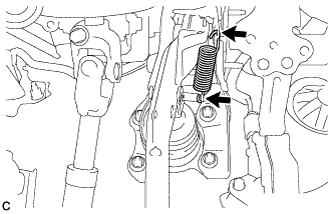
Install the brake pedal return spring to the brake pedal support assembly and push rod pin.
| 10. FILL RESERVOIR WITH BRAKE FLUID |
| 11. CONNECT CABLE TO NEGATIVE BATTERY TERMINAL |
| 12. BLEED BRAKE SYSTEM |
Remove the outer cowl top panel sub-assembly.
Bleed the brake system.
![]() |
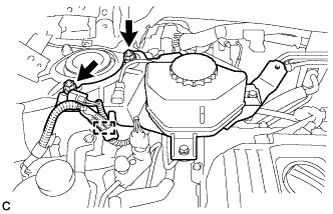
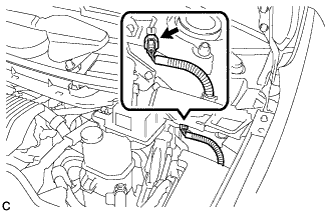
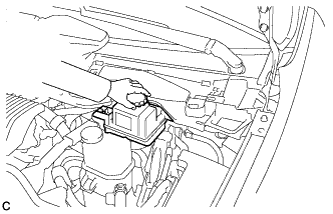
Wait at least 2 minutes with the power switch off, and disconnect the reservoir level switch connector.
![]() |
Remove the brake master cylinder reservoir filler cap assembly.
Add brake fluid into the reservoir between MAX and MIN level on the brake fluid reservoir.
Connect the intelligent tester to the DLC3 and turn the power switch on (IG).
Turn the intelligent tester on and enter the following menus: Chassis / ABS/VSC/TRC / Air Bleeding.
Select the "ABS actuator has been replaced" on the intelligent tester display, and bleed air from the brake fluid following the instructions on the intelligent tester.
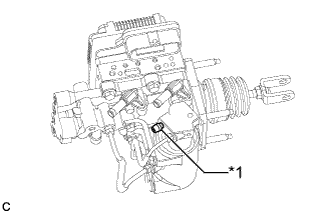
![]() |
After air bleeding, tighten each bleeder plug.
| *1 | Stroke Simulator Bleeder Plug |
Clear the DTCs (Click here).
Turn the intelligent tester off and turn the power switch off.
Install the brake master cylinder reservoir filler cap.
Inspect for brake fluid leaks.
Install the outer cowl top panel sub-assembly.
| 13. INSPECT AND ADJUST BRAKE PEDAL |
| 14. PERFORM EMERGENCY BRAKE SIGNAL LEARNING (w/ Emergency Brake Signal) |
| 15. OBTAIN ZERO POINT OF YAW RATE AND ACCELERATION SENSOR |
| 16. INSTALL OUTER COWL TOP PANEL SUB-ASSEMBLY |
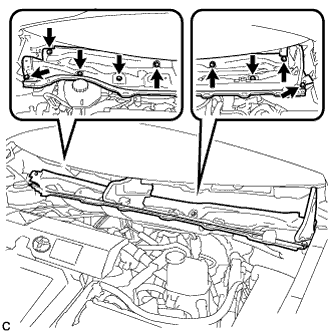
![]() |
Install the outer cowl top panel with the 9 bolts.
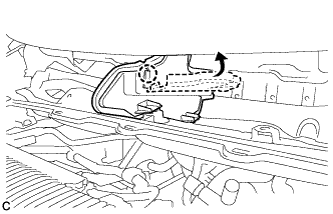
![]() |
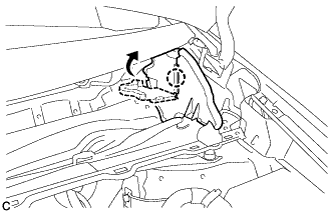
Bend the water guard plate RH and engage the claw.
![]() |
Bend the No. 1 heater air duct splash shield seal and engage the claw.
![]() |
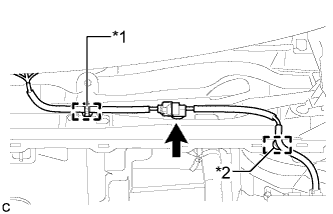
Engage the clamp*2 of the wire harness.
Engage the clamp*1 and connect the connector (w/ Windshield Deicer).
![]() |
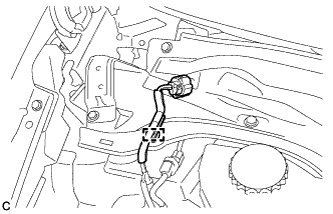
Engage the clamp of the wire harness.
| 17. INSTALL COWL BODY MOUNTING REINFORCEMENT LH |
![]() |
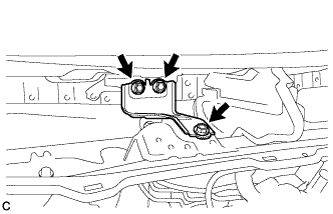
Install the cowl body mounting reinforcement LH with the 3 bolts.
| 18. INSTALL WINDSHIELD WIPER MOTOR AND LINK ASSEMBLY |
| 19. INSTALL NO. 1 INSTRUMENT PANEL UNDER COVER SUB-ASSEMBLY |
Connect each connector.
Engage the guide and 2 claws.
Install the No. 1 instrument panel under cover sub-assembly with the screw <D>.
| 20. INSTALL REAR NO. 3 FLOOR BOARD |
![]() |
Engage the 2 guides to install the rear No. 3 floor board.
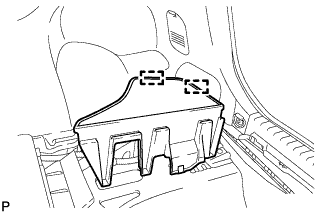
| 21. INSTALL REAR DECK FLOOR BOX |
Install the rear deck floor box.
| 22. INSTALL REAR NO. 2 FLOOR BOARD |
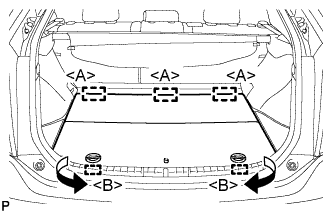
![]() |
Engage the 3 guides <A>.
Engage the 2 guides <B> and install the rear No. 2 floor board as shown in the illustration.