 |
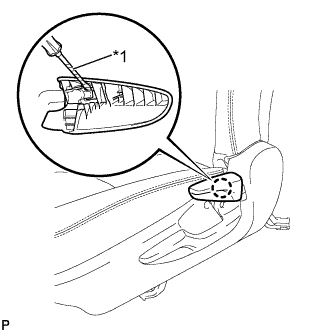
Using a screwdriver wrapped with protective tape, disengage the claw and remove the reclining adjuster release handle.
| *1 | Protective Tape |
SEAT POSITION SENSOR > REMOVAL |
| 1. REMOVE FRONT SEAT ASSEMBLY LH |
| 2. REMOVE RECLINING ADJUSTER RELEASE HANDLE LH (for Manual Seat) |
|
Using a screwdriver wrapped with protective tape, disengage the claw and remove the reclining adjuster release handle.
| *1 | Protective Tape |
| 3. REMOVE VERTICAL ADJUSTING HANDLE LH (for Manual Seat) |
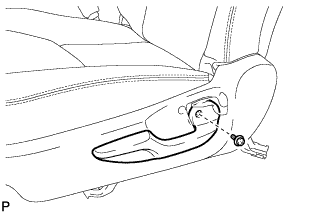 |
Remove the screw and vertical adjusting handle.
| 4. REMOVE FRONT SEAT CUSHION SHIELD ASSEMBLY LH (for Manual Seat) |
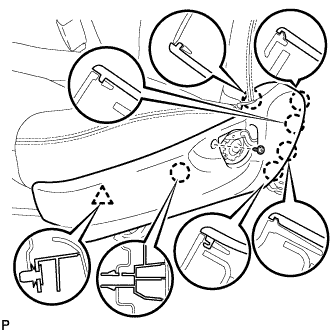 |
Remove the screw.
Disengage the 6 claws and clip, and remove the front seat cushion shield.
| 5. REMOVE SEAT POSITION SENSOR (for Manual Seat) |
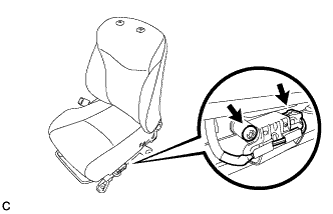 |
Disconnect the connector.
Separate the wire harness from the seat slide position sensor protector.
Using a T30 "TORX" socket wrench, remove the "TORX" screw and seat position sensor with the seat slide position sensor protector.
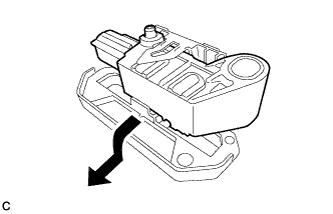 |
Remove the seat position sensor from the seat slide position sensor protector as shown in the illustration.
| 6. REMOVE SEAT POSITION SENSOR (for Power Seat) |
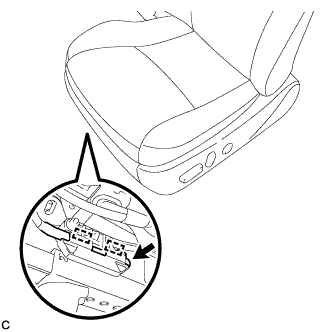 |
Disconnect the connector.
Separate the wire harness from the 2 hooks.
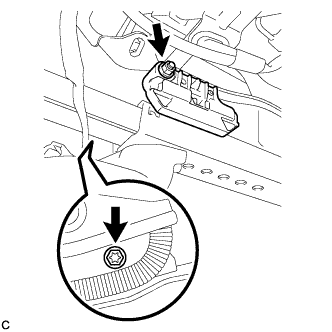 |
Using a T30 "TORX" socket wrench, remove the "TORX" screw, nut, and seat position sensor with the seat slide position sensor protector.
|
Remove the seat position sensor from the seat slide position sensor protector as shown in the illustration.