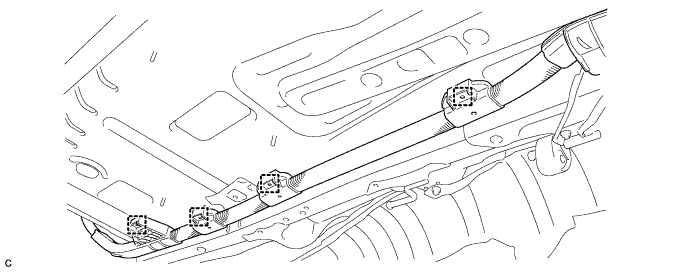
Install the frame wire with the 4 clamps.
FRAME WIRE > INSTALLATION |
| 1. INSTALL FRAME WIRE |
Install the frame wire with the 4 clamps.
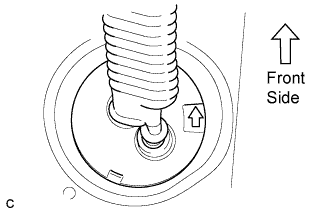 |
Insert the frame wire into the floor panel hole.
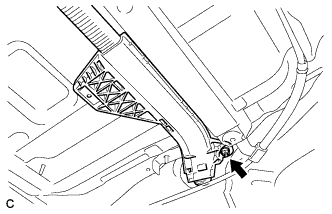 |
Install the nut shown in the illustration.
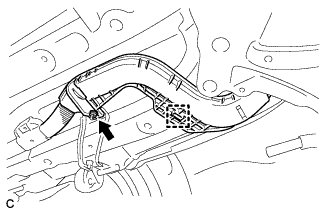 |
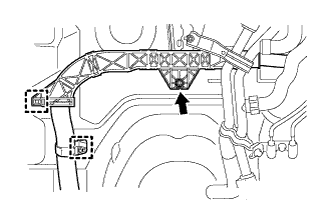
Install the nut and clamp shown in the illustration.
 |
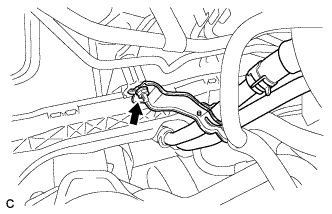
Install the nut and 2 clamps shown in the illustration.
 |
Install the heater water pipe sub-assembly and nut.
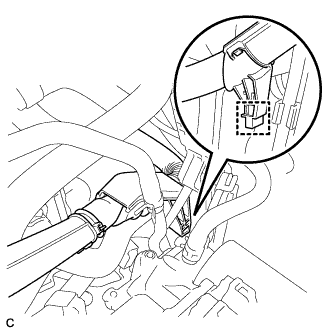 |
Connect the clamp shown in the illustration.
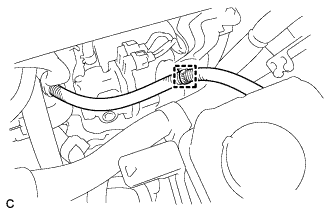 |
Connect the clamp shown in the illustration.
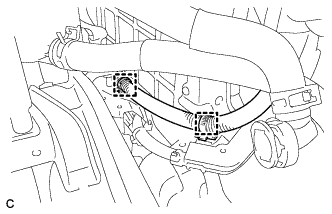 |
Connect the 2 clamps shown in the illustration.
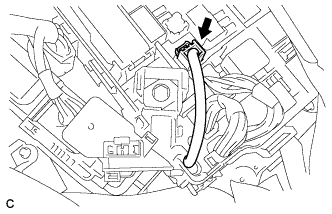 |
Connect the connector to the engine room junction block assembly.
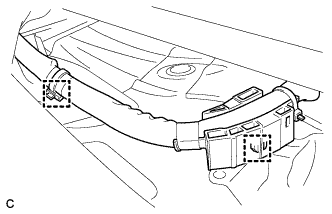 |
Connect the 2 wire harness clamps to the floor panel.
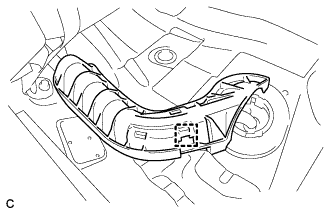 |
Install the wire harness protector and connect the clamp to the floor panel.
| 2. CONNECT HYBRID BATTERY JUNCTION BLOCK |
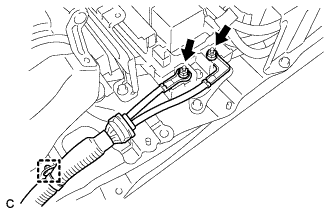 |
Install the frame wire on the hybrid battery junction block with the 2 nuts.
Connect the clamp and frame wire.
| 3. CHECK HIGH VOLTAGE CABLE CONNECTION |
Check that each wire harness is being installed securely.
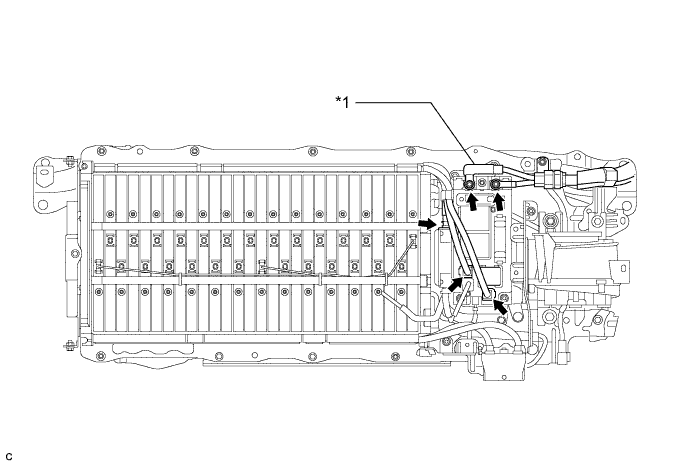
| *3 | Frame Wire | - | - |
| 4. CONNECT CABLE TO BATTERY TERMINAL |
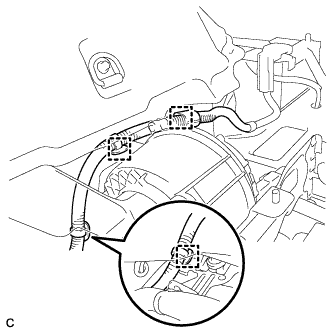 |
Connect the 3 wire harness clamps.
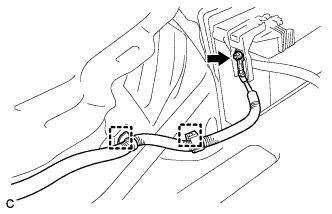 |
Install the nut, and connect the 2 clamps.
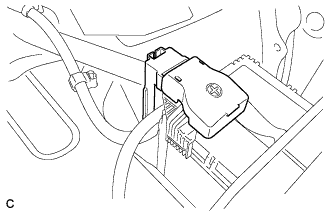 |
Install the terminal cover.
| 5. INSTALL UPPER HYBRID BATTERY COVER SUB-ASSEMBLY |
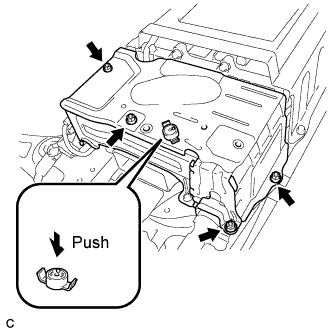 |
Install the upper hybrid battery cover sub-assembly with the 4 nuts.
Install the battery cover lock striker, then push the button to lock.
| 6. INSTALL NO. 1 HYBRID BATTERY EXHAUST DUCT |
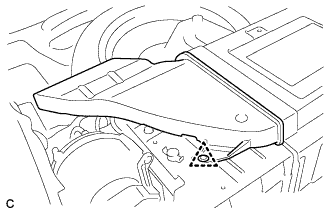 |
Insert the No. 1 hybrid battery exhaust duct with the clip.
| 7. INSTALL REAR FLOOR BOARD SPACER |
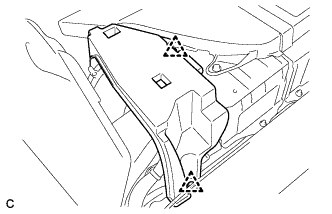 |
Install the rear floor board spacer with the 2 clips.
| 8. INSTALL REAR NO. 1 FLOOR BOARD |
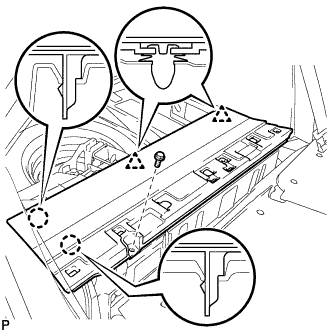 |
Engage the 2 claws and 2 clips.
Install the rear No. 1 floor board with the bolt.
| 9. INSTALL REAR NO. 2 FLOOR BOARD SUB-ASSEMBLY |
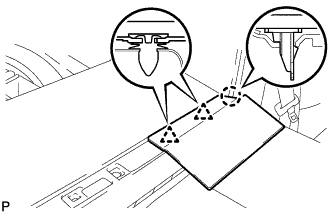 |
Engage the claw and 2 clips to install the rear No. 2 floor board sub-assembly.
| 10. INSTALL REAR NO. 1 FLOOR BOARD SUB-ASSEMBLY |
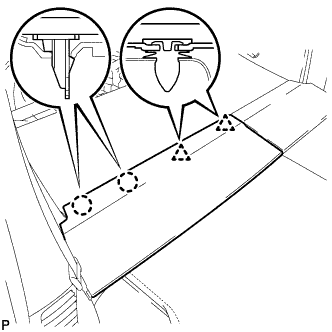 |
Engage the 2 claws and 2 clips to install the rear No. 1 floor board sub-assembly.
| 11. INSTALL REAR SEAT CUSHION ASSEMBLY |
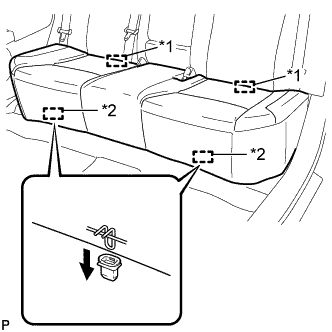 |
Engage the 2 guides of the seat cushion to the seatback.
| *1 | Guide |
| *2 | Hook |
Engage the 2 front hooks of the seat cushion to the vehicle body.
| 12. INSTALL FRONT SUSPENSION MEMBER BRACE REAR RH |
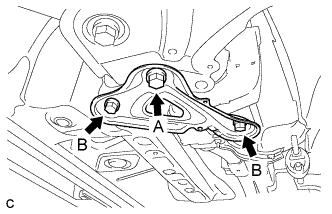 |
Install the front suspension member brace rear RH with the new bolt (A) and 2 bolts (B).
| 13. INSTALL FRONT CENTER FLOOR COVER RH |
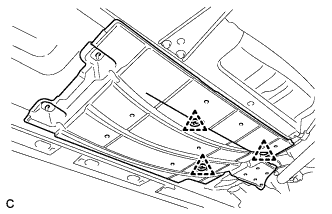 |
Install the front center floor cover RH with the 3 clips.
| 14. INSTALL FRONT FLOOR COVER RH |
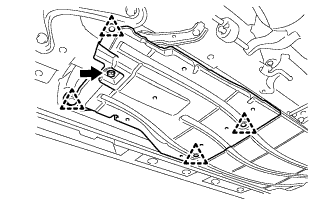 |
Install the front floor cover RH with the 4 clips.
Install the bolt.
| 15. INSTALL FRONT NO. 1 FLOOR HEAT INSULATOR |
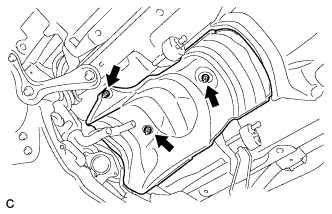 |
Install the 3 nuts and No. 1 front floor heat insulator.
| 16. INSTALL FRONT EXHAUST PIPE ASSEMBLY |
| 17. INSTALL INVERTER WITH CONVERTER ASSEMBLY |
| 18. INSTALL SERVICE PLUG GRIP |
Wear insulated gloves and install the service plug grip in the order shown in the illustration.
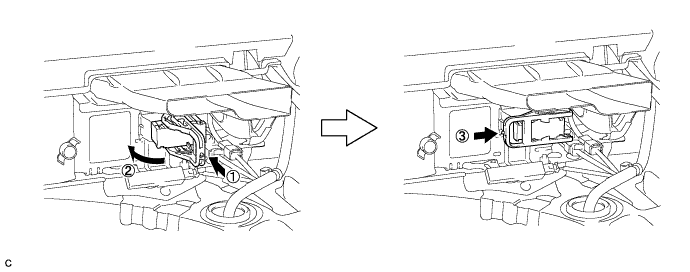
Rotate the handle of the service plug grip 90° toward the battery and slide it in the direction shown by the arrow until a click sound is heard.
| 19. CONNECT CABLE TO NEGATIVE AUXILIARY BATTERY TERMINAL |
| 20. INSTALL REAR NO. 3 FLOOR BOARD |
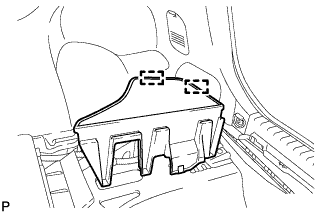 |
Engage the 2 guides to install the rear No. 3 floor board.
| 21. INSTALL REAR DECK FLOOR BOX |
Install the rear deck floor box.
| 22. INSTALL REAR NO. 2 FLOOR BOARD (for Separate Type) |
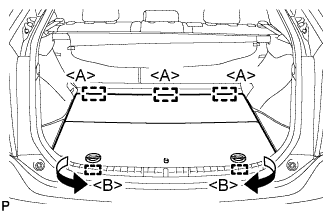 |
Engage the 3 guides <A>.
Engage the 2 guides <B> and install the rear No. 2 floor board as shown in the illustration.