 |
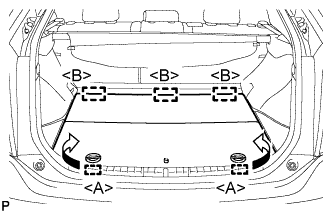
Disengage the 2 guides <A> as shown in the illustration.
HEIGHT CONTROL SENSOR > REMOVAL |
| 1. REMOVE REAR NO. 2 FLOOR BOARD (for Separate Type) |
|
Disengage the 2 guides <A> as shown in the illustration.
Disengage the 3 guides <B> and remove the rear No. 2 floor board.
| 2. REMOVE REAR DECK FLOOR BOX |
Remove the rear deck floor box.
| 3. REMOVE REAR NO. 3 FLOOR BOARD |
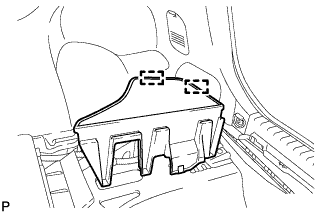 |
Disengage the 2 guides and remove the rear No. 3 floor board.
| 4. DISCONNECT CABLE FROM NEGATIVE BATTERY TERMINAL |
| 5. REMOVE REAR WHEEL |
| 6. REMOVE REAR HEIGHT CONTROL SENSOR SUB-ASSEMBLY |
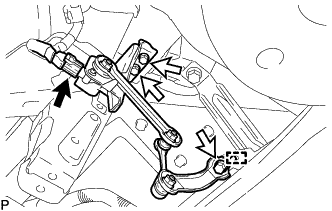 |
Disconnect the connector.
Remove the 3 bolts.
Disengage the guide and remove the rear height control sensor sub-assembly.