 |
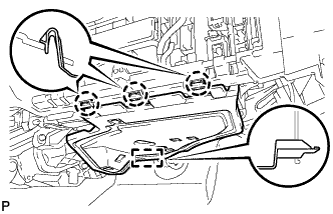
Disengage the 3 claws and guide.
POWER MANAGEMENT CONTROL ECU > REMOVAL |
| 1. DISCONNECT CABLE FROM NEGATIVE BATTERY TERMINAL |
| 2. REMOVE NO. 2 INSTRUMENT PANEL UNDER COVER SUB-ASSEMBLY |
|
Disengage the 3 claws and guide.
Disconnect each connector and remove the No. 2 instrument panel under cover sub-assembly.
| 3. REMOVE GLOVE COMPARTMENT DOOR ASSEMBLY |
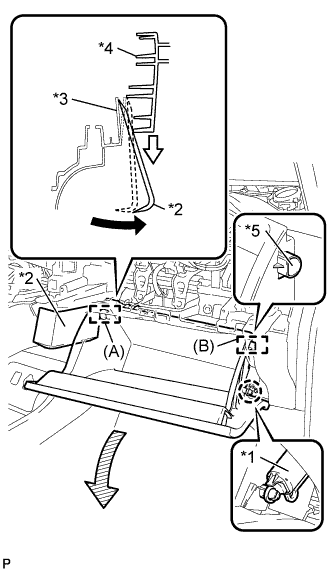 |
Disengage the claw and release the glove compartment door stopper.
| *1 | Glove Compartment Door Stopper Sub-assembly |
| *2 | Moulding Remover |
| *3 | Lower Instrument Panel Sub-assembly |
| *4 | Glove Compartment Door Assembly |
| *5 | Stopper |
Insert the moulding remover into the location shown in the illustration.
Move the moulding remover in the direction indicated by the arrow to bend the lower instrument panel sub-assembly and release the stopper (A).
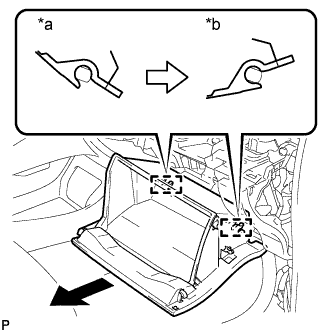 |
Open the glove compartment door assembly to approximately 55° from its closed position. Pull it horizontally in the direction indicated by the arrow to disengage the 2 hinges and remove the glove compartment door assembly.
| *a | Close |
| *b | Open Approximately |
| 4. REMOVE ECU INTEGRATION BOX |
Disconnect each connector.
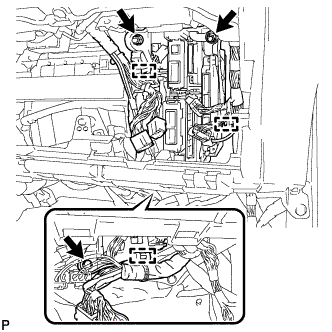 |
Disengage the 3 clamps and disconnect the wire harness.
Remove the bolt, 2 nuts and ECU integration box.
| 5. REMOVE POWER MANAGEMENT CONTROL ECU |
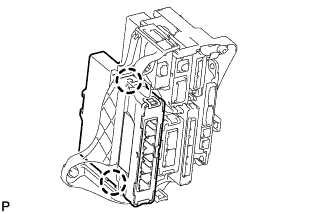 |
Disengage the 2 claws and remove the power management control ECU.