 |
Install the motor cable to the hybrid transaxle assembly with the 3 bolts.
- Torque:
- 10 N*m{ 102 kgf*cm , 7 ft.*lbf }
- NOTICE:
- Keep the sealing surface of the motor cable and the connector terminal joint free of foreign matter.
MOTOR CABLE > INSTALLATION |
| 1. INSTALL MOTOR CABLE |
|
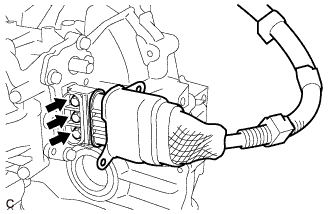
Install the motor cable to the hybrid transaxle assembly with the 3 bolts.
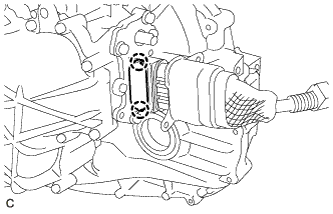 |
Engage the 2 claws to install a new terminal cap.
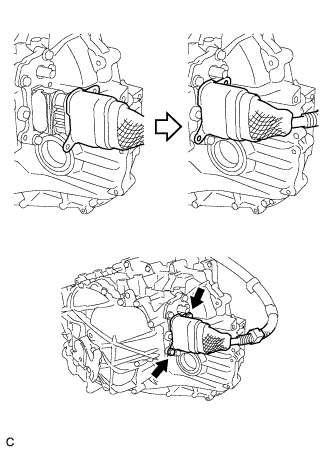 |
Place the motor cable connector shell in position and install it with the 2 bolts.
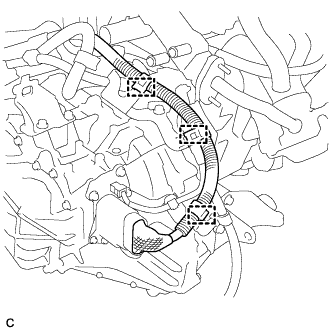 |
Connect the 3 clamps.
| 2. INSTALL INVERTER TRAY BRACKET |
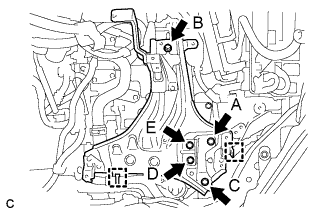 |
Position the inverter tray bracket as shown in the illustration.
Temporarily install the inverter tray bracket with bolt B.
Tighten the 5 bolts to the inverter tray bracket in the order the bolt A, bolt C, bolt D, bolt E and bolt B.
Connect the 2 clamps to the inverter tray bracket.
| 3. INSTALL INVERTER RESERVE TANK ASSEMBLY |
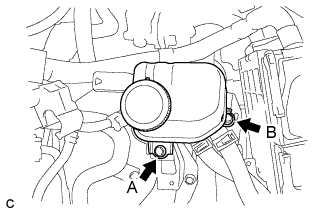 |
Temporarily install the inverter reserve tank assembly with bolt A.
Tighten the 2 bolts to the inverter reserve tank assembly in the order the bolt B and bolt A.
| 4. INSTALL INVERTER WITH CONVERTER ASSEMBLY |
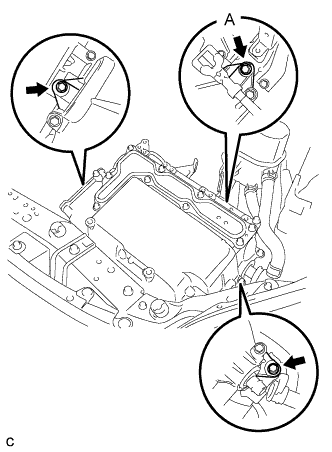 |
Temporarily install the inverter with converter assembly with the 3 bolts.
Tighten the bolt A.
Tighten the 2 bolts.
| 5. CONNECT WATER HOSE |
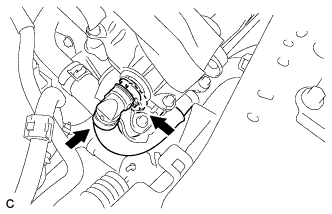 |
Connect the water hose to the inverter with converter assembly and lock the hose with the retainer.
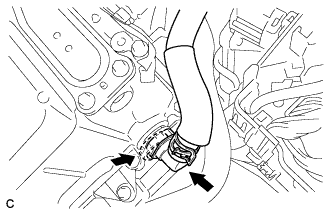 |
Connect the water hose to the inverter with converter assembly and lock the hose with the retainer.
| 6. CONNECT NO. 2 ENGINE ROOM WIRE |
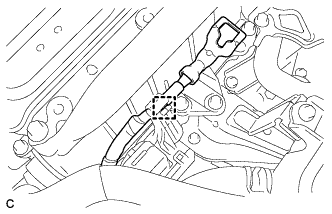 |
Disconnect the No. 2 engine room wire from the protector.
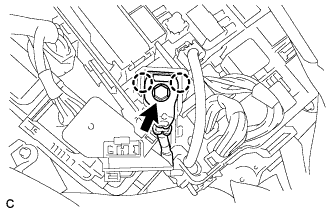 |
Connect the No. 2 engine room wire with the bolt and 2 claws.
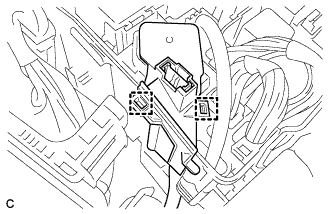 |
Install the No. 1 relay block cover and 2 clamps.
Install the relay block cover.
| 7. REMOVE INVERTER TERMINAL COVER |
 |
Remove the 9 bolts and inverter terminal cover.
| 8. CONNECT NO. 2 ENGINE WIRE |
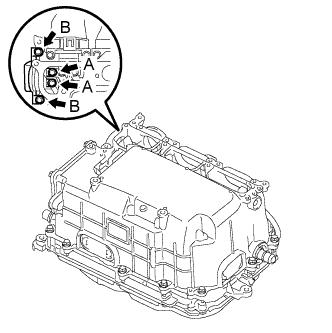 |
Temporarily install the No. 2 engine wire (high voltage cables of the air conditioning) and 4 bolts to the inverter assembly by hand.
Fully tighten the 4 bolts.
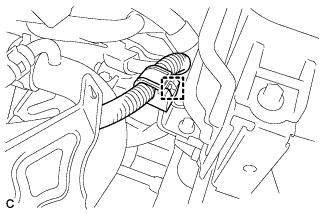 |
Connect the harness clamp.
| 9. CONNECT HIGH VOLTAGE CABLE OF FRONT TRANSAXLE |
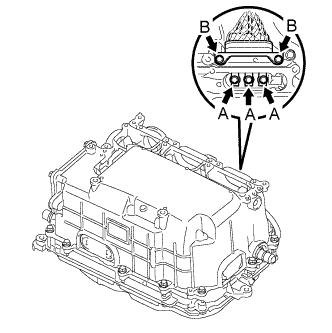 |
Temporarily install the high voltage cable of the motor (MG2) and 5 bolts to the inverter assembly by hand.
Fully tighten the 5 bolts.
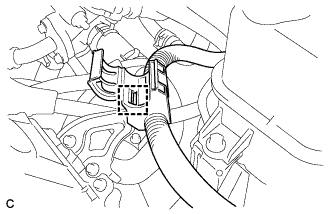 |
Connect the harness clamp.
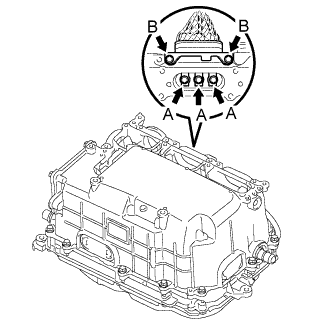 |
Temporarily install the high voltage cable of the generator (MG1) and 5 bolts to the inverter assembly by hand.
Fully tighten the 5 bolts.
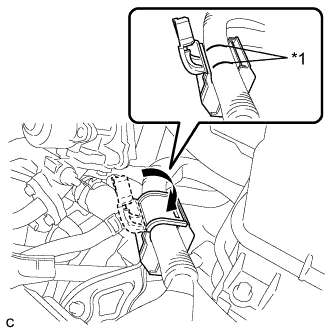 |
Install the cable and cover.
| *1 | Align Mark |
| 10. CONNECT FRAME WIRE |
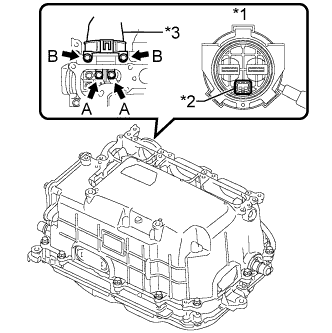 |
Temporarily install the frame wire (high voltage cables of the hybrid battery) and 4 bolts to the inverter assembly by hand.
| *1 | Front view of frame wire connector |
| *2 | Interlock |
| *3 | High voltage cables of the hybrid battery |
Fully tighten the 4 bolts.
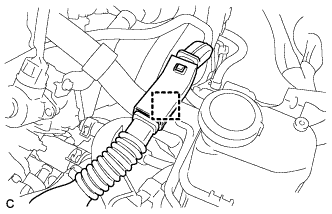 |
Connect the harness clamp.
| 11. CHECK HIGH VOLTAGE CABLE CONNECTION |
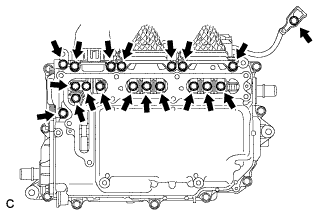 |
Check that each connector and terminal is firmly installed.
| 12. INSTALL INVERTER TERMINAL COVER |
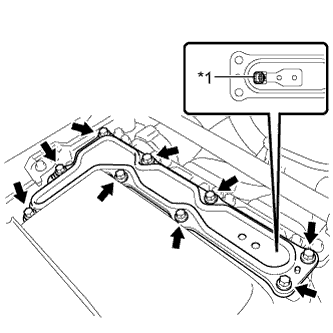 |
Install the inverter terminal cover with the 9 bolts to the inverter with converter assembly.
| *1 | Interlock |
| 13. INSTALL ENGINE ROOM MAIN WIRE |
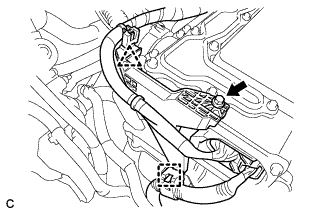 |
Install the bolt, clamp and clip, and connect the engine room main wire.
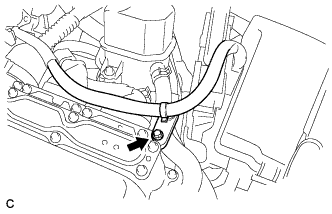 |
Install the bolt.
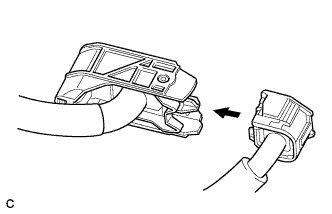 |
Connect the engine wire to the engine room main wire.
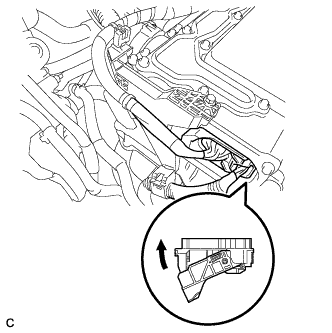 |
Connect the connector to the inverter with converter assembly and lock the connector with the lock lever.
| 14. INSTALL NO. 1 INVERTER BRACKET |
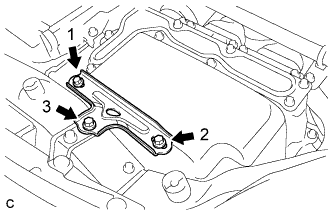 |
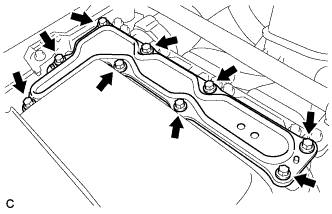
Temporarily install the No. 1 inverter bracket with the 3 bolts.
Tighten the 3 bolts in the order shown in the illustration.
| 15. INSTALL SERVICE PLUG GRIP |
Wear insulated gloves and install the service plug grip in the order shown in the illustration.
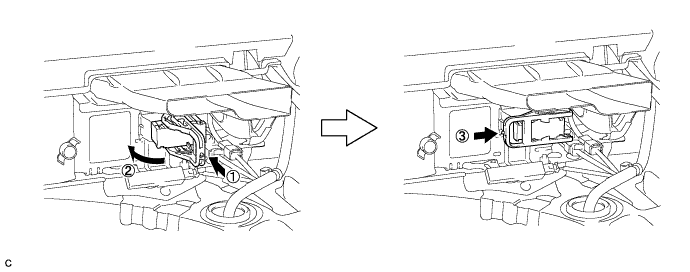
Rotate the handle of the service plug grip 90° toward the battery and slide it in the direction shown by the arrow until a click sound is heard.
| 16. CONNECT CABLE TO NEGATIVE BATTERY TERMINAL |
| 17. INSTALL REAR NO. 3 FLOOR BOARD |
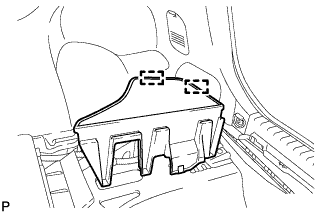 |
Engage the 2 guides to install the rear No. 3 floor board.
| 18. INSTALL REAR DECK FLOOR BOX |
Install the rear deck floor box.
| 19. INSTALL REAR NO. 2 FLOOR BOARD (for Separate Type) |
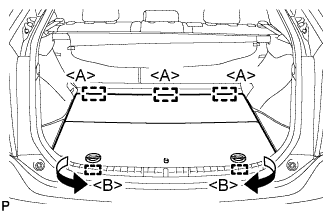 |
Engage the 3 guides <A>.
Engage the 2 guides <B> and install the rear No. 2 floor board as shown in the illustration.
| 20. ADD COOLANT (for Inverter) |
| DTC Code | Detection Item |
| P0A01-726 | Motor Electronics Coolant Temperature Sensor Circuit Range / Performance |
| P0A04-725 | Motor Electronics Coolant Temperature Sensor Circuit Intermittent |
| P0A08-264 | DC / DC Converter Status Circuit |
| P0A78-284 | Drive Motor "A" Inverter Performance |
| P0A78-286 | Drive Motor "A" Inverter Performance |
| P0A7A-322 | Generator Inverter Performance |
| P0A7A-324 | Generator Inverter Performance |
| P0A93-346 | Inverter Cooling System Performance |
| P0A94-553 | DC / DC Converter Performance |
| P0A94-557 | DC / DC Converter Performance |
| P0AEE-277 | Motor Inverter Temperature Sensor "A" Circuit Range / Performance |
| P0AF1-276 | Drive Motor Inverter Temperature Sensor "A" Circuit Intermittent / Erratic |
| P0BCD-315 | Generator Inverter Temperature Sensor Circuit Range / Performance |
| P0BD0-314 | Generator Inverter Temperature Sensor Circuit Intermittent / Erratic |
| P0C39-626 | DC / DC Converter Temperature Sensor "A" Range / Performance |
| P0C3C-625 | DC / DC Converter Temperature Sensor "A" Intermittent / Erratic |
| P0C3E-628 | DC / DC Converter Temperature Sensor "B" Range / Performance |
| P0C41-627 | DC / DC Converter Temperature Sensor "B" Intermittent / Erratic |
| P0C73-776 | Motor Electronics Coolant Pump "A" Control Performance |
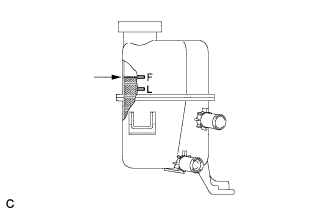 |
Slowly pour coolant into the reserve tank until it reaches the F line.
When using the Techstream:
Connect the Techstream to the DLC3.
Turn the power switch on (IG).
On the Techstream, enter the following menus: Powertrain / Hybrid Control / Active Test / Activate the Water Pump.
Keep the coolant at the F line in the reserve tank to compensate for the drop in coolant level when the air bleeds.
When not using the Techstream:
Turn the power switch on (READY). [*1]
Turn the power switch off and add coolant to the F line because the coolant level drops as the air bleeds. [*2]
Repeat steps [*1] and [*2] until air bleeding from the cooling system is completed.
After the air is completely bled from the cooling system, tighten the reserve tank cap.
|
Add coolant to the F line of the reserve tank.
| 21. INSPECT FOR COOLANT LEAK (for Inverter) |
Remove the reserve tank cap.
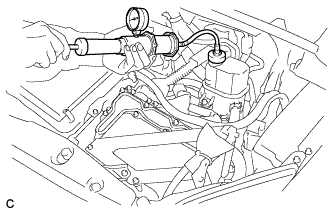 |
Install the radiator cap tester.
Pump the radiator cap tester to 122 kPa (1.2 kgf/ cm2, 17.7 psi), and then check that the pressure does not drop.
Reinstall the reserve tank cap.
| 22. INSTALL FRONT SPOILER COVER (w/ Front Spoiler) |
| 23. INSTALL ENGINE UNDER COVER (w/ Cover) |
| 24. INSTALL NO. 1 ENGINE UNDER COVER |
| 25. INSTALL RADIATOR SUPPORT OPENING COVER |
Engage the 2 claws and install the radiator support opening cover.
Install the 3 clips.