 |
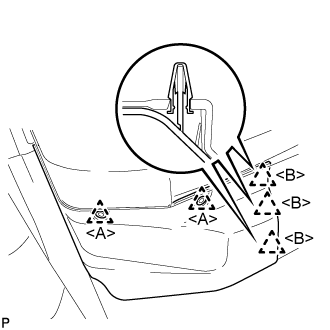
Using a clip remover, remove the 2 clips <A>.
RADIATOR > REMOVAL |
| 1. PRECAUTION |
| 2. REMOVE FRONT FLOOR COVER RH |
|
Using a clip remover, remove the 2 clips <A>.
Disengage the 3 clips <B>.
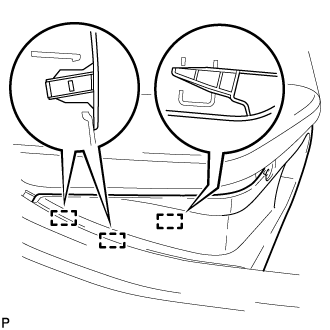 |
Disengage the 3 guides and remove the front floor cover RH.
| 3. DISCONNECT CABLE FROM NEGATIVE AUXILIARY BATTERY TERMINAL |
| 4. REMOVE ENGINE UNDER COVER LH |
| 5. REMOVE ENGINE UNDER COVER RH |
| 6. DRAIN COOLANT (for Inverter) |
Remove the reserve tank cap.
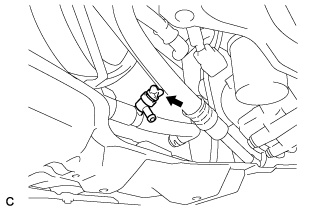 |
Loosen the radiator drain cock plug and drain the coolant.
Tighten the radiator drain cock plug.
| 7. DRAIN COOLANT (for Engine) |
Loosen the radiator drain cock plug.
Remove the water filler cap sub-assembly and drain the coolant.
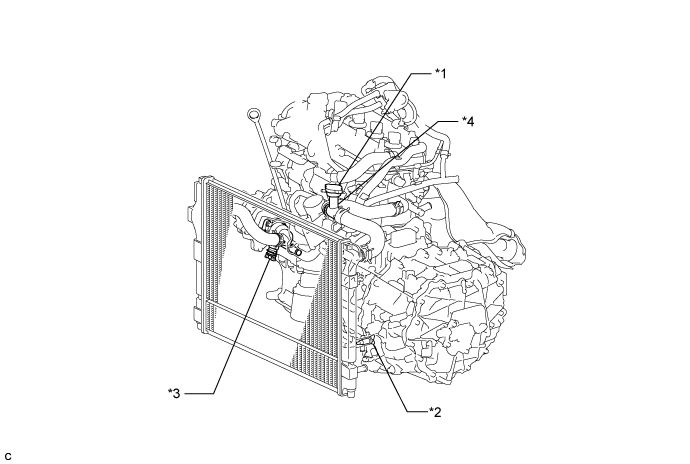
| *1 | Water Filler Cap Sub-assembly | *2 | Radiator Drain Cock Plug |
| *3 | Engine Drain Cock Plug | *4 | Water Filler |
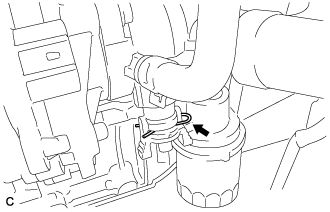 |
Remove the stop ring.
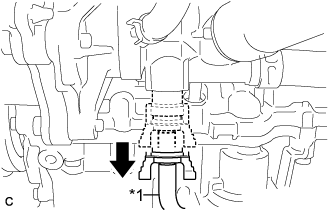 |
Connect the hose to the engine drain cock plug.
| *1 | Hose |
Pull out the engine drain cock plug and drain the coolant.
| 8. REMOVE FRONT BUMPER ASSEMBLY |
| 9. REMOVE RADIATOR SUPPORT OPENING COVER |
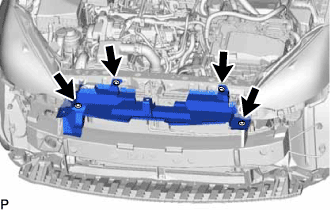 |
Remove the 4 clips and remove the radiator support opening cover.
| 10. REMOVE AIR CLEANER CAP SUB-ASSEMBLY |
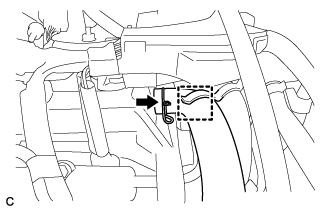 |
Disconnect the ventilation hose.
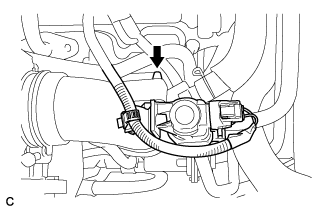 |
Disconnect the purge VSV.
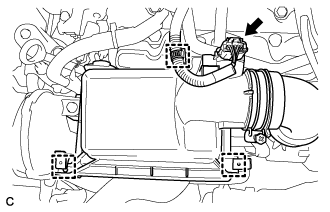 |
Disconnect the mass air flow meter connector.
Disconnect the wire harness clamp.
Release the 2 clamps.
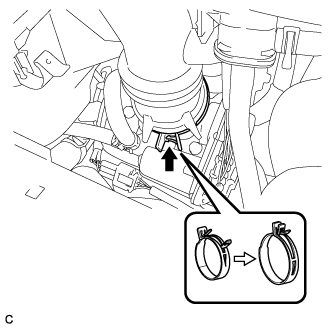 |
Loosen the hose clamp and remove the air cleaner cap sub-assembly.
| 11. REMOVE AIR CLEANER CASE SUB-ASSEMBLY |
Remove the air cleaner filter element sub-assembly.
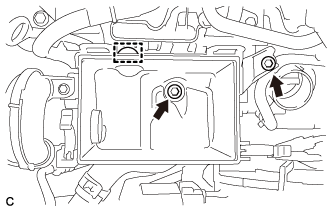 |
Remove the 2 bolts, grommet and air cleaner case sub-assembly.
| 12. REMOVE HOOD LOCK ASSEMBLY |
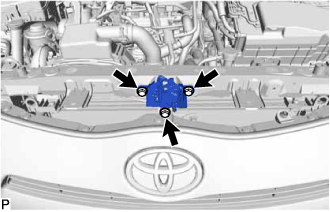 |
Remove the 3 bolts.
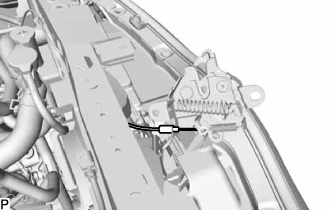 |
Disconnect the hood lock control cable and remove the hood lock assembly.
| 13. DISCONNECT NO. 1 RADIATOR HOSE |
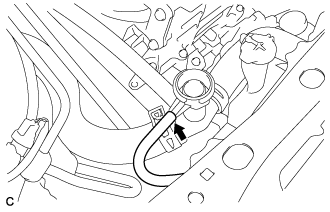 |
Disconnect the reserve tank hose.
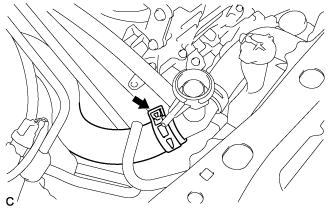 |
Disconnect the No. 1 radiator hose.
| 14. DISCONNECT NO. 2 RADIATOR HOSE |
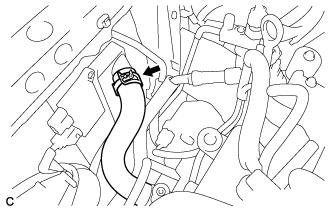 |
Disconnect the No. 2 radiator hose.
| 15. DISCONNECT OUTLET NO. 1 HYBRID WATER PUMP HOSE |
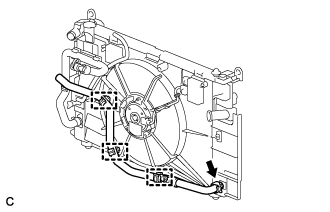 |
Disconnect the 3 clamps and outlet No. 1 hybrid water pump hose.
| 16. DISCONNECT NO. 1 INVERTER COOLING HOSE ASSEMBLY |
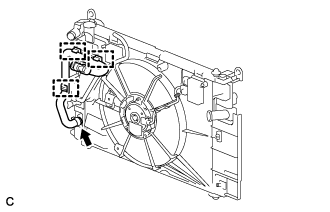 |
Disconnect the 3 clamps and No. 1 inverter cooling hose assembly.
| 17. REMOVE UPPER RADIATOR SUPPORT SUB-ASSEMBLY |
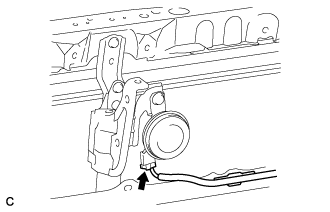 |
Disconnect the horn connector.
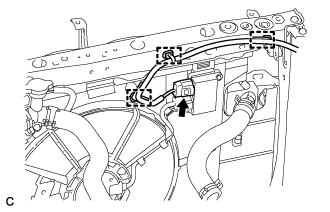 |
Disconnect the 3 clamps and cooling fan ECU connector.
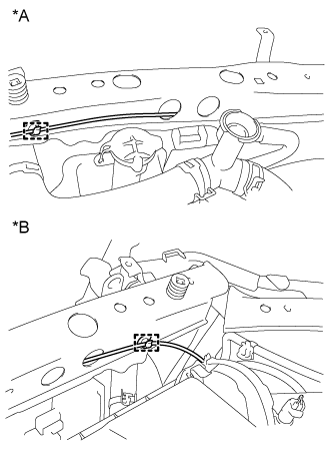 |
Disconnect the clamp of hood lock control cable.
| *A | for LHD |
| *B | for RHD |
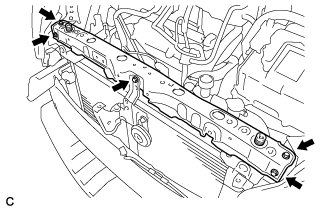 |
Remove the 5 bolts and upper radiator support sub-assembly.
Remove the 2 radiator support cushions.
| 18. REMOVE NO. 2 FAN SHROUD |
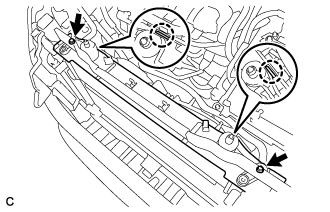 |
Remove the 2 bolts, 2 claws and No. 2 fan shroud.
| 19. REMOVE RADIATOR ASSEMBLY |
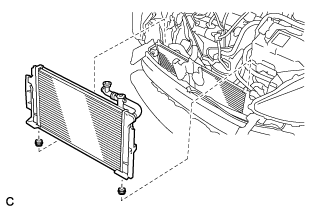 |
Remove the radiator assembly with the fan shroud.
Remove the 2 lower radiator supports.
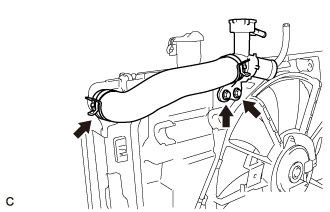 |
Remove the 2 bolts and No. 3 radiator hose.
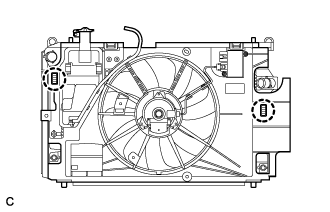 |
Remove the 2 claws and radiator assembly.