 |
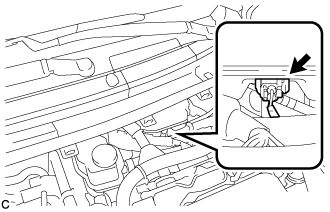
Disconnect the reservoir level switch connector with the parking brake applied.
BRAKE BOOSTER PUMP (for RHD) > REMOVAL |
| 1. PRECAUTION |
| 2. DISABLE BRAKE CONTROL |
Wait at least 2 minutes after turning the power switch off.
|
Disconnect the reservoir level switch connector with the parking brake applied.
Disconnect the cable from the negative (-) auxiliary battery terminal (Click here).
Depress the brake pedal 40 times or more to return all the fluid in the accumulator back to the reservoir.
Check that the brake pedal can not be further depressed.
Release the parking brake.
| 3. REMOVE WINDSHIELD WIPER MOTOR AND LINK ASSEMBLY |
| 4. REMOVE INNER COWL TOP TO COWL BRACE |
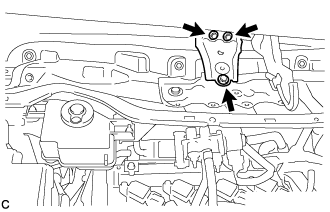 |
Remove the 3 bolts and inner cowl top to cowl brace.
| 5. REMOVE FRONT AIR SHUTTER SEAL |
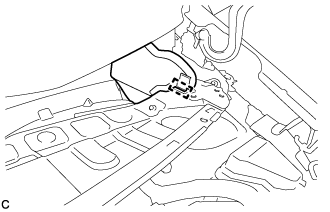 |
Disengage the clamp to remove the front air shutter seal.
| 6. REMOVE FRONT NO. 1 VENTILATOR SEAL |
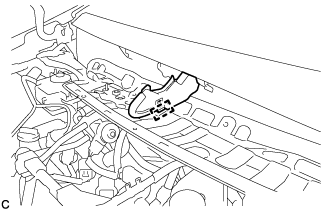 |
Disengage the clamp to remove the front No. 1 ventilator seal.
| 7. REMOVE OUTER COWL TOP PANEL SUB-ASSEMBLY |
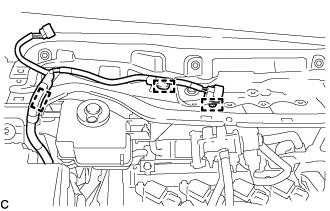 |
Disengage the 3 clamps to separate the wire harness from the outer cowl top panel sub-assembly.
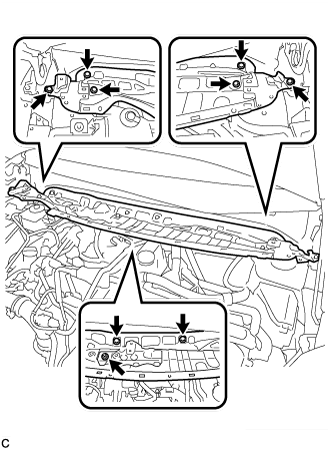 |
Remove the 8 bolts, nut and outer cowl top panel sub-assembly.
| 8. DRAIN BRAKE FLUID |
| 9. DISCONNECT BRAKE ACTUATOR HOSE |
Disconnect the 2 connectors from the ECM .
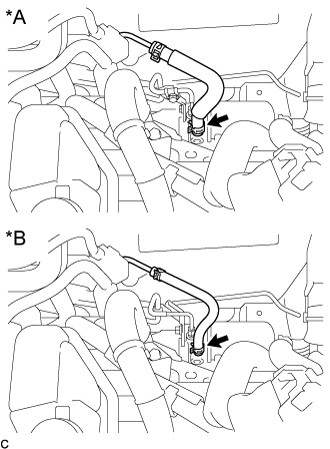 |
Move the clip and disconnect the brake actuator hose from the brake booster pump assembly.
| *A | for Type A |
| *B | for Type B |
| 10. DISCONNECT FRONT NO. 1 BRAKE TUBE |
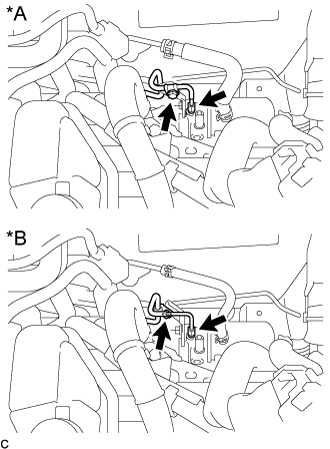 |
Using a union nut wrench, disconnect the front No. 1 brake tube from the brake booster pump assembly.
| *A | for Type A |
| *B | for Type B |
Remove the bolt to separate the front No. 1 brake tube from the No. 1 brake tube clamp bracket.
| 11. REMOVE NO. 1 BRAKE TUBE CLAMP BRACKET |
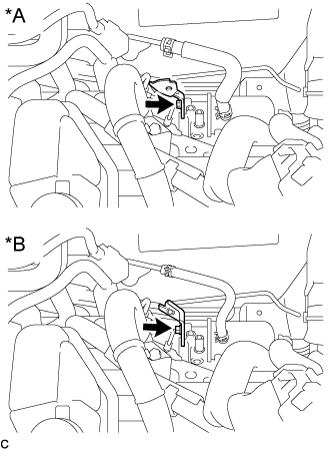 |
Remove the bolt and No. 1 brake tube clamp bracket.
| *A | for Type A |
| *B | for Type B |
| 12. REMOVE BRAKE BOOSTER PUMP ASSEMBLY |
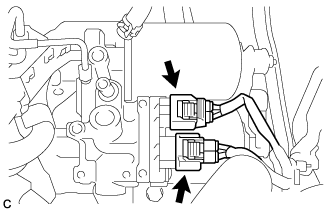 |
Disconnect the 2 connectors from the brake booster pump assembly.
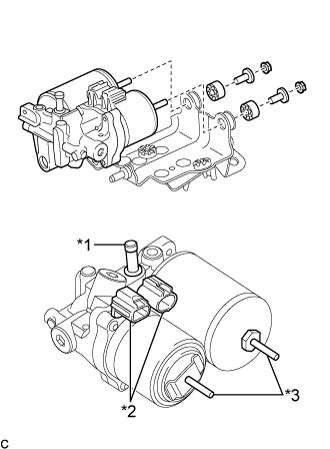 |
Remove the 2 nuts, brake booster pump assembly, 2 brake actuator case collars and 2 brake booster pump bushings from the brake actuator bracket assembly.
| *1 | Union |
| *2 | Connector |
| *3 | Stud |
| 13. REMOVE FRONT WHEEL LH |
| 14. REMOVE ENGINE UNDER COVER LH |
| 15. REMOVE BRAKE ACTUATOR BRACKET ASSEMBLY |
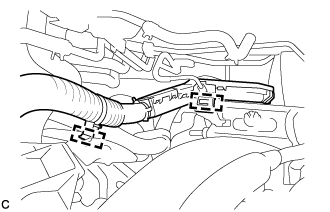 |
Disengage the 2 clamps to separate the frame wire from the brake actuator bracket assembly.
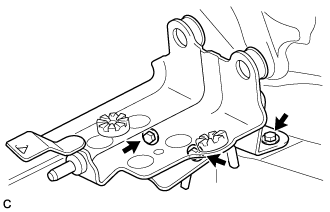 |
Remove the 3 bolts and brake actuator bracket assembly.
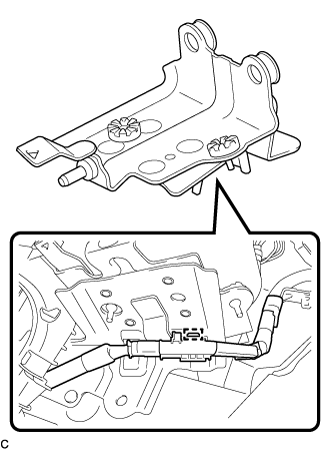 |
Disengage the clamp to separate the frame wire from the brake actuator bracket assembly.