MOTOR GENERATOR CONTROL COMPUTER > DISASSEMBLY |
|
| 1. REMOVE INVERTER WITH CONVERTER ASSEMBLY |
| 2. DRAIN COOLANT (for Inverter) |
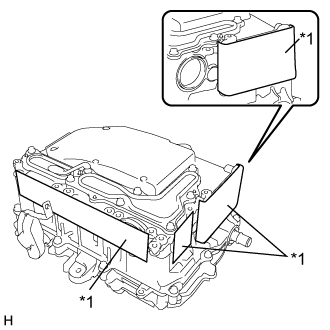 |
Apply protective tape to the areas shown in the illustration without leaving any gaps between the tape and part.
| *1 | Protective Tape |
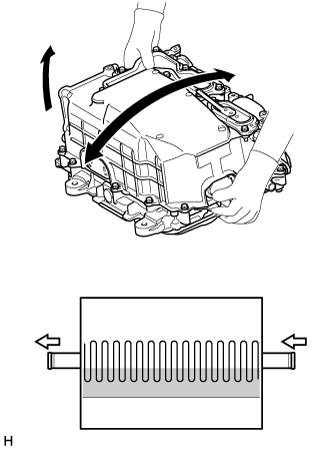 |
Tilt the inverter with converter assembly back and forth to drain the coolant (for inverter).
| *1 | Coolant (for inverter) Passage |
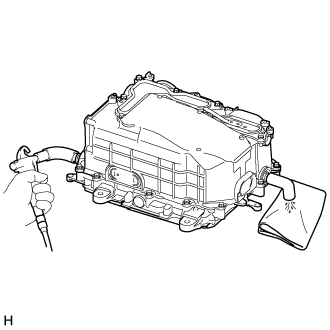 |
Blow compressed air into the inverter with converter assembly until most all of the coolant (for inverter) is blown out.
| 3. CLEAN INVERTER WITH CONVERTER ASSEMBLY |
Using a piece of cloth, clean the outside of the inverter with converter assembly and around the bolts.
Turn the inverter with converter assembly over and clean around the bolts.
| 4. REMOVE INVERTER TERMINAL COVER |
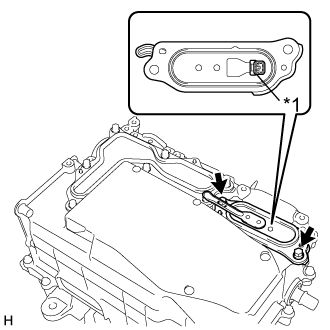 |
Remove the 2 bolts and inverter terminal cover.
| *1 | Interlock Connector |
| 5. REMOVE INVERTER COVER |
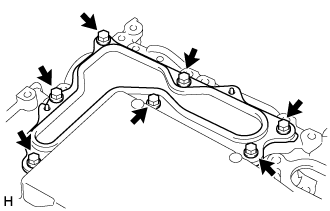 |
Remove the 7 bolts and inverter cover.
| 6. REMOVE INVERTER SIGNAL CONNECTOR COVER |
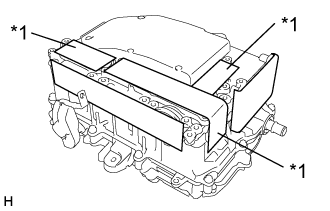 |
Apply protective tape to the area that was exposed when the inverter terminal cover was removed.
| *1 | Protective Tape |
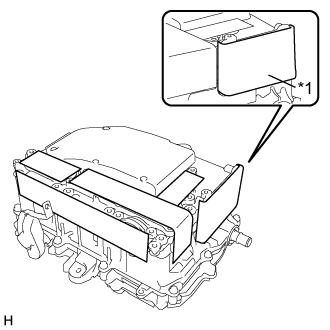 |
Remove the protective tape from the inverter signal connector.
| *1 | Protective Tape |
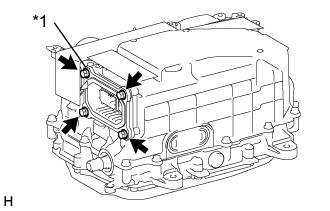 |
Remove the 4 bolts and inverter signal connector cover.
| *1 | Inverter Signal Connector Cover |
| 7. REMOVE NO. 1 AND NO. 2 INVERTER DRAIN PLUG |
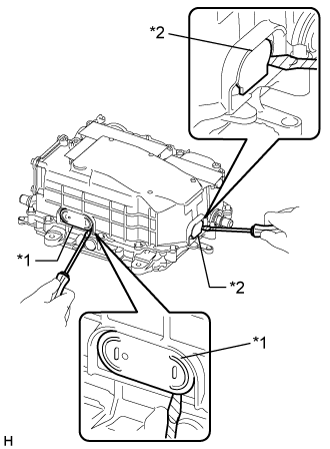 |
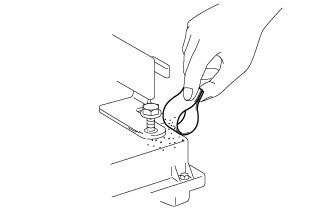
Using a screwdriver with its tip wrapped with protective tape, remove the No. 1 and No. 2 inverter drain plugs.
| *1 | No. 1 Inverter Drain Plug |
| *2 | No. 2 Inverter Drain Plug |
| 8. VERIFY THAT VOLTAGE OF INVERTER WITH CONVERTER IS 0 V |
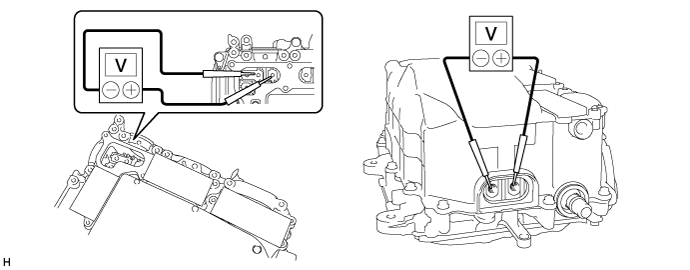
Using a voltmeter, measure the voltage between the high voltage cable connector terminals.
| 9. REMOVE INVERTER UNION GROMMET |
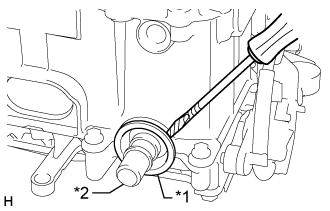 |
Using a screwdriver with its tip wrapped with protective tape, remove the 2 inverter union grommets from the inverter with converter assembly.
| *1 | Inverter Union Grommet |
| *2 | Coolant Pipe |
| 10. REMOVE INVERTER CASE WITH CONDENSER |
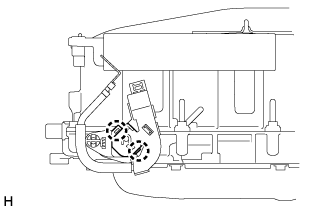 |
Disengage the 2 claws and open the terminal cover.
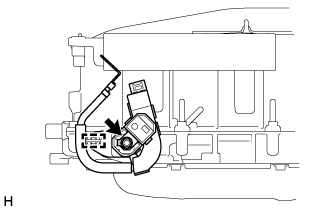 |
Loosen the nut of the No. 2 engine room wire to secure enough space to perform work.
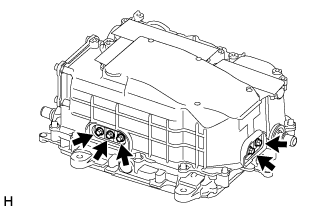 |
Remove the 5 bolts.
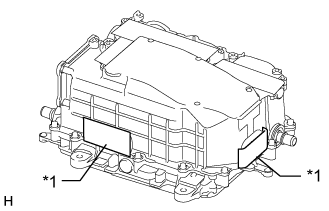 |
Apply protective tape to the installation holes of the No. 1 and No. 2 inverter drain plugs as shown in the illustration.
| *1 | Protective Tape |
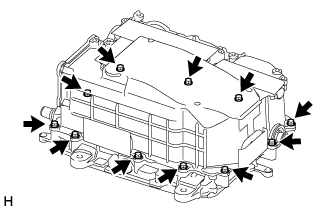 |
Remove the 11 bolts.
Apply protective tape to the coolant pipe as shown in the illustration.
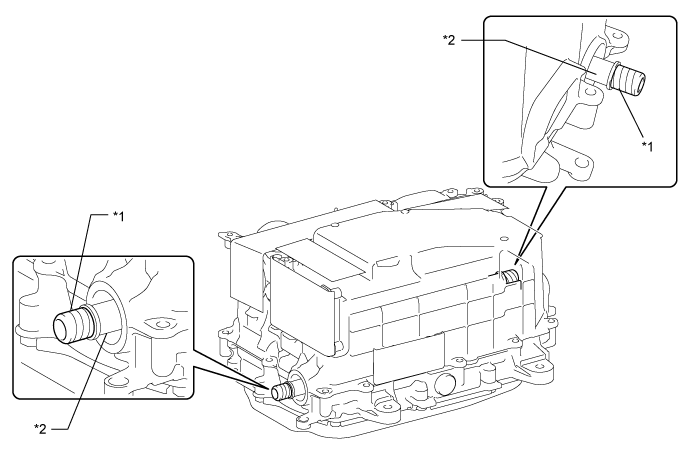
| *1 | Protective Tape | *2 | Coolant Pipe |
Install SST to the inverter with converter assembly. (Step A)
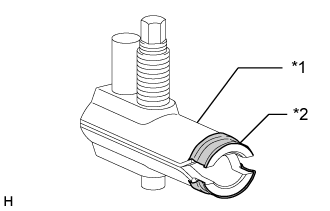 |
Apply protective tape to SST as shown in the illustration.
| *1 | SST |
| *2 | Protective Tape |
Insert SST into the inverter union grommet installation hole and tighten the bolt (A) of SST to install SST to the inverter with converter assembly as shown in the illustration.
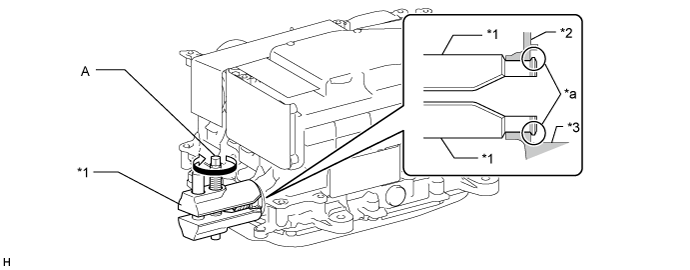
| *1 | SST | *2 | Inverter Case with Condenser |
| *3 | Hybrid Vehicle Converter Kit | - | - |
| *a | Tip | - | - |
Check that the tips of SST are not in contact with the grommet sealing surface of the inverter with converter assembly.
While supporting SST by hand, tighten the bolt A of SST to separate the inverter case with condenser and hybrid vehicle converter kit as shown in the illustration. (Step B)
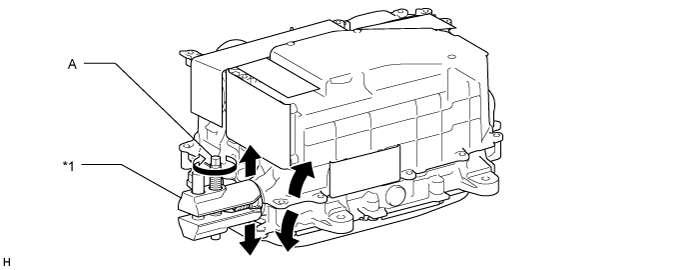
| *1 | SST | - | - |
Remove SST from the inverter with converter assembly, and then insert SST into the inverter union grommet installation hole on the opposite side of the inverter with converter assembly and tighten the bolt (A) of SST to install SST to the inverter with converter assembly as shown in the illustration. (Step C)
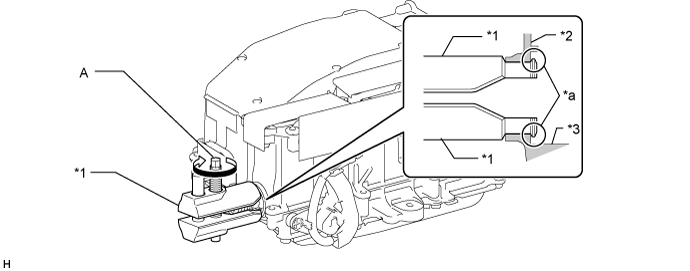
| *1 | SST | *2 | Inverter Case with Condenser |
| *3 | Hybrid Vehicle Converter Kit | - | - |
| *a | Tips | - | - |
While supporting SST by hand, tighten the bolt A of SST to separate the inverter case with condenser and hybrid vehicle converter kit as shown in the illustration. (Step D)
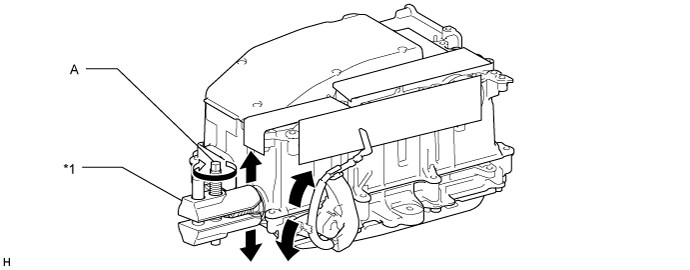
| *1 | SST | - | - |
Perform steps A, B, C and D on the opposite side of the inverter with converter assembly and remove the inverter case with condenser from the hybrid vehicle converter kit.
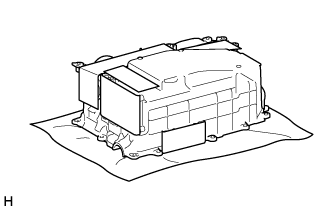 |
Place the inverter case with condenser on a clean piece of cloth.
| 11. HOW TO PREVENT STATIC ELECTRICITY |
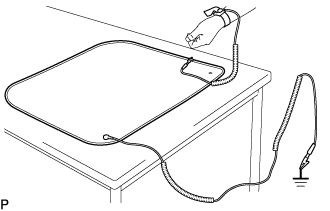 |
Wear an antistatic wrist strap.
Connect the ground clip of the antistatic mat securely to a ground point provided in the workshop or on a workbench (anchor bolt).
Connect the ground clip of the antistatic wrist strap securely to the specified point of the antistatic mat.
After removing the inverter case with condenser, perform work with bare hands to prevent damage from static electricity and entry of foreign matter.
| 12. REMOVE INVERTER TERMINAL WITH SENSOR SUB-ASSEMBLY |
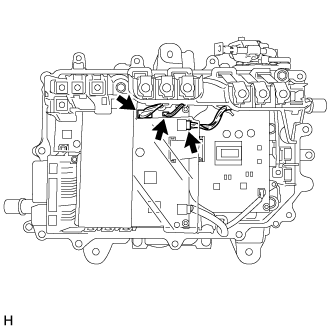 |
Disconnect the 3 connectors from the MG control computer with bracket sub-assembly.
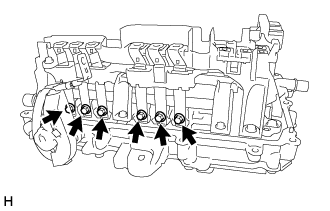 |
Remove the 6 bolts.
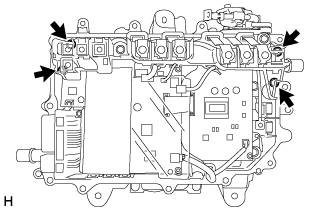 |
Remove the 4 bolts and inverter terminal with sensor sub-assembly.
| 13. REMOVE MG CONTROL COMPUTER WITH BRACKET SUB-ASSEMBLY |
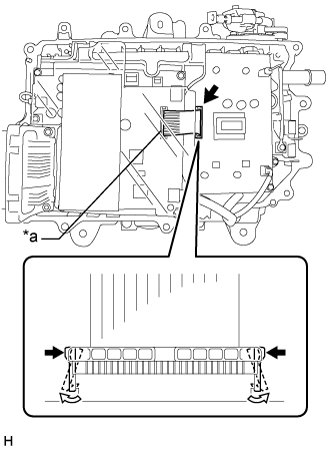 |
While disengaging the white resin lock claws of the connector, disconnect the flat cable from the power module intelligent transistor kit.
| *a | Do not disconnect |
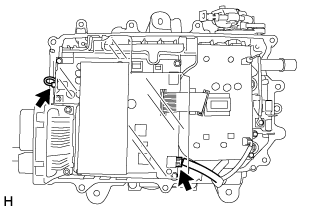 |
Disconnect the 2 connectors.
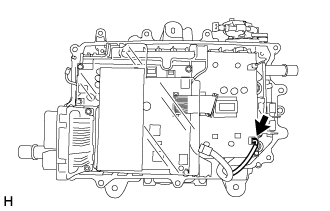 |
Disconnect the connector.
Disengage the 2 wire harnesses from the 4 clamps.
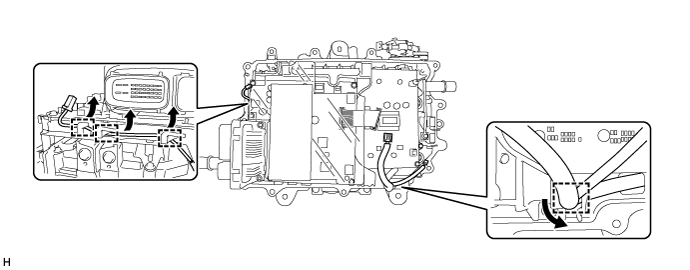
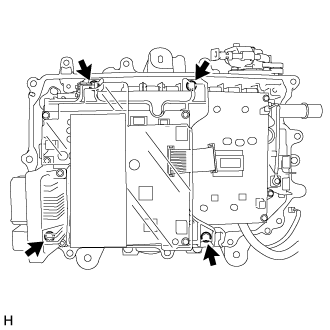 |
Remove the 4 bolts and MG control computer with bracket sub-assembly.