EXTERIOR PANELS / TRIM FRONT BUMPER REMOVAL
CAUTION / NOTICE / HINT
The necessary procedures (adjustment, calibration, initialization, or registration) that must be performed after parts are removed and installed, or replaced during front bumper removal/installation are shown below.
| Replaced Part or Performed Procedure | Necessary Procedure | Effect/Inoperative Function when Necessary Procedure not Performed | Link |
|---|---|---|---|
| Front bumper assembly | ·
Ultrasonic sensor detection angle (w/ TOYOTA Parking Assist-sensor System) ·
Ultrasonic sensor detection angle registration (w/ TOYOTA Parking Assist-sensor System) |
·
Intelligent clearance sonar system ·
Simple advanced parking guidance system |
( ) |
| Change grille shutter control modes and/or perform initialization (w/ Exhaust Heat Recirculation System) | Grille Shutter system | ()
|
PROCEDURE

 1. PRECAUTION (w/ Exhaust Heat Recirculation System)
Change the grille shutter control mode to maintenance mode.
Click hereVehicle Exterior>EXTERIOR PANELS / TRIM>GRILLE SHUTTER SYSTEM>INITIALIZATION
- NOTICE:
-
Make sure to change the grille shutter control mode to maintenance mode to prevent the grill shutter from opening or closing when the power switch is off.
53289A
2.REMOVE RADIATOR SUPPORT OPENING COVER
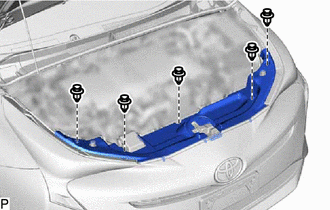
Remove the 5 clips.
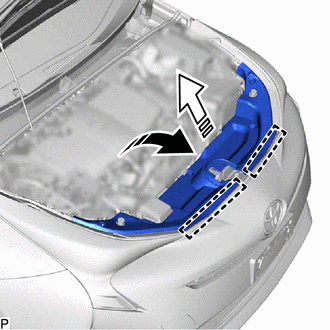

|
Remove in this Direction (1) |

|
Remove in this Direction (2) |
Disengage the 2 guides and remove the radiator support opening cover as shown in the illustration.
3.REMOVE FRONT BUMPER ASSEMBLY
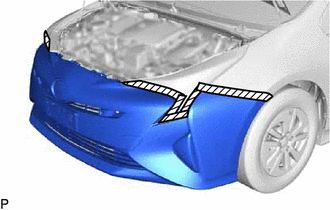

|
Protective Tape |
Apply protective tape around the front bumper assembly.
- HINT:
-
Use the same procedure for the RH side and LH side.
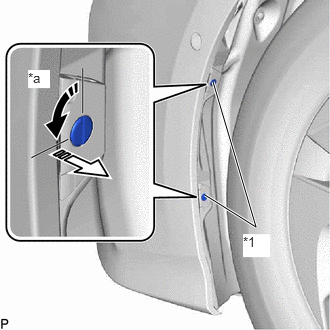
| *1 | Pin Hold Clip |
| *a | 90 deg |
|
|
Remove in this Direction (1) |
|
|
Remove in this Direction (2) |
Using a screwdriver, turn the pin 90 degrees and remove the 2 pin hold clips.
- HINT:
-
Use the same procedure for the RH side and LH side.
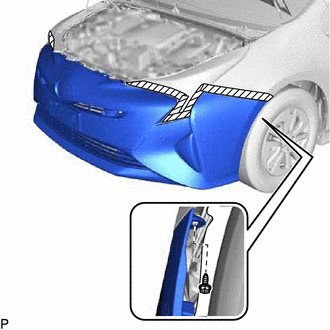
Remove the screw.
- HINT:
-
Use the same procedure for the RH side and LH side.
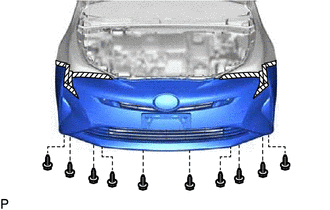
Remove the 10 screws.
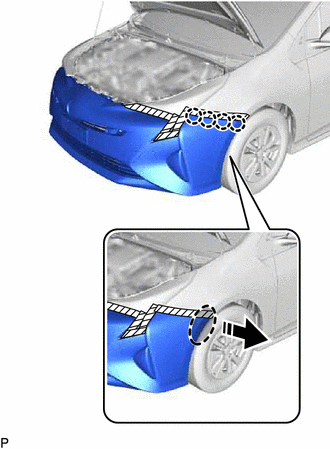

|
Place Hand Here |
|
|
Remove in this Direction |
Disengage the 4 claws as shown in the illustration.
- HINT:
-
Use the same procedure for the RH side and LH side.
w/ Fog Light:
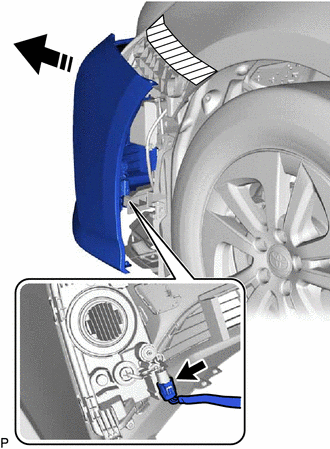
|
|
Remove in this Direction |
Pull back the side of the front bumper assembly and disconnect the connector.
- NOTICE:
-
Do not apply excessive force when pulling back the front bumper assembly.
- HINT:
-
Use the same procedure for the RH side and LH side.
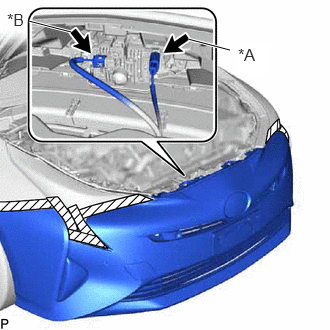
| *A | w/ TOYOTA Parking Assist-sensor System |
| *B | w/ Toyota Safety Sense |
w/ TOYOTA Parking Assist-sensor System:
Disconnect the connector.
w/ Toyota Safety Sense:
Disconnect the connector.
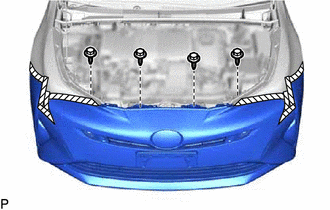
Remove the 4 bolts.
|
|
Remove in this Direction |
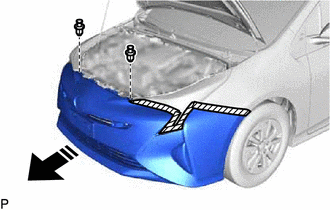
Remove the 2 clips and front bumper assembly as shown in the illustration.