REMOVAL
Removal / installation · Vehicles built from Aug 2007
- CAUTION:
- Do not allow fuel to spray when removing the pipe between the high pressure side fuel pump and the fuel injector. The fuel in the pipe is highly pressurized.
| 1. DISCHARGE FUEL SYSTEM PRESSURE |

- CAUTION:
- The "DISCHARGE FUEL SYSTEM PRESSURE" procedures must be performed before disconnecting any part of the fuel system.
- After performing the "DISCHARGE FUEL SYSTEM PRESSURE" procedures, pressure will remain in the fuel lines. When disconnecting a fuel line, cover it with a shop rag or a piece of cloth to prevent fuel from spraying or coming out.
- The "DISCHARGE FUEL SYSTEM PRESSURE" procedures must be performed before disconnecting any part of the fuel system.
Remove the console box (Click here).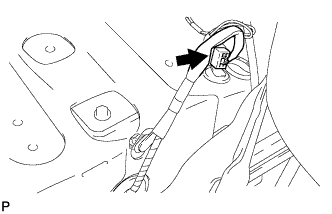

Start the engine. After the engine has stopped, turn the ignition switch off.
- HINT:
- DTC P0171/P0172 (system too lean) may be set.
Check that the engine does not start.
Remove the fuel tank cap, and let the air out of the fuel tank.
Connect the connector.
Install the console box (Click here).
| 2. DISCONNECT CABLE FROM NEGATIVE BATTERY TERMINAL |
- CAUTION:
- Wait at least 90 seconds after disconnecting the cable from the negative (-) battery terminal to prevent airbag and seat belt pretensioner activation.
| 3. REMOVE V-BANK COVER SUB-ASSEMBLY |
Detach the 3 clips and remove the V-bank cover.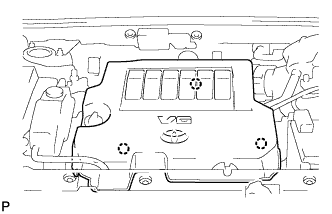
| 4. DRAIN ENGINE COOLANT |
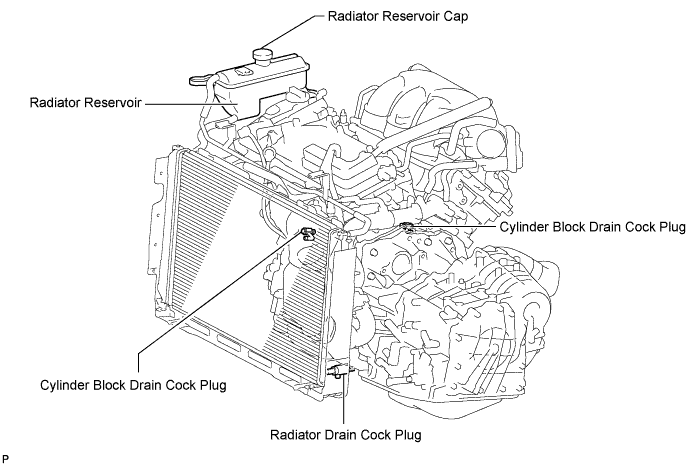
Loosen the radiator drain cock plug.
- HINT:
- Collect the coolant in a container and dispose of it according to the regulations in your area.
Remove the radiator reservoir cap.
- CAUTION:
- Do not remove the radiator reservoir cap while the engine and radiator are still hot. Pressurized, hot engine coolant and steam may be released and cause serious burns.
Loosen the 2 cylinder block drain cock plugs.
| 5. REMOVE AIR CLEANER CAP SUB-ASSEMBLY |
Disconnect the mass air flow meter connector.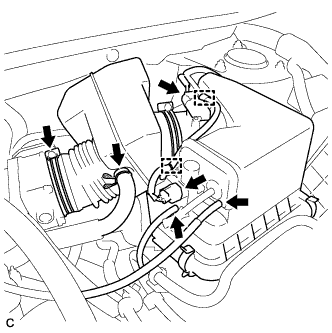
Disconnect the VSV (air intake control) connector.
Disconnect the 2 wire harness clamps and 2 vacuum hoses.
Disconnect the No. 2 ventilation hose from the air cleaner hose.
Loosen the No. 1 air cleaner hose clamp.
Unfasten the 2 hook clamps, and then remove the air cleaner cap.
Remove the air cleaner filter element from the air cleaner case.
| 6. REMOVE INTAKE AIR SURGE TANK ASSEMBLY |
Disconnect the 2 water by-pass hoses from the throttle body.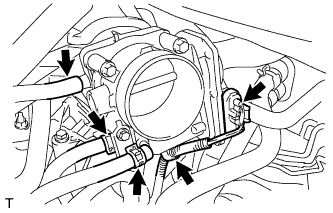
Disconnect the vapor feed hose.
Disconnect the throttle body connector and clamp.
Disconnect the connector.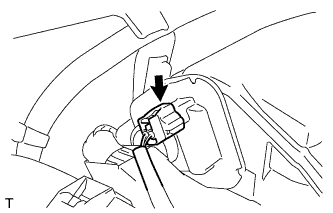
Disconnect the No. 1 ventilation hose and vacuum hose.
Remove the 2 bolts and throttle body bracket.
Remove the 2 bolts and No. 1 surge tank stay.
Using a 5 mm socket hexagon wrench, remove the 4 bolts.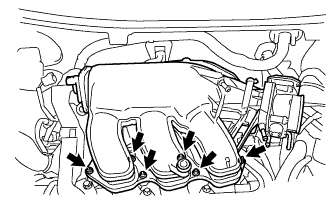
Remove the 2 nuts and surge tank.
Remove the gasket from the surge tank.
| 7. DISCONNECT FUEL MAIN TUBE |
Remove the No. 2 fuel pipe clamp.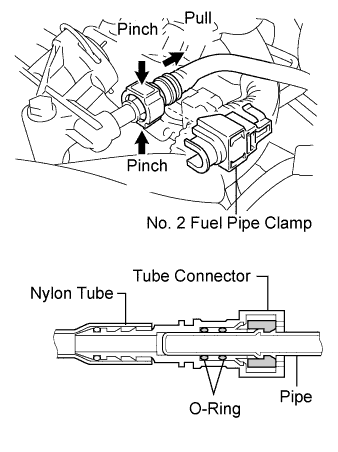
Pinch the tube connector and then pull out the fuel pipe.
- NOTICE:
- Check for foreign matter in the fuel tube around the fuel tube's connector. Clean it if necessary. Foreign matter can affect the O-ring's ability to seal the connector and fuel main pipe.
- Do not use any tools to separate the connector and pipe.
- Do not forcefully bend, kink or twist the hose.
- Keep the connector and pipe free from foreign matter.
- If the connector and pipe are stuck together, pinch the connector and turn it carefully to disconnect it.
- Put the connector in a plastic bag to prevent damage and contamination.
- Check for foreign matter in the fuel tube around the fuel tube's connector. Clean it if necessary. Foreign matter can affect the O-ring's ability to seal the connector and fuel main pipe.
| 8. REMOVE FUEL INJECTOR ASSEMBLY |
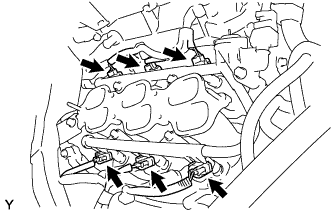 |
Disconnect the 6 injector connectors.
Remove the 5 bolts and fuel delivery pipe together with the 6 injectors.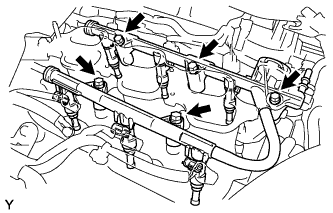
- NOTICE:
- Be careful not to drop the fuel injectors when removing the fuel delivery pipe.
Remove the 6 insulators from the intake manifold.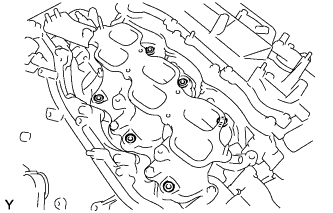
Pull out the 6 fuel injectors from the fuel delivery pipe.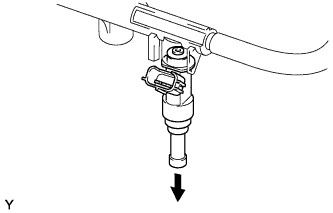
Remove the O-ring from each fuel injector.