INSTALLATION
Removal / installation · Vehicles built Nov 2005 – Jul 2008
Versions by build date: Nov 2005 – Jul 2008 from Aug 2008
| 1.
INSTALL FUEL TANK ASSEMBLY |
 |
Set the fuel tank on a mission jack.
Lift up the mission jack.
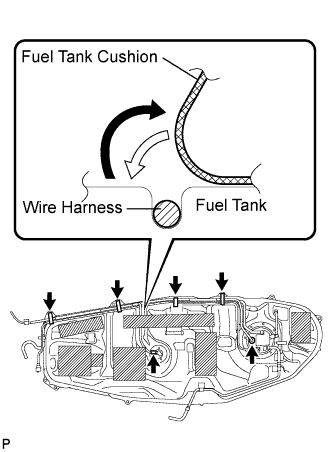
Fold back the 2 cushion rubbers.
Connect the fuel pump connector and sender gauge connector to the fuel tank.
- NOTICE:
- Be careful not to cut the wirings.
Attach the wire harness to the 4 clamps.
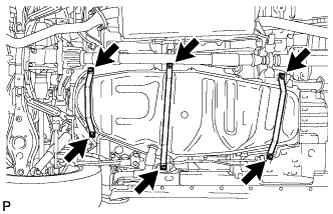
- Install the 3 fuel tank bands with the 6 bolts.
-
Torque:
- 40 N*m{
408 kgf*cm
, 30 ft.*lbf
}
| 2.
INSTALL FUEL TANK FILLER PIPE |
|
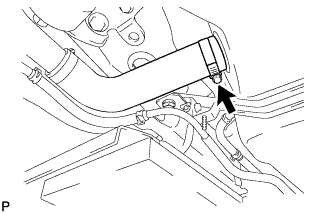
Install the filler pipe with the 2 bolts.
-
Torque:
- 23.5 N*m{
240 kgf*cm
, 17 ft.*lbf
}
Install the filler pipe protector with the 3 bolts.
-
Torque:
- 5.4 N*m{
55 kgf*cm
, 48 in.*lbf
}
| 3.
CONNECT FUEL TANK TO FILLER PIPE HOSE |
|
Connect the filler pipe hose to the fuel tank.
| 4.
CONNECT FUEL TANK BREATHER HOSE |
|
- Connect the fuel tank breather hose to the fuel tank.
- NOTICE:
- Before installing the pipe, make sure that it is not damaged. Make sure that there are no dirt present on the connecting surfaces.
- After connecting, check if the pipe and the connector are securely connected by pulling on them.
| 5.
CONNECT FUEL EMISSION HOSE |
|
- Connect the air inlet line hose.
| 6.
CONNECT FUEL TANK MAIN TUBE SUB-ASSEMBLY |
|
- NOTICE:
- Before installing the tube connector to the pipe, check the connector for damage and foreign matter.
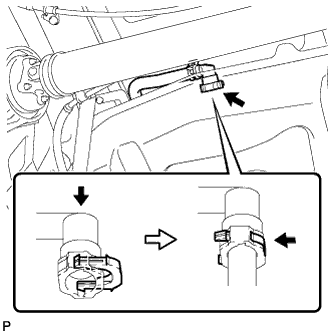
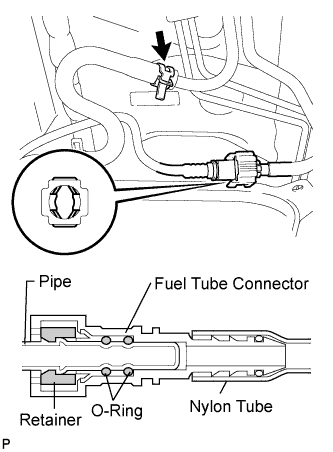
- Connect the main tube connector to the pipe. Push the 2 parts together firmly until a "click" sound is heard.
- NOTICE:
- Check that the connector and pipe are securely connected by trying to pull them apart.
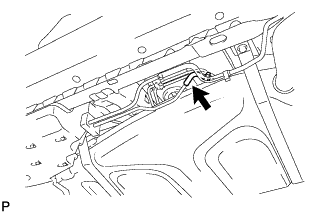
Connect the purge line hose to the pipe.
| 7.
INSTALL NO. 1 FUEL TANK PROTECTOR |
|
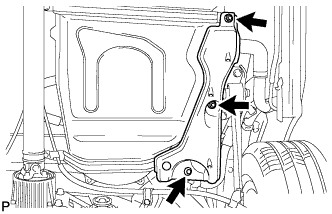
Install the fuel tank protector with the 3 clips and 2 bolts.
| 8.
INSTALL NO. 1 FLOOR UNDER COVER |
|
- Install the floor cover with the clip and 2 nuts.
| 9.
INSTALL FRONT FLOOR COVER |
|
Install the floor under cover with the 3 clips, bolt and nut.
| 10.
INSTALL NO. 2 PARKING BRAKE CABLE ASSEMBLY |
|
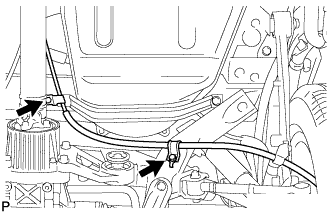
- Install the parking brake cable with the 2 bolts.
| 11.
INSTALL FUEL TANK CAP |
|
| 12.
CONNECT CABLE TO NEGATIVE BATTERY TERMINAL |
|
| 13.
CHECK FOR FUEL LEAKS
|
|
- Make sure that there are no fuel leaks after performing maintenance on the fuel system.
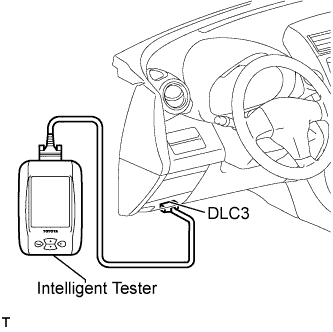
Connect the intelligent tester to the DLC3.
Turn the ignition switch on (IG), and push the intelligent tester main switch ON.
- NOTICE:
- Do not start the engine.
Select the Active Test mode on the intelligent tester.
- HINT:
- Refer to the intelligent tester operator's manual for further details.
Check that there are no leaks from the fuel system.
Turn the ignition switch off.
Disconnect the intelligent tester from the DLC3.