INSTALLATION
Removal / installation · Vehicles built Aug 2007 – Jul 2008
Versions by build date: Aug 2007 – Jul 2008 from Aug 2008
| 1.
INSTALL FUEL SENDER GAUGE ASSEMBLY |
 |
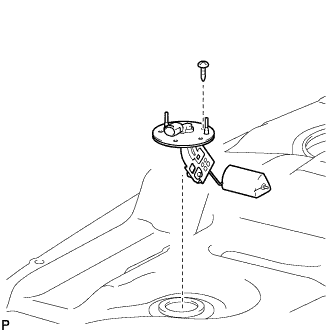
- Install the sender gauge with the 5 screws.
-
Torque:
- 1.5 N*m{
15 kgf*cm
, 13 in.*lbf
}
| 2.
INSTALL FUEL TANK CUSHION |
|
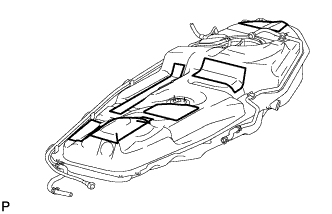
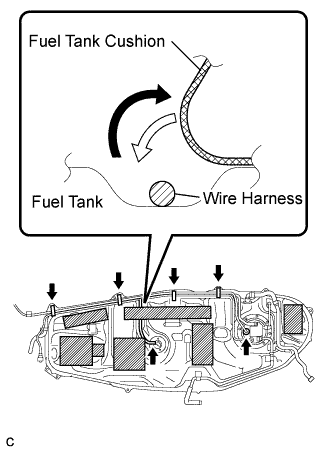
- Install 7 new fuel tank cushions onto the fuel tank as shown in the illustration.
| 3.
INSTALL FUEL TUBE GROMMET |
|
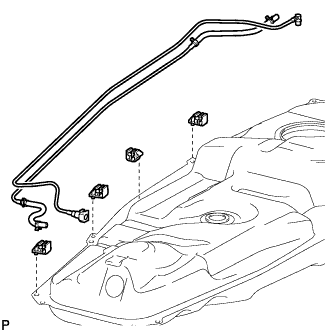
- Install the 3 fuel tube grommets and No. 5 fuel tube clamp to the fuel tank.
| 4.
INSTALL NO. 1 FUEL EVAPORATION TUBE SUB-ASSEMBLY |
|
Install the tube to the fuel tube clamps.
| 5.
INSTALL FUEL TANK MAIN TUBE SUB-ASSEMBLY |
|
Install the tube to the fuel tube clamps.
| 6.
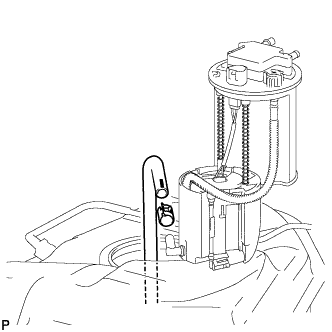
INSTALL FUEL SUCTION WITH PUMP ASSEMBLY
|
|
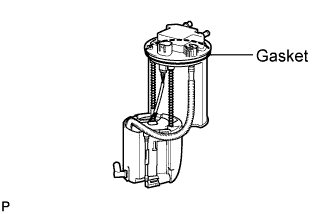
- Install a new gasket onto the fuel suction with pump assembly.
- Connect the fuel hose and install the fuel suction with pump assembly into the fuel tank.
| 7.
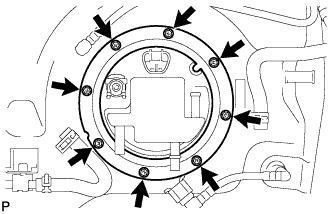
INSTALL FUEL TANK VENT TUBE SET PLATE
|
|
- Install the set plate with the 8 bolts.
-
Torque:
- 4.0 N*m{
41 kgf*cm
, 35 in.*lbf
}
| 8.
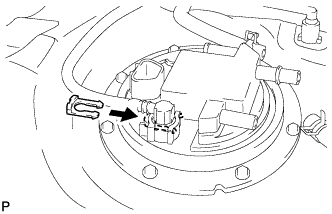
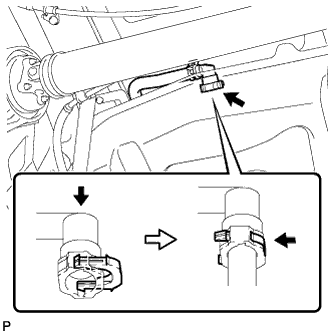
CONNECT FUEL TANK MAIN TUBE SUB-ASSEMBLY
|
|
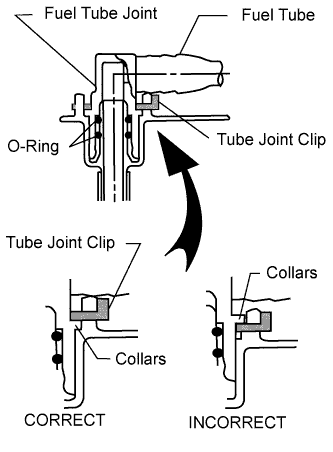
- Install the fuel tube with the joint clip.
- CAUTION:
- Check that there are no scratches or foreign objects on the connecting parts.
- Check that the fuel tube joint is inserted securely.
- Check that the fuel tube joint clip is on the collars of the fuel tube joint.
- After installing the tube joint clip, check that the fuel tube joint has not been pulled off.
- Be careful not to damage the clip. If the clip is damaged, replace it.
| 9.
CONNECT FUEL EMISSION HOSE
|
|
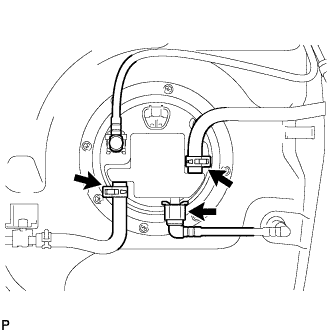
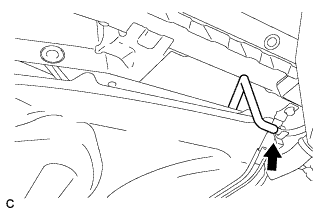
- Install the purge line hose, air inlet line hose and EVAP line tube to the fuel pump.
| 10.
INSTALL FUEL TANK ASSEMBLY |
|
Set the fuel tank on a transmission jack.
Lift up the transmission jack.
- Fold back the 2 cushion rubbers.
Connect the fuel pump connector and sender gauge connector to the fuel tank.
- NOTICE:
- Be careful not to cut the wirings.
Attach the wire harness to the 4 clamps.
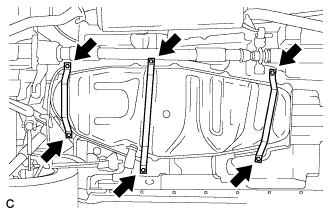
- Install the 3 fuel tank bands with the 6 bolts.
-
Torque:
- 40 N*m{
408 kgf*cm
, 30 ft.*lbf
}
| 11.
INSTALL FUEL TANK FILLER PIPE |
|
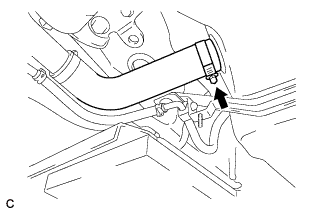
Install the filler pipe with the 2 bolts.
-
Torque:
- 23.5 N*m{
240 kgf*cm
, 17 ft.*lbf
}
Install the filler pipe protector with the 3 bolts.
-
Torque:
- 5.4 N*m{
55 kgf*cm
, 48 in.*lbf
}
| 12.
CONNECT FUEL TANK TO FILLER PIPE HOSE |
|
- Connect the filler pipe hose to the fuel tank.
| 13.
CONNECT FUEL TANK BREATHER HOSE |
|
- Connect the fuel tank breather hose to the fuel tank.
- NOTICE:
- Before installing the pipe, make sure that it is not damaged. Make sure that there are no dirt present on the connecting surfaces.
- After connecting, check if the pipe and the connector are securely connected by pulling on them.
| 14.
CONNECT FUEL EMISSION HOSE |
|
- Connect the fuel emission hose.
| 15.
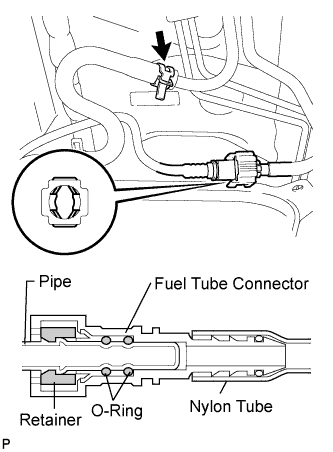
CONNECT FUEL TANK MAIN TUBE SUB-ASSEMBLY |
|
- NOTICE:
- Before installing the tube connector to the pipe, check the connector for damage and foreign matter.
- Connect the main tube connector to the pipe. Push the 2 parts together firmly until a "click" sound is heard.
- NOTICE:
- Check that the connector and pipe are securely connected by trying to pull them apart.
Connect the purge line hose to the pipe.
| 16.
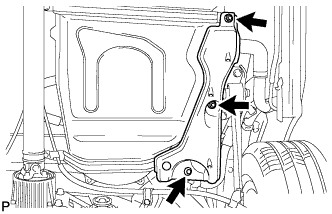
INSTALL NO. 1 FUEL TANK PROTECTOR |
|
Install the fuel tank protector with the 3 clips and 2 bolts.
| 17.
INSTALL NO. 1 FLOOR UNDER COVER |
|
- Install the floor under cover with the clip and 2 nuts.
| 18.
INSTALL FRONT FLOOR COVER |
|
Install the floor cover with the 3 clips, bolt and nut.
| 19.
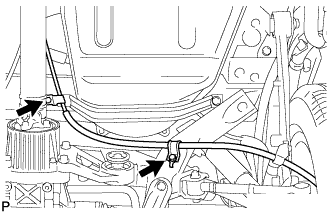
INSTALL NO. 2 PARKING BRAKE CABLE ASSEMBLY |
|
- Install the parking brake cable with the 2 bolts.
| 20.
INSTALL FUEL TANK CAP |
|
| 21.
CONNECT CABLE TO NEGATIVE BATTERY TERMINAL |
|
| 22.
INSPECT FOR FUEL LEAK |
|
- HINT:
- (Click here).