INSTALLATION
Removal / installation · Vehicles built from Aug 2008
Versions by build date: Nov 2005 – Jul 2008 from Aug 2008
| 1.
INSTALL REAR WASHER MOTOR AND PUMP ASSEMBLY |
 |
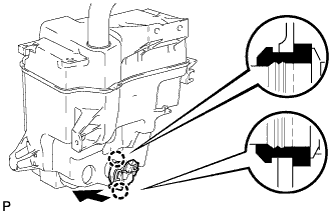
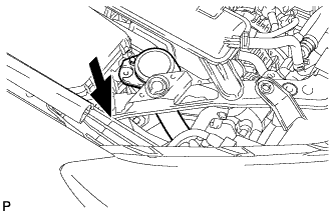
Install the washer motor and pump to the packing of the washer jar.
| 2.
INSTALL WINDSHIELD WASHER MOTOR AND PUMP ASSEMBLY |
|
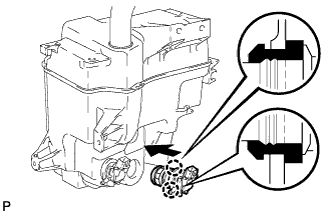
- Install the windshield washer motor and pump to the packing of the washer jar.
| 3.
INSTALL WINDSHIELD WASHER JAR ASSEMBLY |
|
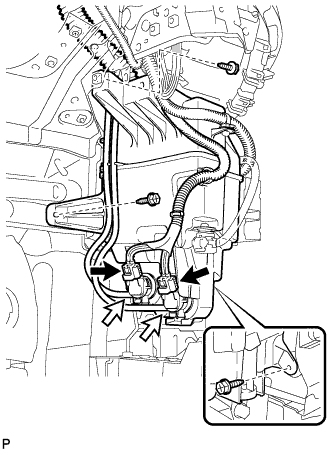
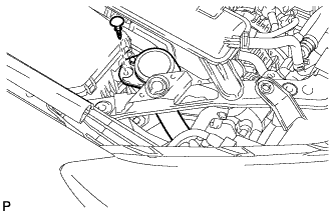
- Install the windshield washer jar with the 3 screws.
-
Torque:
- 5.0 N*m{
51 kgf*cm
, 44 in.*lbf
}
Connect the 2 connectors.
Connect the 2 washer hoses to the washer motor and pumps.
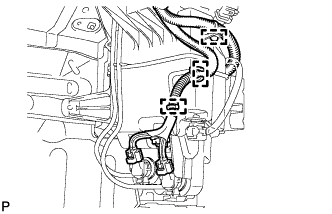
- Attach the 3 clamps.
| 4.
FILL UP WASHER JAR ASSEMBLY WITH WASHER FLUID |
|
Fill the washer jar with washer fluid.
| 5.
INSTALL WASHER INLET SUB-ASSEMBLY |
|
- Install the washer inlet to the windshield washer jar.
- Install the clip to the washer inlet of the washer jar.
| 6.
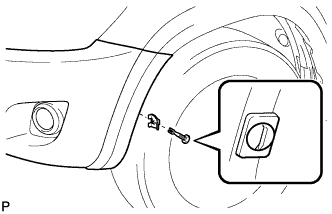
INSTALL FRONT BUMPER COVER
|
|
w/ Fog Light:
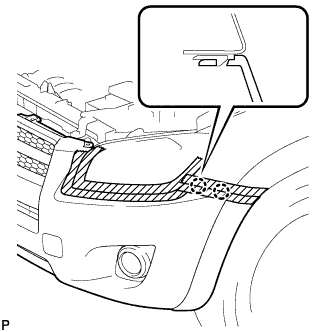
Connect the 2 fog light connectors.
Attach the 4 claws to install the bumper cover.
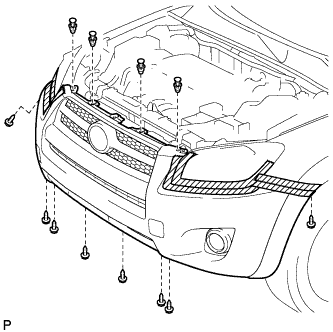
- Install the 8 screws and 4 clips.
- Install the retainer.
- HINT:
- Use the same procedure for the RH and LH sides.
Position the groove on the pin hold clip vertically and insert the clip to install it.
- NOTICE:
- Make sure that the groove on the pin hold clip is positioned vertically.
- HINT:
- Use the same procedure for the RH and LH sides.
| 7.
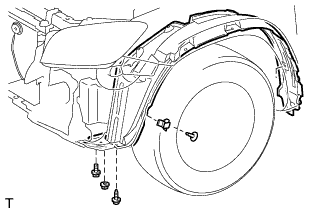
INSTALL FRONT FENDER LINER LH |
|
- Install the fender liner with the clip and fender liner retainer.
Install the screw, nut and bolt.
| 8.
INSTALL FRONT FENDER LINER RH |
|
- HINT:
- Use the same procedures described for the LH side.
| 9.
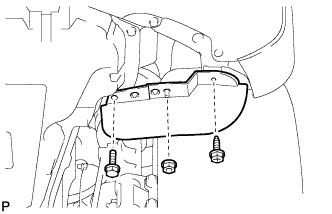
INSTALL FRONT FENDER FRONT SPLASH SHIELD LH
|
|
Install the splash shield with the nut, bolt and screw.
| 10.
INSTALL FRONT FENDER FRONT SPLASH SHIELD RH
|
|
- HINT:
- Use the procedure described for the LH side.
| 11.
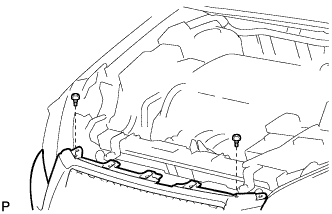
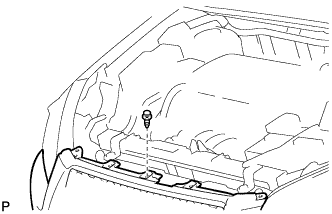
INSTALL RADIATOR GRILLE PROTECTOR
|
|
Install the 2 radiator grille protectors.
| 12.
INSTALL CENTER HOOD CUSHION
|
|
Install the hood cushion.
| 13.
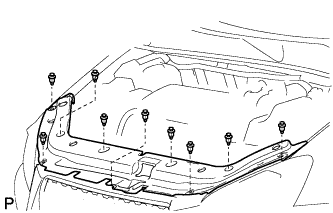
INSTALL RADIATOR SUPPORT OPENING COVER
|
|
Install the radiator support opening cover with the 9 clips.
| 14.
CONNECT CABLE TO NEGATIVE BATTERY TERMINAL |
|