Versions by build date: Nov 2005 – Dec 2006from Jan 2007
INSPECT STARTER ASSEMBLY
NOTICE:
The following tests must be performed for no longer than 5 seconds to prevent the coil from burning out.
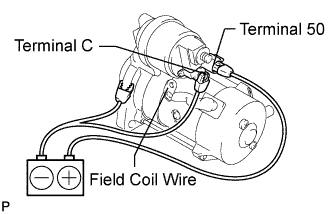
Perform the pull-in test.
Disconnect the field coil wire from terminal C.
Connect the battery to the magnetic switch as shown in the illustration. Check that the clutch pinion gear moves outward. If the clutch pinion gear does not move outward, replace the magnetic switch.
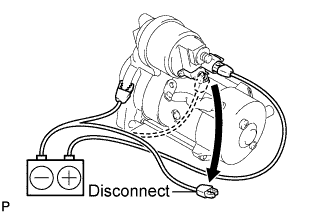
Perform the hold-in test.
Disconnect the negative (-) terminal lead from terminal C with the condition specified in the pull-in test above being maintained. Check that the pinion gear remains out. If the clutch pinion gear moves inward, replace the magnetic switch.
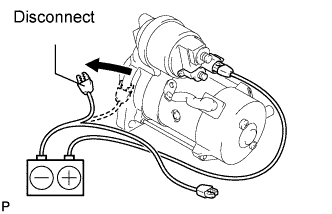
Inspect the clutch pinion gear return.
Disconnect the negative (-) lead from the starter body. Check that the clutch pinion gear moves inward. If the clutch pinion gear does not move inward, replace the magnetic switch assembly.
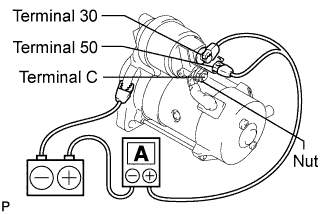
Perform the no-load performance test.
Connect the field coil wire to terminal C with the nut. Make sure that the lead is not grounded.
Torque:
5.9 N*m{
60 kgf*cm
, 52 in.*lbf
}
Clamp the starter in a vise.
Connect the battery and an ammeter to the starter as shown in the illustration.
Check that the starter rotates smoothly and steadily while the pinion gear is moving out. Then measure the current.
Standard current:
190 A or less at 11.5 V
If the current is not as specified, replace the starter assembly.
INSPECT STARTER ARMATURE ASSEMBLY
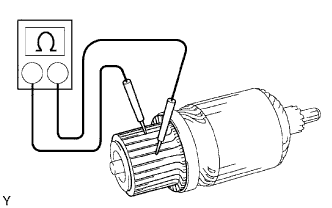
Inspect the resistance of the commutator. If there is no continuity between any segments, replace the armature.
Measure the resistance between the segments of the commutator.
Standard resistance:
Below 1 Ω
If the resistance is not as specified, replace the armature assembly.
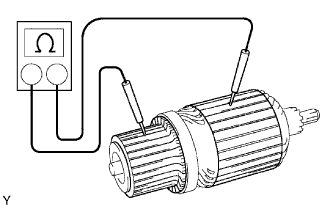
Measure the resistance between the commutator and armature coil core.
Standard resistance:
10 kΩ or higher
If the resistance is not as specified, replace the armature assembly.
Check the surface of the commutator for dirt or burns. If the surface is dirty or burnt, smooth it with 400-grit sandpaper or lathe it.
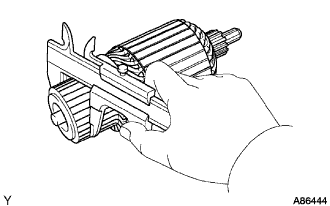
Using a vernier caliper, measure the commutator diameter.
Standard diameter:
35.0 mm (1.378 in.)
Minimum diameter:
34.0 mm (1.339 in.)
If the diameter is less than the minimum, replace the armature assembly.
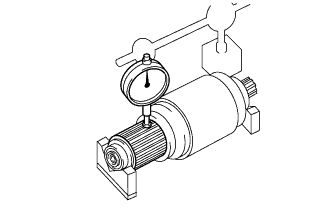
Using a dial indicator, measure the commutator's runout.
Maximum commutator's runout:
0.05 mm (0.0020 in.)
If the commutator's runout is greater than the maximum, correct it using a lathe.
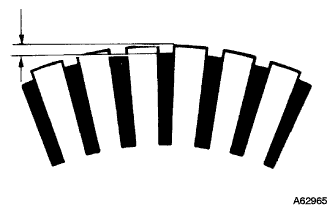
Check that the undercut depth is clean and free of foreign materials. Smooth out the edge.
Standard undercut depth:
0.6 mm (0.024 in.)
Minimum undercut depth:
0.2 mm (0.008 in.)
If the undercut depth is less than the minimum, increase the depth using a hacksaw blade.
INSPECT STARTER YOKE ASSEMBLY
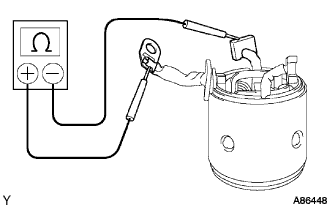
Inspect the resistance of the field coil.
Measure the resistance between the lead wire and field coil brush lead.
Standard resistance:
Below 1 Ω
If the resistance is not as specified, repair or replace the yoke assembly.
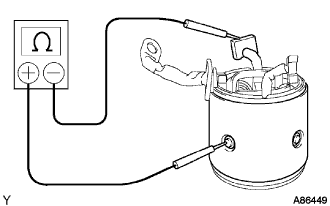
Measure the resistance between the field coil end and field frame.
Standard resistance:
10 kΩ or higher
If the resistance is not as specified, repair or replace the yoke assembly.
INSPECT BRUSH
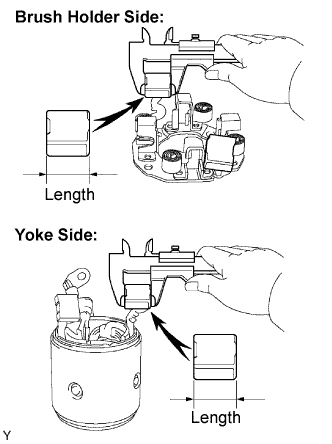
Using a vernier caliper, measure the brush length.
Standard length:
15.5 mm (0.610 in.)
Minimum length:
10.0 mm (0.394 in.)
If the brush length is less than the minimum, replace the brush holder and yoke assembly.
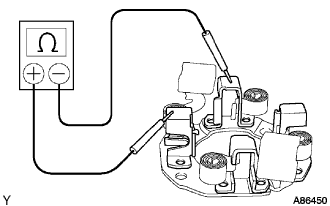
INSPECT STARTER BRUSH HOLDER ASSEMBLY
Inspect the insulation.
Measure the resistance between the positive (+) and negative (-) brush holders.
Standard resistance:
10 kΩ or higher
If the resistance is not as specified, replace the brush holder.
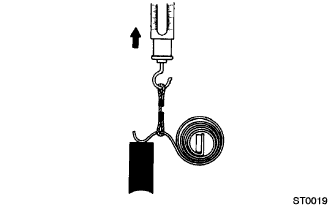
Inspect the load of the brush spring.
Take the pull scale reading immediately after the brush spring separates from the brush.
Standard spring installed load:
23.5 to 29.5 N (2.4 to 3.0 kgf, 5.3 to 6.6 lbf)
If the installed load is less than the minimum, replace the brush springs.
INSPECT STARTER CENTER BEARING CLUTCH SUB-ASSEMBLY
Check the gear teeth of the planetary gear and starter center bearing clutch for wear or damage. If any planetary gear is damaged, replace the planetary gear assembly. If any gear of the starter center bearing clutch is damaged, replace the clutch.
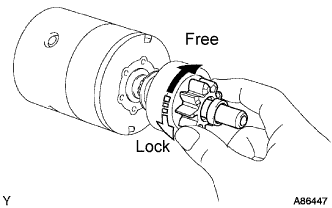
Check the movement of the clutch pinion gear.
Rotate the clutch pinion gear clockwise, and check that it turns freely.
Try to rotate the clutch pinion gear counterclockwise, and check that it locks. If the clutch pinion gear cannot be turned clockwise smoothly, or does not lock in the counterclockwise direction, replace the starter clutch.
INSPECT STARTER MAGNETIC SWITCH ASSEMBLY
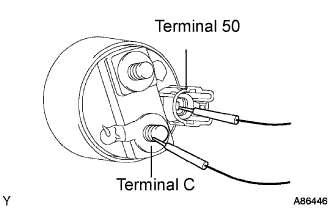
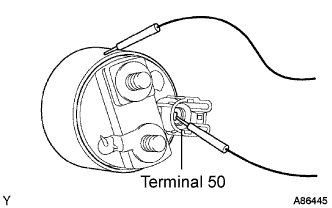
Inspect the resistance of the pull-in coil.
Measure the resistance between terminals 50 and C.
Standard resistance:
Below 1 Ω
If the resistance is not as specified, replace the starter magnetic switch assembly.
Inspect the resistance of the hold-in coil.
Measure the resistance between terminal 50 and the switch body.
Standard resistance:
Below 1.5 Ω
If the resistance is not as specified, replace the starter magnetic switch assembly.