INSTALLATION
Removal / installation · Vehicles built from Nov 2005
| 1. INSTALL FUEL INJECTOR ASSEMBLY |

Apply a light coat of gasoline or spindle oil to new O-rings, then install one onto each fuel injector.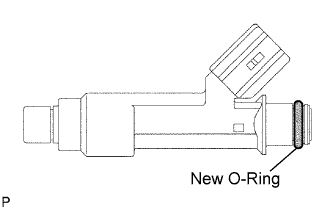

Apply a light coat of gasoline or spindle oil to the part of the fuel delivery pipe which comes into contact with the O-ring of the fuel injector.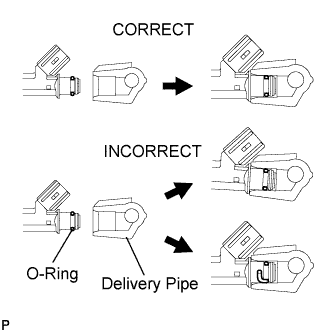
Apply a light coat of gasoline or spindle oil to the O-ring again, then install the right and left fuel injectors onto the fuel delivery pipe.
- NOTICE:
- Make sure that the O-ring is not cracked or jammed when installing.
Check that the fuel injector rotates smoothly.
If the fuel injector does not rotate, replace the O-ring.
| 2. INSTALL FUEL DELIVERY PIPE SUB-ASSEMBLY |
Install 4 new insulators into the cylinder head.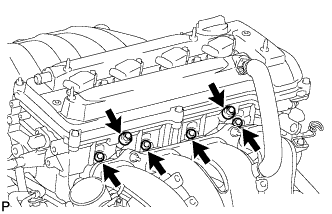
Install the 2 delivery pipe spacers onto the cylinder head.
Install the fuel delivery pipe together with the 4 fuel injectors, then temporarily tighten the 2 bolts.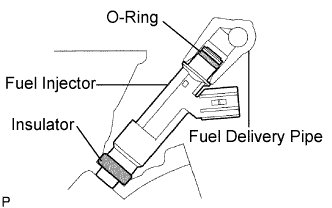
- NOTICE:
- Be careful not to drop the fuel injectors when installing the fuel delivery pipe.
Check that the fuel injector rotates smoothly.
If the fuel injector does not rotate, replace the O-ring.
Tighten the 2 bolts to the specified torque.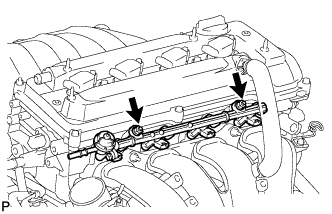
- Torque:
- 20 N*m{ 205 kgf*cm , 15 ft.*lbf }
Connect the 4 fuel injector connectors.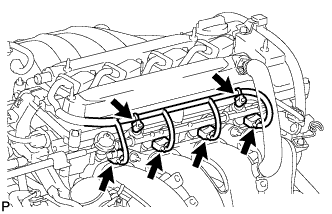
Install the 2 wire harness clamps.
| 3. CONNECT NO. 2 VENTILATION HOSE |
Connect the ventilation hose to the ventilation valve.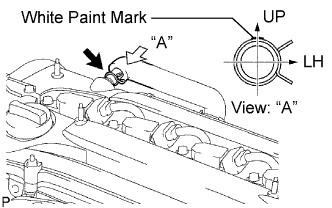
- NOTICE:
- Make sure that the paint mark and hose clamp are at the correct angle when installing the hose.
| 4. CONNECT FUEL MAIN TUBE |
Connect the fuel main tube.
Push the fuel tube connector until it makes a "click" sound.
Install the fuel pipe clamp.
Install the fuel tube to the fuel hose clamp.
| 5. INSTALL AIR CLEANER CAP SUB-ASSEMBLY |
Install the air cleaner filter element onto the air cleaner case.
Insert the hinge part of the air cleaner cap into the air cleaner case, then hang the 2 hook clamps.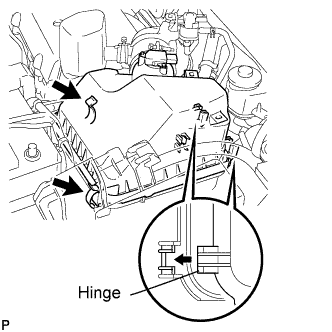
Align the matchmarks of the No. 1 air cleaner hose and throttle body, and then connect the air cleaner hose No. 1 to the throttle body and unfasten the No. 1 air cleaner hose clamp.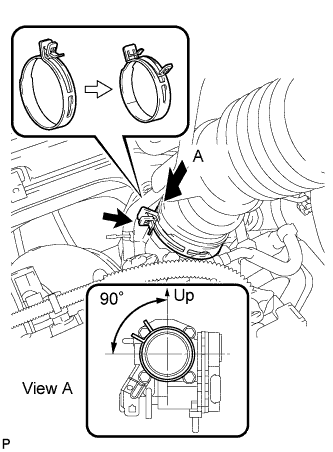
- NOTICE:
- Make sure that the hose clamp is at the correct angle.
Connect the purge line hose to the clamp.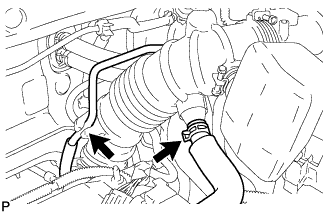
Connect the No. 2 ventilation hose to the air cleaner hose.
Install the 4 wire harness clamps.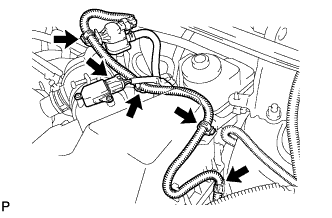
Connect the mass air flow meter connector.
| 6. INSTALL NO. 1 ENGINE COVER SUB-ASSEMBLY |
Install the cover with the 2 nuts.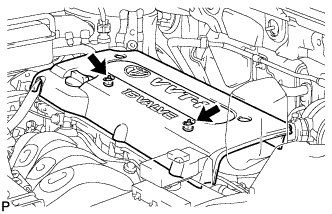
- Torque:
- 7.0 N*m{ 71 kgf*cm , 62 in.*lbf }
| 7. CONNECT CABLE TO BATTERY NEGATIVE TERMINAL |
| 8. CHECK FOR FUEL LEAKAGE |
Make sure that there are no fuel leaks after performing maintenance on the fuel system.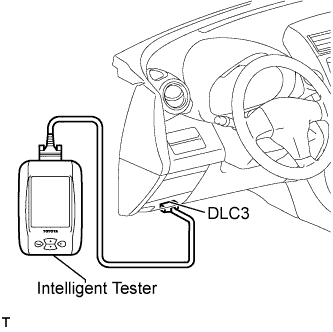
Connect the intelligent tester to the DLC3.
Turn the ignition switch on (IG), and push the intelligent tester main switch ON.
- NOTICE:
- Do not start the engine.
Select the Active Test mode on the intelligent tester.
- HINT:
- Refer to the intelligent tester operator's manual for further details.
Check that there are no leaks from the fuel system.
Turn the ignition switch off.
Disconnect the intelligent tester from the DLC3.