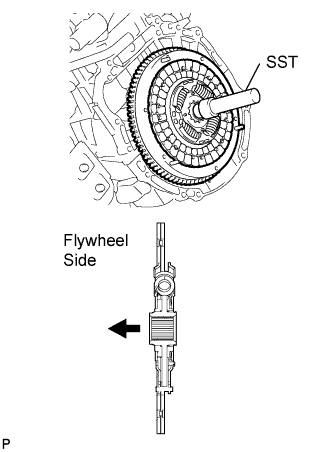
Insert SST in the disc, then insert them in the flywheel.
SST
09301-00210
NOTICE:
Take care not to insert the clutch disc in the wrong direction.
2.
INSTALL CLUTCH COVER ASSEMBLY
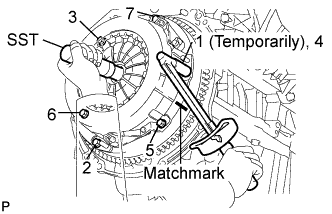
Align the matchmarks on the cover and flywheel.
Following the procedures shown in the illustration, tighten the 6 bolts in order, starting with the bolt located near the knock pin on the top.
Torque:
19 N*m{
195 kgf*cm
, 14 ft.*lbf
}
HINT:
Following the order in the illustration, tighten the bolts one at a time, evenly.
Move SST up and down, and right and left lightly after checking that the disc is in the center to tighten the bolts.
SST
09301-00210
3.
INSPECT AND ADJUST CLUTCH COVER ASSEMBLY
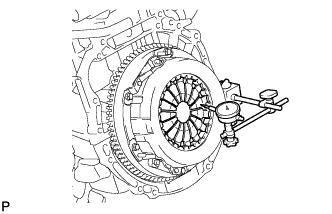
Using a dial indicator with a roller instrument, measure the diaphragm spring tip alignment.
Maximum misalignment:
0.5 mm (0.020 in.)
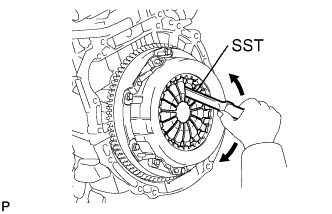
If the alignment is greater than the maximum, use SST to adjust the diaphragm spring tip alignment.
SST
09333-00013
4.
INSTALL RELEASE FORK SUPPORT
Install the release fork support on the transaxle.
Torque:
47 N*m{
479 kgf*cm
, 34 ft.*lbf
}
5.
INSTALL CLUTCH RELEASE FORK BOOT
6.
INSTALL RELEASE BEARING HUB CLIP
7.
INSTALL CLUTCH RELEASE FORK SUB-ASSEMBLY
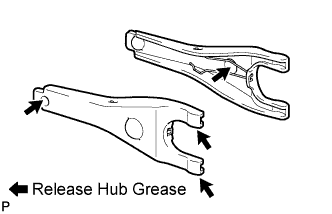
Apply release hub grease to the contact surfaces of the release fork and release bearing, fork and push rod, and fork and fork support.
Release hub grease:
Part No. 08887-01806, RELEASE HUB GREASE or equivalent
Install the fork to the release bearing.
8.
INSTALL CLUTCH RELEASE BEARING ASSEMBLY
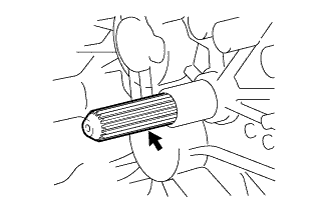
Apply clutch spline grease to the input shaft spline.
Clutch spline grease:
Part No. 08887-01706, CLUTCH SPLINE GREASE or equivalent
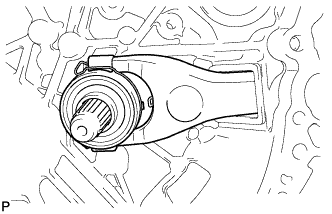
Install the bearing with release fork to the transaxle.
NOTICE:
After the installation, move the fork forward and backward to check that the release bearing slides smoothly.
9.
INSTALL MANUAL TRANSAXLE ASSEMBLY
Install the manual transaxle. For E352F, E359F, refer to the following procedures (Click here). For E352, refer to the following procedures (Click here).