INSTALLATION
Removal / installation · Vehicles built from Nov 2005
- HINT:
- Use the same procedures for the RH side and LH side.
- The procedures listed below are for the LH side.
- Use the same procedures for the RH side and LH side.
| 1. INSTALL FRONT DOOR BELT MOULDING ASSEMBLY LH |

Attach the claws to install the belt moulding.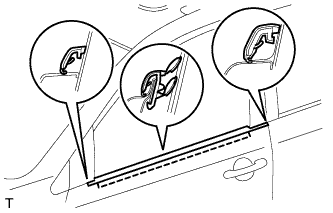

- HINT:
- Confirm that the moulding is firmly installed.
| 2. INSTALL OUTER REAR VIEW MIRROR ASSEMBLY LH |
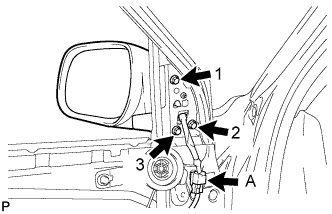 |
Pass the connector labeled A and wire harness of the mirror through the wire harness hole.
Temporarily install the mirror by inserting the bosses on the mirror into the holes on the vehicle.
Tighten the 3 screws in the sequence shown in the illustration and install the mirror.
- Torque:
- 9.0 N*m{ 92 kgf*cm , 80 in.*lbf }
Connect the connector labeled A.
| 3. INSTALL FRONT DOOR TRIM BOARD SUB-ASSEMBLY LH |
Attach the 4 claws to install the speaker door grille.
Attach the 7 claws to install the weatherstrip inner.
Attach the 2 claws to install the inside handle.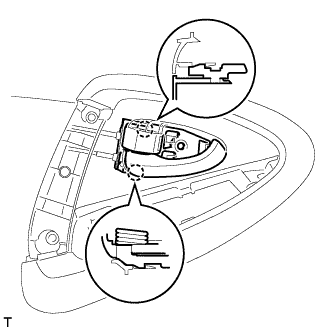
Attach the 10 clips to install the trim board.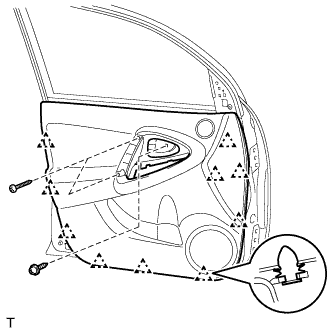
Install the 3 screws.
Attach the 3 claws to install the door inside handle bezel plug.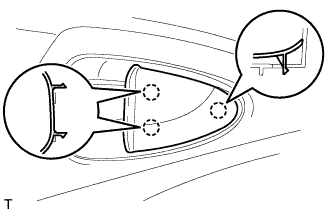
Attach the 12 claws to install the door assist grip.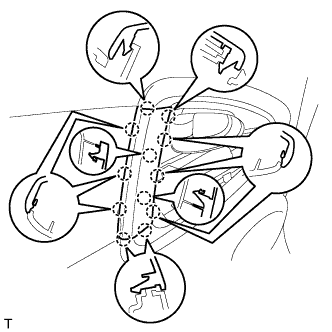
| 4. INSTALL FRONT ARMREST BASE PANEL UPPER LH |
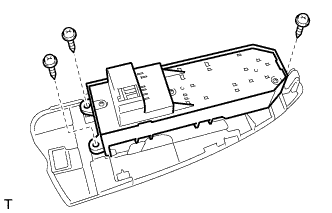 |
for Driver Side:
Install the power window regulator master switch to the panel with the 3 screws.
for Passenger Side: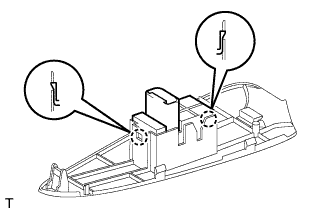
Attach the 2 claws and install the power window regulator switch to the panel.
Connect the switch connectors.
Attach the clip and 5 claws to install the panel (with the switch).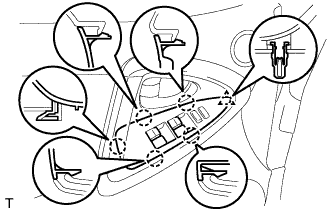
| 5. INSTALL FRONT DOOR LOWER FRAME BRACKET GARNISH LH |
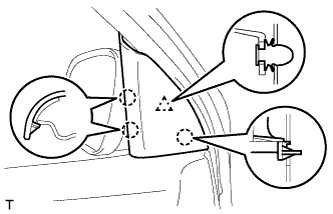 |
Attach the clip and 3 claws to install the garnish.
| 6. CONNECT CABLE TO NEGATIVE BATTERY TERMINAL |