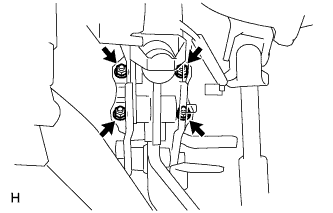
Refer to the procedures from the removal of the air cleaner cap sub-assembly up until the removal of the air cleaner bracket.
5.
DRAIN BRAKE FLUID
NOTICE:
Wash off brake fluid immediately if it comes in contact with any painted surface.
6.
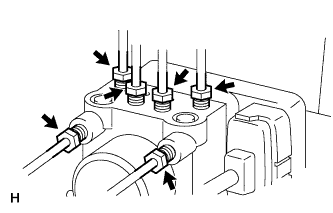
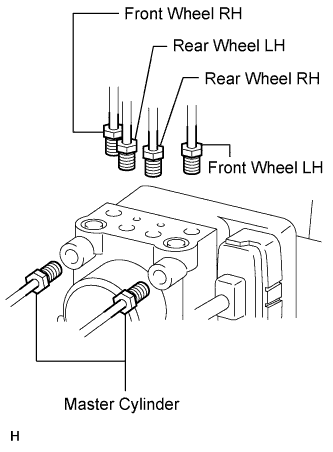
DISCONNECT BRAKE LINES (w/o VSC)
Using SST, disconnect the 6 brake lines from the actuator.
SST
09023-00101
Place tags or marks to identify the installation locations of each brake line.
7.
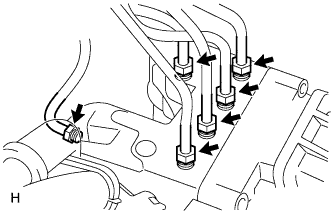
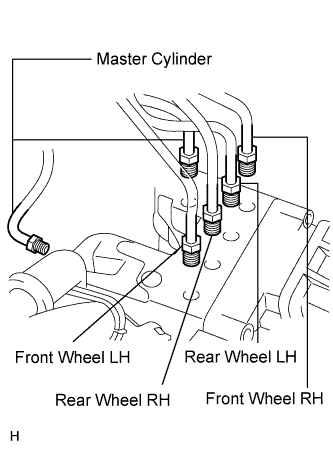
DISCONNECT BRAKE LINES (w/ VSC)
Using SST, disconnect the 6 brake lines from the actuator.
SST
09023-00101
Place tags or marks to identify the installation locations of each brake line.
8.
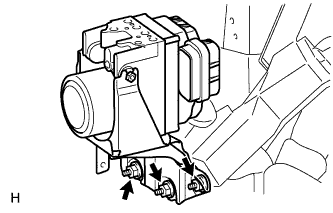
REMOVE BRAKE ACTUATOR ASSEMBLY WITH BRACKET (w/o VSC)
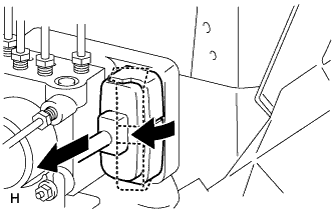
Release the latch of the actuator connector and disconnect the connector.
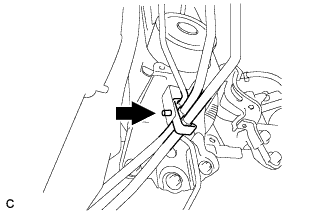
Disconnect the brake tube clamp from the bracket.
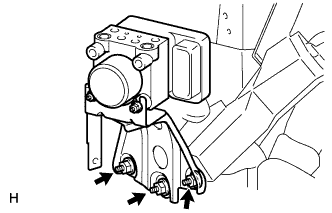
Remove the 3 nuts and actuator with bracket.
NOTICE:
Be careful not to damage the brake tubes.
9.
REMOVE ABS AND TRACTION ACTUATOR ASSEMBLY WITH BRACKET (w/ VSC)
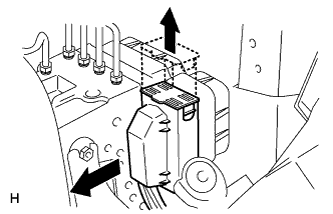
Pull the lock lever upward and disconnect the connector.
Disconnect the brake tube clamp from the bracket.
Remove the 3 nuts and actuator with bracket.
NOTICE:
Be careful not to damage the brake tubes.
10.
REMOVE BRAKE MASTER CYLINDER SUB-ASSEMBLY
Release the vacuum pressure in the brake booster as follows.
Stop the engine.
Depress the brake pedal several times.
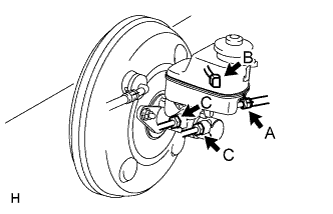
for Manual Transaxle: Disconnect the clutch reservoir tube labeled A from the master cylinder.
Disconnect the brake fluid level warning switch connector labeled B.
Using SST, disconnect the 2 brake lines labeled C from the master cylinder.
SST
09023-00101
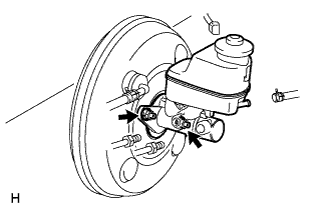
Remove the 2 nuts.
Pull out the master cylinder from the brake booster.
NOTICE:
The master cylinder and piston are designed so that the piston can easily fall out. Prevent this by making sure to tip of the master cylinder points downward when handling the master cylinder.
Make sure foreign matter does not attach to the master cylinder's piston. If foreign matter attaches, clean it off with a cloth. Then apply lithium soap base glycol grease to the entire outer circumference contact surface area of the piston.