REASSEMBLY
Removal / installation · Vehicles built from Aug 2007
Versions by build date: Nov 2005 – Dec 2006 Jan 2007 – Jul 2007 from Aug 2007
- HINT:
- Use the same procedures for the LH side and RH side.
- The procedures listed below are for the LH side.
| 1.
APPLY HIGH TEMPERATURE GREASE |
 |
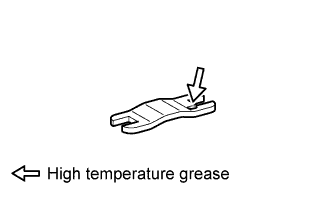
Apply high temperature grease to the contact surface of the shoe and backing plate.
| 2.
INSTALL PARKING BRAKE SHOE LEVER LH |
|
| 3.
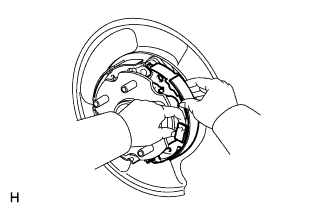
INSTALL NO. 2 PARKING BRAKE SHOE ASSEMBLY LH |
|
Connect the parking brake cable to the parking brake shoe lever.
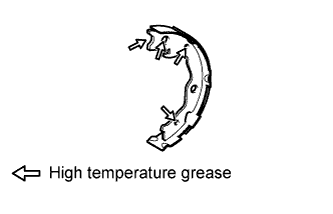
- Apply high temperature grease to the following contact surfaces of the shoe.
- Shoe to anchor pin
- Shoe to parking brake lever pin
- Shoe to spring
- Install the shoe with the shoe hold-down spring and pin.
| 4.
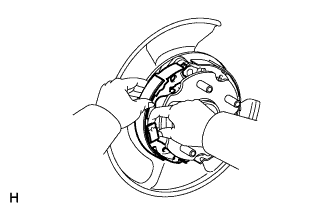
INSTALL NO. 1 PARKING BRAKE SHOE ASSEMBLY LH |
|
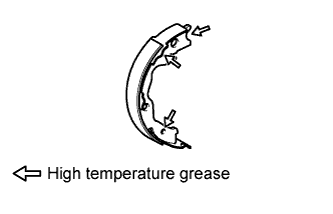
- Apply high temperature grease to the following contact surfaces of the shoe.
- Shoe to anchor pin
- Shoe to spring
- Install the shoe with the shoe hold-down spring and pin.
| 5.
INSTALL PARKING BRAKE SHOE ADJUSTING SCREW SET |
|
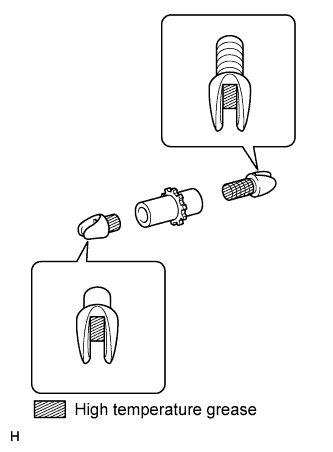
- Apply high temperature grease to the areas of the shoe adjusting screw set shown in the illustration.
Install the screw set.
| 6.
INSTALL PARKING BRAKE SHOE RETURN TENSION SPRING (for Lower Side) |
|
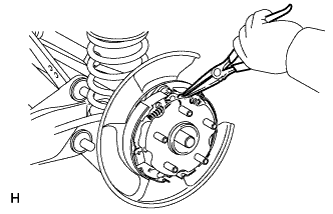
Using needle-nose pliers, install the tension spring.
| 7.
INSTALL PARKING BRAKE SHOE STRUT LH |
|
- Apply high temperature grease to the contact surface of the strut and shoe return tension spring.
Install the strut.
| 8.
INSTALL PARKING BRAKE SHOE RETURN TENSION SPRING (for Upper Side) |
|
- Using needle-nose pliers, install the 2 shoe return tension springs.
| 9.
CHECK PARKING BRAKE INSTALLATION |
|
Check that each part is installed properly.
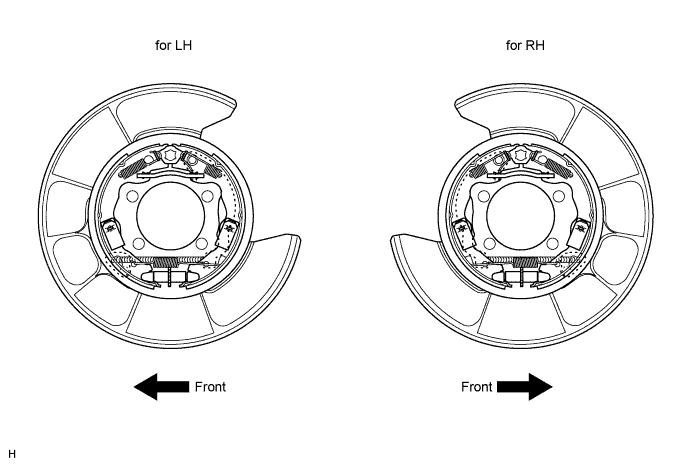

- NOTICE:
- There should be no oil or grease adhering to the friction surfaces of the shoe lining and disc.
| 10.
INSTALL REAR DISC |
|
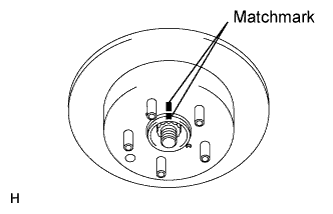
- Align the matchmarks and install the disc.
- HINT:
- When replacing the disc with a new one, select the installation position where the disc has the smallest runout.
| 11.
ADJUST PARKING BRAKE SHOE CLEARANCE |
|
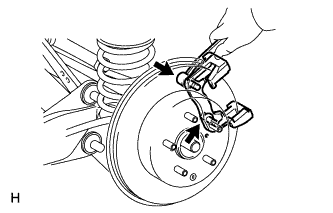
Temporarily install the hub nuts.
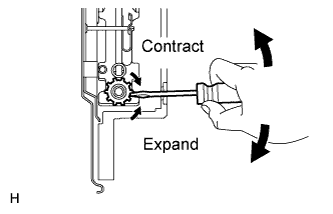
- Remove the shoe adjusting hole plug, and then turn the adjuster to expand the shoe adjuster until the disc locks.
Turn the shoe adjuster so that it contracts to a point where the disc can rotate smoothly.
- Standard:
- 8 notches
Check that the shoe has no brake drag.
| 12.
INSTALL PARKING BRAKE SHOE ADJUSTING HOLE PLUG |
|
Install the shoe adjusting hole plug to the rear disc.
| 13.
CONNECT REAR DISC BRAKE CYLINDER MOUNTING LH
|
|
- Install the cylinder mounting with the 2 bolts.
-
Torque:
- 88 N*m{
897 kgf*cm
, 65 ft.*lbf
}
| 14.
INSTALL REAR WHEEL |
|
-
Torque:
- 103 N*m{
1050 kgf*cm
, 76 ft.*lbf
}
| 15.
SETTLE PARKING BRAKE SHOE AND DISC |
|
Pull the parking brake lever with a force of 147 N (15 kgf, 33 lbf).
Drive the vehicle at approximately 50 km/h (31 mph) for approximately 400 m (0.25 miles).
- NOTICE:
- Drive the vehicle on a safe, level and dry road.
Repeat the above steps 2 or 3 times.
| 16.
CHECK PARKING BRAKE LEVER TRAVEL
|
|
Pull the lever upward with a force of approximately 200 N (20 kgf, 44 lbf) and count the number of clicks.
- OK:
- 6 to 8 clicks (without rear brake dragging)
| 17.
ADJUST PARKING BRAKE LEVER TRAVEL
|
|
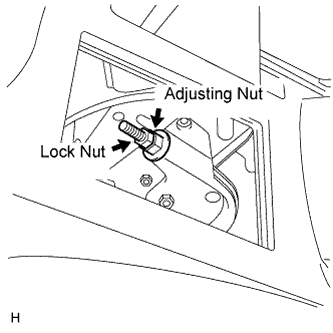
- Turn the No. 1 wire adjusting nut until the lever travel is correct.
- OK:
- 6 to 8 clicks (without rear brake dragging)
<Lever pulling force: approximately 200 N (20 kgf, 44 lbf)>
Tighten the lock nut.
-
Torque:
- 6.0 N*m{
61 kgf*cm
, 53 in.*lbf
}
Operate the parking brake lever 3 to 4 times, and check the parking brake lever travel.
- OK:
- 6 to 8 clicks (without rear brake dragging)
<Lever pulling force: approximately 200 N (20 kgf, 44 lbf)>
When operating the parking brake lever, check that the brake warning light illuminates at the first click.
- Standard condition:
- Brake warning light always illuminates at the first click.