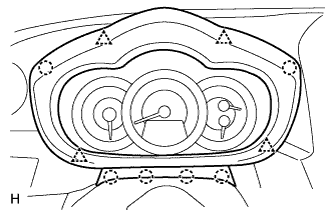
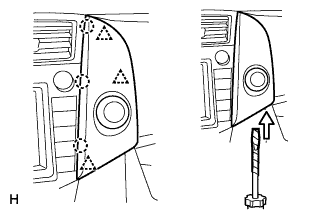
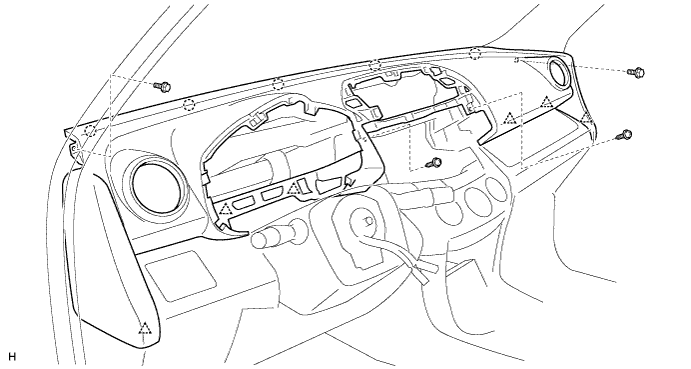
Using a screwdriver, detach the 4 clips, 6 claws and remove the instrument cluster finish panel.
HINT:
Tape the screwdriver tip before use.
4.
REMOVE COMBINATION METER ASSEMBLY
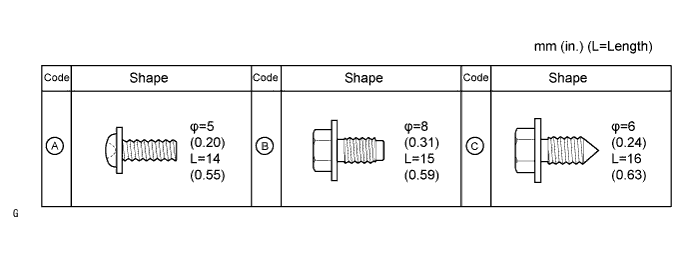
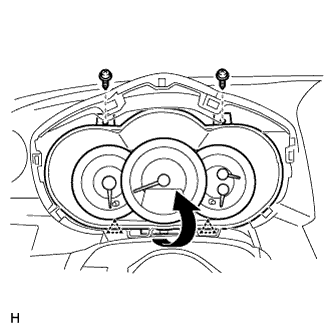
Remove the 2 screws.
Pull the combination meter as indicated by the arrow in the illustration to detach the 2 clips.
Disconnect the connector and remove the combination meter.
5.
REMOVE NO. 2 INSTRUMENT CLUSTER FINISH PANEL CENTER
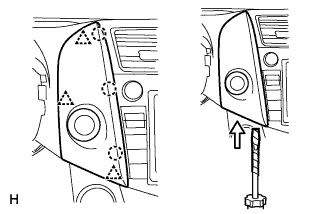
Using a screwdriver, detach the 3 clips, 3 claws and remove the cluster finish panel, then disconnect the connector.
HINT:
Tape the screwdriver tip before use.
6.
REMOVE NO. 1 INSTRUMENT CLUSTER FINISH PANEL CENTER
Using a screwdriver, detach the 3 clips, 3 claws and remove the cluster finish panel, then disconnect the connector.
HINT:
Tape the screwdriver tip before use.
7.
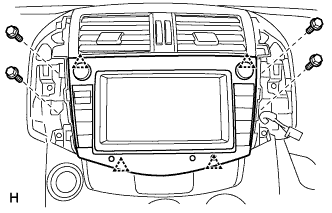
REMOVE RADIO RECEIVER (w/ Radio Receiver)
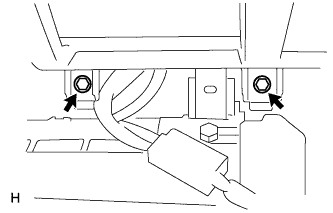
Remove the 4 bolts.
Detach the 4 clips, remove the radio receiver and then disconnect the connectors.
8.
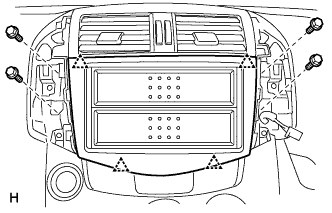
REMOVE STEREO OPENING COVER (w/o Radio Receiver)
Remove the 4 bolts.
Detach the 4 clips and remove the stereo opening cover.
9.
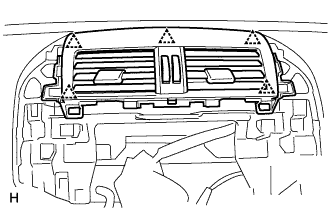
REMOVE INSTRUMENT PANEL REGISTER ASSEMBLY CENTER
Using a screwdriver, detach the 5 clips and remove the instrument panel register.
HINT:
Tape the screwdriver tip before use.
10.
REMOVE GLOVE COMPARTMENT DOOR ASSEMBLY
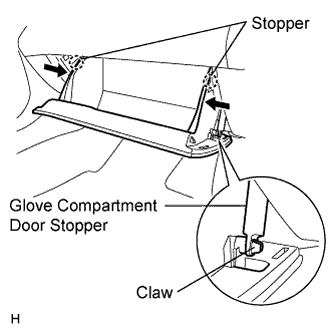
Open the glove compartment door.
Detach the claw from the glove compartment door stopper.
While pushing in the sides of the glove compartment door as indicated by the arrows in the illustration, open the door to release it from the 2 stoppers.
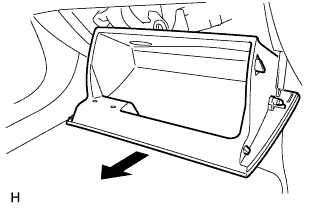
Open the door until it is horizontal.
Pull the glove compartment door toward the rear of the vehicle to detach the 2 hinges and remove the glove compartment door.