Removal / installation · Vehicles built Nov 2005 – Dec 2006
Versions by build date: Nov 2005 – Dec 2006from Jan 2007
1.
INSTALL ECM
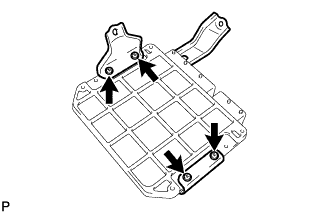
Install the 2 ECM brackets with the 4 screws.
Torque:
3.0 N*m{
30 kgf*cm
, 27 in.*lbf
}
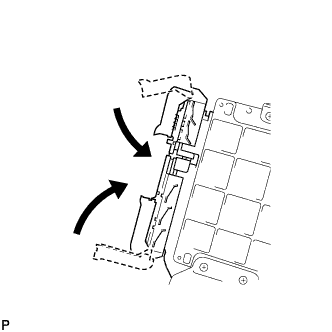
Connect the 2 ECM connectors.
Connect the 2 connectors to the ECM and lower the 2 levers.
NOTICE:
Make sure that the 2 levers are securely lowered.
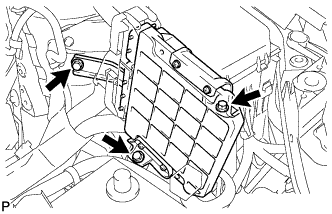
Install the ECM with the 3 bolts.
Torque:
6.5 N*m{
66 kgf*cm
, 57 in.*lbf
}
2.
INSTALL AIR CLEANER CASE
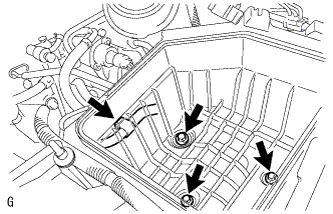
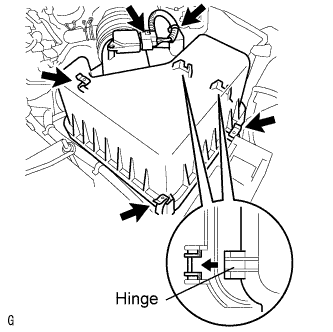
Install the cleaner case with the 3 bolts and connect the wire harness clamp.
Torque:
5.0 N*m{
51 kgf*cm
, 44 in.*lbf
}
Install the air filter element.
3.
INSTALL AIR CLEANER CAP
Insert the hinge parts of the air cleaner cap into the air cleaner case, and then hang the 3 hook clamps.
Connect the mass air flow meter connector.
Engage the wire harness clamp.
4.
INSTALL NO. 1 ENGINE COVER
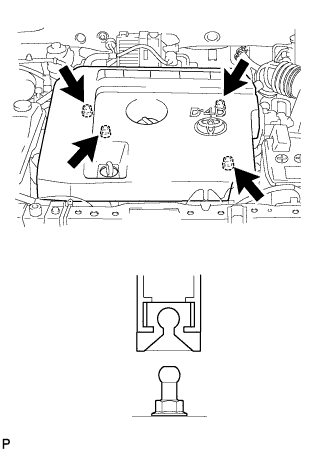
Attach the 4 clips to install the engine cover.
5.
CONNECT CABLE TO NEGATIVE BATTERY TERMINAL
6.
PERFORM REGISTRATION
When the ECM is replacing, all of the existing injector compensation codes and transfer catalyst record of DPNR must be input into the new ECM (Click here).
w/ cruise control When replacing the ECM, perform vehicle stability control system recognition in ECM (Click here).
7.
INITIALIZE THE LEARNING VALUE OF THE SUPPLY PUMP ASSEMBLY