Footwell Light Circuit
Circuit diagnosis · Vehicles built from Nov 2005
DESCRIPTION
The main body ECU receives information regarding the door lock position switch and ignition switch, and turns on each foot light.WIRING DIAGRAM
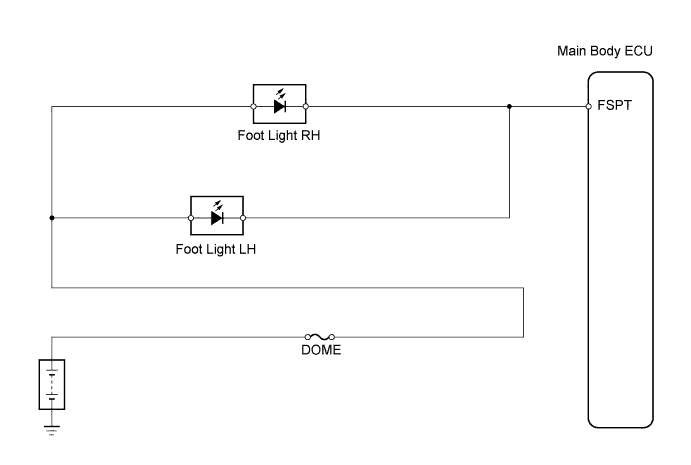

INSPECTION PROCEDURE
| 1. PERFORM ACTIVE TEST USING INTELLIGENT TESTER (MAIN BODY ECU) |

Connect the intelligent tester to the DLC3.
Turn the ignition switch on (IG) and press the intelligent tester main switch ON.
Select the item below in the ACTIVE TEST and then check the relay operates.
Main body ECU Item
Test Details
Diagnostic Note
Step Light
Foot light ON/OFF
-
- OK:
- Headlights (LOW) come on.
|
|
||||

| NG | |
 |
| 2. INSPECT FUSE (DOME) |
Remove the DOME fuse from the engine room No. 2 relay block.
Measure the resistance of the fuse.
- Standard resistance:
- Below 1 Ω
|
|
||||
| OK | |
|
| 3. INSPECT FOOT LIGHT |
Remove the foot light.
Connect the positive (+) lead from the battery to terminal 2 and the negative (-) lead to terminal 1, then check that the light comes on.
- OK:
- Light comes on.
|
|
||||
| OK | |
|
| 4. CHECK WIRE HARNESS (BATTERY - MAIN BODY ECU) |
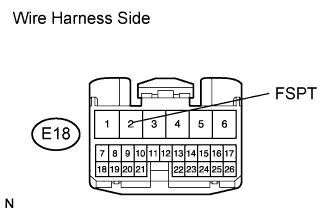 |
Connect the foot light.
Disconnect the E18 main body ECU connector.
Measure the voltage of the wire harness side connector.
- Standard voltage:
Tester Connection
Specified Condition
E18-2 (FSPT) - Body ground
10 to 14 V
|
|
||||
| OK | ||
 |
||
| ||