Use the same procedure for the RH side (transaxle case oil seal) and LH side (transaxle case oil seal).
The procedure listed below are for the LH side (transaxle case oil seal).
1.
DRAIN TRANSAXLE OIL
Remove the filler plug and gasket.
Remove the drain plug and gasket, and then drain the manual transaxle oil.
Install a new gasket and the drain plug.
Torque:
49 N*m{
500 kgf*cm
, 36 ft.*lbf
}
2.
REMOVE FRONT WHEEL
3.
REMOVE NO. 1 ENGINE UNDER COVER
4.
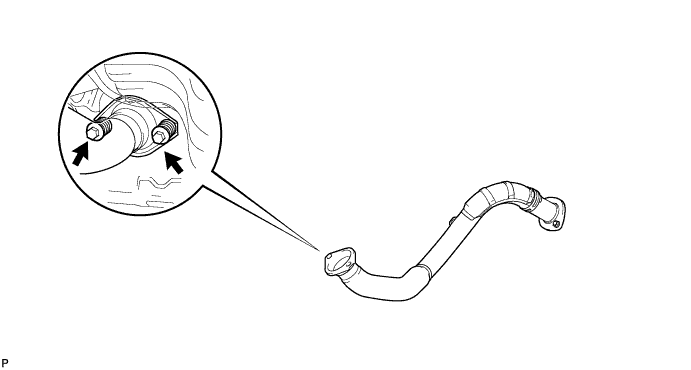
REMOVE FRONT EXHAUST PIPE
Remove the 2 bolts, 2 compression springs and front exhaust pipe.
Remove the gasket from the exhaust manifold.
5.
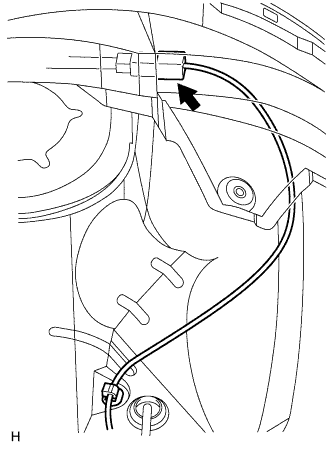
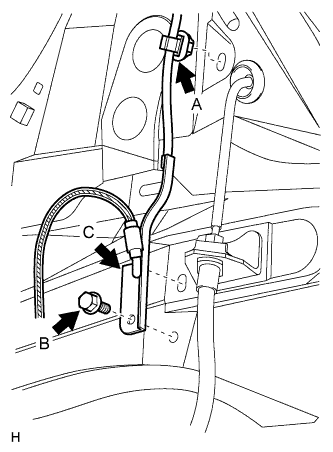
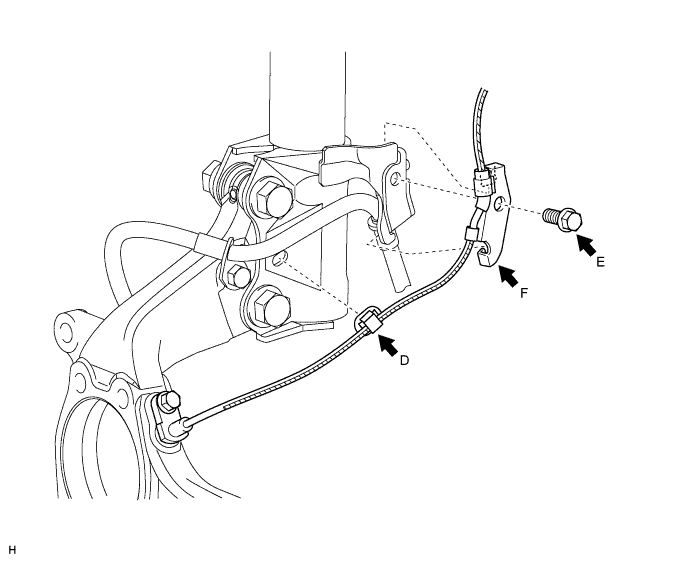
REMOVE FRONT SPEED SENSOR LH
Disconnect the sensor connector.
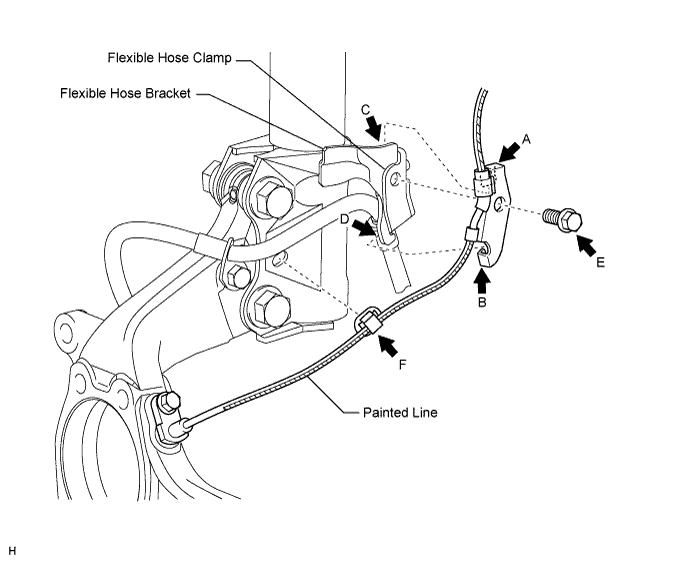
Remove the sensor clip (labeled A), bolt (labeled B) and sensor clamp (labeled C).
Remove the sensor clip (labeled D), bolt (labeled E) and sensor clamp (labeled F).
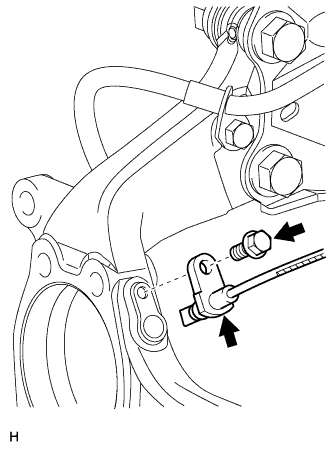
Remove the bolt and sensor body from the knuckle.
NOTICE:
Keep the sensor tip and sensor installation hole free from foreign matter.
6.
REMOVE FRONT SPEED SENSOR RH
HINT:
Use the same procedures described for the LH side.
7.
DISCONNECT FRONT STABILIZER LINK ASSEMBLY LH
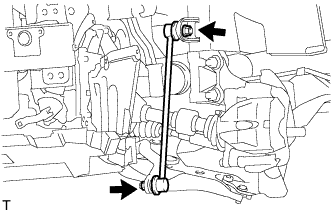
Remove the 2 nuts and stabilizer link.
8.
DISCONNECT FRONT STABILIZER LINK ASSEMBLY RH
HINT:
Use the same procedures described for the LH side.
9.
DISCONNECT FRONT SUSPENSION NO. 1 LOWER ARM SUB-ASSEMBLY LH
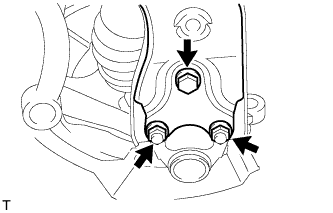
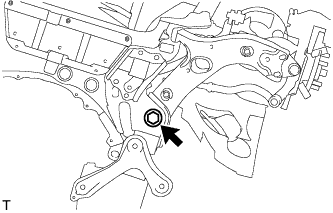
Remove the 2 nuts and bolt, and disconnect the lower arm from the ball joint.
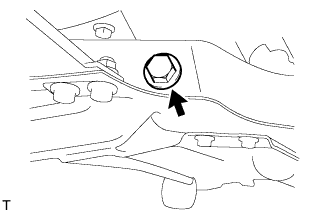
Remove the bolt and nut from the suspension member (front side).
Remove the bolt and nut from the suspension member (rear side).
10.
DISCONNECT FRONT SUSPENSION NO. 1 LOWER ARM SUB-ASSEMBLY RH
HINT:
Use the same procedures described for the LH side.
11.
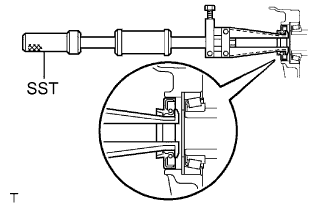
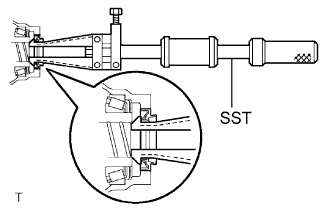
REMOVE FRONT DRIVE SHAFT ASSEMBLY LH
Using SST, remove the front drive shaft.
SST
09520-01010 09520-24010
(09520-32040)
NOTICE:
Be careful not to damage the transaxle case oil seal, inboard joint boot and drive shaft dust cover.
Be careful not to drop the drive shaft.
12.
REMOVE FRONT DRIVE SHAFT ASSEMBLY RH
HINT:
Use the same procedures described for the LH side.
13.
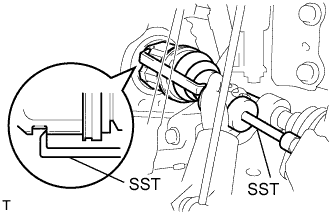
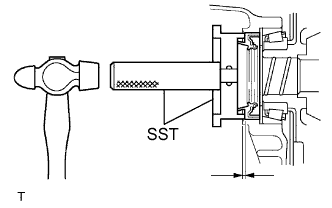
REMOVE TRANSAXLE CASE OIL SEAL LH
Using SST, tap out the transaxle case oil seal.
SST
09308-00010
14.
REMOVE TRANSAXLE CASE OIL SEAL RH
SST
09308-00010
Using SST, tap out the transaxle case oil seal.
15.
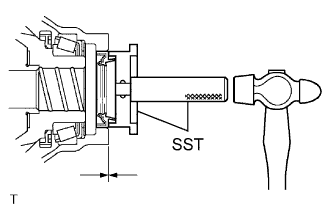
INSTALL TRANSAXLE CASE OIL SEAL LH
Coat the lip of a new oil seal with MP grease.
Using SST and a hammer, tap in the oil seal.
SST
09608-10010 09950-70010
(09951-07200)
Standard depth:
3.0 to 4.0 mm (0.118 to 0.158 in.)
NOTICE:
Be careful not to damage the lip of the oil seal.
16.
INSTALL TRANSAXLE CASE OIL SEAL RH
Coat the lip of a new transaxle case oil seal with MP grease.
Using SST and a hammer, tap in the oil seal.
SST
09608-10010 09950-70010
(09951-07200)
Standard depth:
5.5 to 6.5 mm (0.22 to 0.26 in.)
NOTICE:
Be careful not to damage the lip of the oil seal.
17.
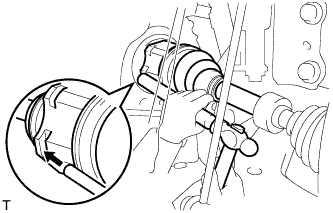
INSTALL FRONT DRIVE SHAFT ASSEMBLY LH
Coat the spline of the inboard joint shaft with gear oil.
Using a brass bar and hammer, align the shaft splines in the drive shaft.
NOTICE:
Set the snap ring with the opening side facing downwards.
Be careful not to damage the oil seal, boot and dust cover.
18.
INSTALL FRONT DRIVE SHAFT ASSEMBLY RH
HINT:
Use the same procedures described for the LH side.
19.
CONNECT FRONT SUSPENSION NO. 1 LOWER ARM SUB-ASSEMBLY LH
Temporarily install the lower arm with the bolt and nut to the suspension member (front side).
Temporarily install the lower arm with the bolt and nut to the suspension member (rear side).
20.
CONNECT FRONT SUSPENSION NO. 1 LOWER ARM SUB-ASSEMBLY RH
HINT:
Use the same procedures described for the LH side.
21.
CONNECT FRONT STABILIZER LINK ASSEMBLY LH
Install the link with the 2 nuts.
Torque:
74 N*m{
755 kgf*cm
, 55 ft.*lbf
}
22.
INSTALL FRONT STABILIZER LINK ASSEMBLY RH
HINT:
Use the same procedures described for the LH side.
23.
INSTALL FRONT SPEED SENSOR LH
NOTICE:
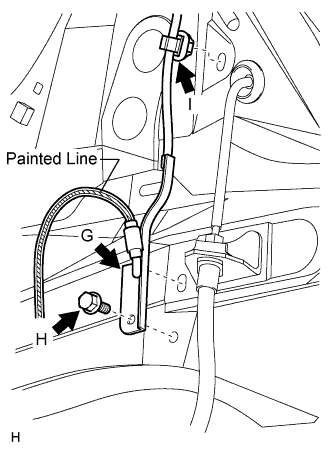
To prevent interference with other parts, do not twist the sensor wire's painted line areas when installing it.
Set the sensor body to the knuckle, and then install the sensor with the bolt.
Torque:
8.5 N*m{
87 kgf*cm
, 75 in.*lbf
}
NOTICE:
Keep the sensor tip and sensor installation hole free from foreign matter.
Firmly insert the sensor body into the knuckle before tightening the bolt.
After installing the sensor to the knuckle, make sure that there is no clearance between the sensor stay and knuckle. Also make sure that no foreign matter is stuck between the parts.
To prevent interference between the sensor and magnetic rotor, do not rotate the sensor body during or after the insertion of the sensor body to the knuckle.
Install the sensor clamp and sensor clip as follows.
Set the flexible hose clamp on the flexible hose bracket.
Simultaneously perform the following: 1) hang the hook part of the sensor clamp (labeled A) on the part of the flexible hose bracket (labeled C); and 2) insert the hook part of the sensor clamp (labeled B) to the part of the flexible hose bracket (labeled D).
NOTICE:
Do not twist the sensor wire when installing the clamp.
Tighten together the sensor clamp and the flexible hose clamp to the flexible hose bracket with the bolt (labeled E).
Torque:
18.5 N*m{
189 kgf*cm
, 14 ft.*lbf
}
Insert the sensor clip (labeled F) into the hole on the absorber lower bracket.
Install the sensor clamp, and sensor clip as follows.
Set the sensor clamp (labeled G) on the side member, and then tighten it with the bolt (labeled H).
Torque:
8.5 N*m{
87 kgf*cm
, 75 in.*lbf
}
NOTICE:
Do not twist the sensor wire when installing the clamp.
Insert the sensor clip (labeled I) into the hole on the apron.
Connect the sensor connector.
24.
INSTALL FRONT SPEED SENSOR RH
HINT:
Use the same procedures described for the LH side.
25.
INSTALL FRONT EXHAUST PIPE
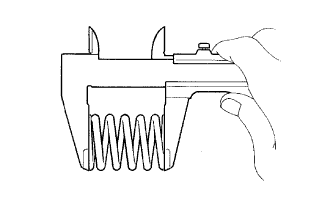
Using a vernier caliper, measure the free length of the compression spring.
Minimum length:
41.5 mm (1.634 in.)
If the length is less than the minimum, replace the compression spring.
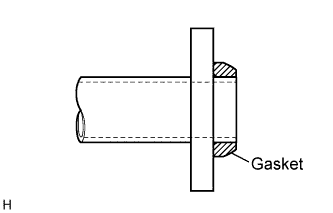
Install a new gasket by hand so that its surface is flush with the exhaust manifold.
NOTICE:
Make sure the gasket is facing the correct direction.
Do not reuse the removed gasket.
Do not push in the gasket while installing the front exhaust pipe.
Install the front exhaust pipe with the 2 compression springs and 2 bolts.