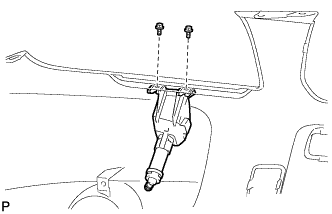
REMOVAL
Removal / installation · Vehicles built from Nov 2005
- HINT:
- Use the same procedures for the RH and LH sides.
- The procedures listed below are for the LH side.
- Use the same procedures for the RH and LH sides.
| 1. DISCONNECT CABLE FROM NEGATIVE BATTERY TERMINAL |

- CAUTION:
- Wait at least 90 seconds after disconnecting the cable from the negative (-) battery terminal to prevent airbag and seat belt pretensioner activation.
| 2. REMOVE FRONT FENDER LINER LH |
Using a screwdriver, remove the clip and fender liner retainer.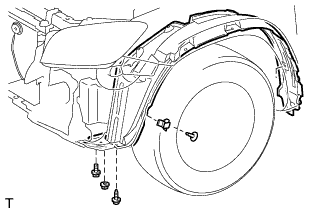

Remove the screw, nut and bolt.
w/ Splash Shield:
Remove the front fender splash shield LH.
Partially remove the fender liner.
- HINT:
- It is not necessary to fully remove the fender liner. Partially remove it so that the bumper cover can be removed later.
| 3. REMOVE FRONT FENDER LINER RH |
- HINT:
- Use the same procedures described for the LH side.
| 4. REMOVE RADIATOR SUPPORT OPENING COVER |
Remove the 2 clips.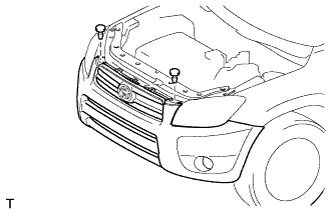
Partially remove the radiator support opening cover.
- HINT:
- It is not necessary to fully remove the radiator support opening cover. Partially remove it so that the bumper cover can be removed later.
| 5. REMOVE FRONT BUMPER COVER |
Remove the 8 screws.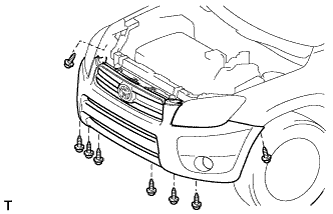
Apply protective tape under the front fender and headlight.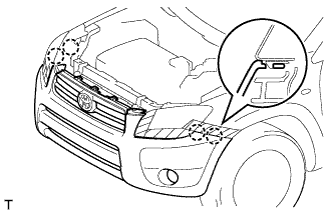
Using a screwdriver, detach the 4 claws.
- HINT:
- Tape the screwdriver tip before use.
w/ Fog Light:
Disconnect the 2 fog light connectors.
w/ Headlight Cleaner:
Disconnect the headlight cleaner.
Using a clip remover, remove the hood cushion center.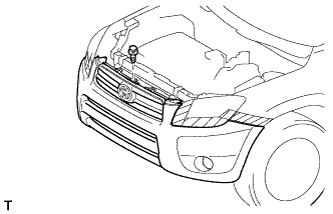
Using a clip remover, remove the 4 clips and front bumper cover.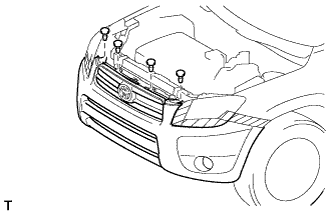
| 6. REMOVE HEADLIGHT CLEANER HOSE |
Detach the 8 clips and remove the hose from the front bumper.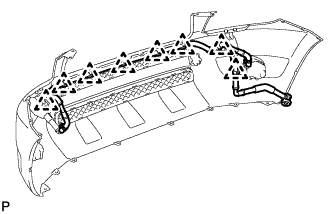
| 7. REMOVE HEADLIGHT WASHER NOZZLE SUB-ASSEMBLY LH |
Extend the headlight cleaner washer nozzle.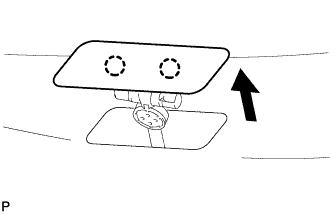
Detach the 2 claws and remove the headlight cleaner washer nozzle.
| 8. REMOVE HEADLIGHT WASHER ACTUATOR SUB-ASSEMBLY LH |
Remove the 2 screws and headlight washer actuator.