INSTALLATION
Removal / installation · Vehicles built from Aug 2007
Versions by build date: Nov 2005 – Jul 2007 from Aug 2007
- HINT:
- Use the same procedures for the RH side and LH side.
- The procedures listed below are for the LH side.
- Use the same procedures for the RH side and LH side.
| 1. TEMPORARILY INSTALL REAR SHOCK ABSORBER ASSEMBLY LH |

Temporarily install the bracket to the shock absorber lower side with the bolt and nut.
- NOTICE:
- Fix the nut in place and temporarily install the bolt.
Temporarily install the shock absorber upper side to the suspension member with the bolt and nut.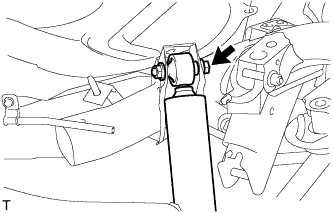

- NOTICE:
- Fix the nut in place and temporarily install the bolt.
Install the shock absorber with the 2 bolts to the axle carrier.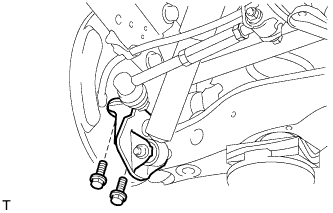
- Torque:
- 80 N*m{ 816 kgf*cm , 59 ft.*lbf }
Temporarily install the suspension arm with the bolt and 2 nuts to the suspension member and axle carrier.
| 2. INSTALL REAR WHEEL |
- Torque:
- 103 N*m{ 1,050 kgf*cm , 76 ft.*lbf }
| 3. STABILIZE SUSPENSION |
Lower the vehicle.
Press down on the vehicle several times to stabilize the suspension.
| 4. TIGHTEN REAR SHOCK ABSORBER ASSEMBLY LH |
For the shock absorber upper and lower side, fix the 2 nuts in place and tighten the 2 bolts.
- Torque:
- 80 N*m{ 816 kgf*cm , 59 ft.*lbf }
Install the nut and 2 bolts.
- Torque:
- 90 N*m{ 918 kgf*cm , 66 ft.*lbf } for bolt
- 100 N*m{ 1,020 kgf*cm , 74 ft.*lbf } for nut
- NOTICE:
- For the nut on the rear suspension member side, do not tighten the nut.
| 5. INSPECT AND ADJUST REAR WHEEL ALIGNMENT |
Inspect and adjust the rear wheel alignment (Click here).