 |
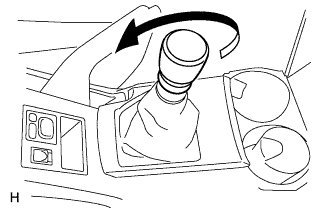
for Manual Transaxle:
Twist the shift lever knob in the direction indicated by the arrow and remove it.
FUEL LID LOCK CONTROL (for LHD) > REMOVAL |
| 1. DISCONNECT CABLE FROM NEGATIVE BATTERY TERMINAL |
| 2. REMOVE FRONT SEAT ASSEMBLY LH |
for Manual Seat:
Remove the front seat assembly (Click here).
for Power Seat:
Remove the front seat assembly (Click here).
| 3. REMOVE FRONT SEAT ASSEMBLY RH |
| 4. REMOVE REAR NO. 1 SEAT ASSEMBLY LH |
Remove the rear No. 1 seat (Click here).
| 5. REMOVE REAR NO. 1 SEAT ASSEMBLY RH |
Remove the rear No. 1 seat (Click here).
| 6. REMOVE SHIFT LEVER KNOB SUB-ASSEMBLY |
|
for Manual Transaxle:
Twist the shift lever knob in the direction indicated by the arrow and remove it.
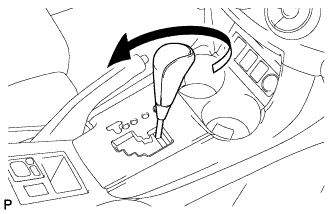 |
for Automatic Transaxle:
Twist the shift lever knob in the direction indicated by the arrow and remove it.
| 7. REMOVE NO. 1 CONSOLE UPPER PANEL GARNISH |
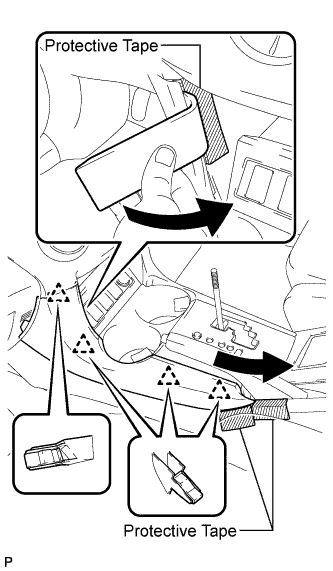 |
Place protective tape as shown in the illustration.
Using a moulding remover, detach the 4 clips and remove the upper panel garnish.
| 8. REMOVE NO. 2 CONSOLE UPPER PANEL GARNISH |
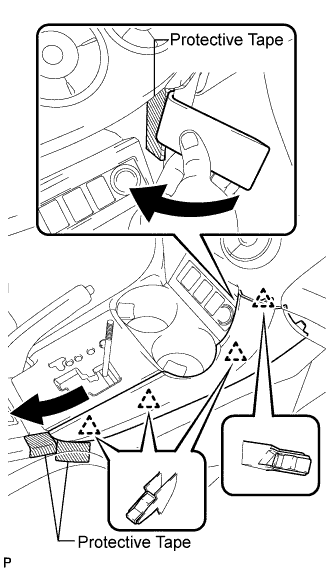 |
Place protective tape as shown in the illustration.
Using a moulding remover, detach the 4 clips and remove the upper panel garnish.
| 9. REMOVE UPPER CONSOLE PANEL SUB-ASSEMBLY (for Manual Transaxle) |
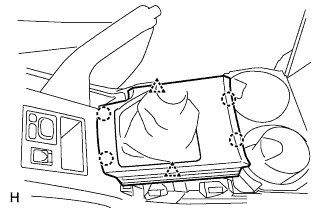 |
Using a screwdriver, detach the 2 clips and 4 claws, and then remove the upper console panel.
| 10. REMOVE FLOOR SHIFT POSITION INDICATOR HOUSING SUB-ASSEMBLY (for Automatic Transaxle) |
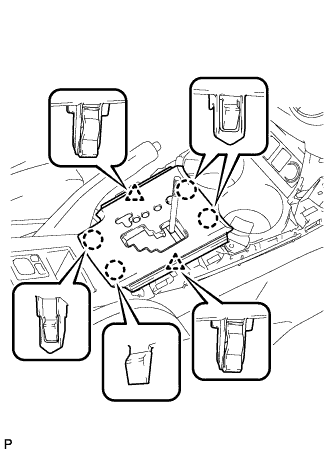 |
Using a screwdriver, detach the 2 clips and 4 claws, and then remove the floor shift position indicator housing.
Disconnect the connector.
| 11. REMOVE SWITCH BASE |
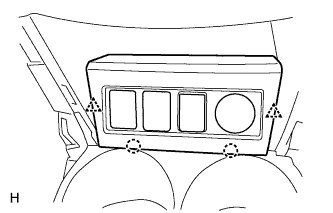 |
Detach the 2 clips and 2 claws.
Disconnect the connectors and remove the switch base.
| 12. REMOVE CONSOLE CUP HOLDER BOX |
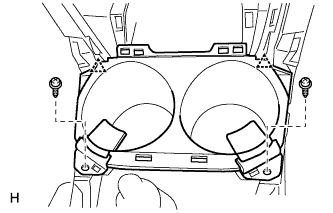 |
Remove the 2 screws.
Detach the 2 clips and remove the cup holder box.
| 13. REMOVE UPPER REAR CONSOLE PANEL SUB-ASSEMBLY |
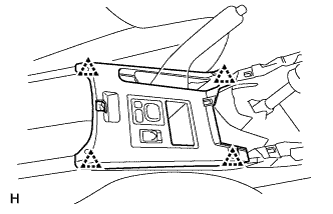 |
Using a screwdriver, detach the 4 clips.
Disconnect the connector and remove the upper rear console panel.
| 14. REMOVE CONSOLE REAR END PANEL |
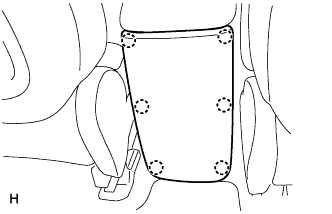 |
Using a screwdriver, detach the 6 claws and remove the console rear end panel.
| 15. REMOVE NO. 1 INSTRUMENT PANEL BRACKET COVER INNER LH |
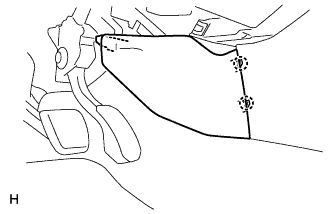 |
Detach the 2 claws and remove the instrument panel bracket cover.
| 16. REMOVE NO. 1 INSTRUMENT PANEL BRACKET COVER INNER RH |
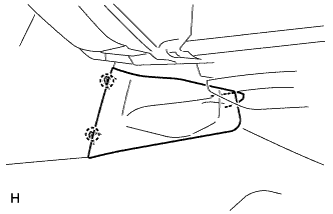 |
Detach the 2 claws and remove the instrument panel bracket cover.
| 17. REMOVE CONSOLE BOX CARPET |
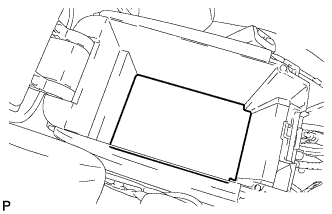 |
Remove the console box carpet.
| 18. REMOVE REAR CONSOLE BOX SUB-ASSEMBLY |
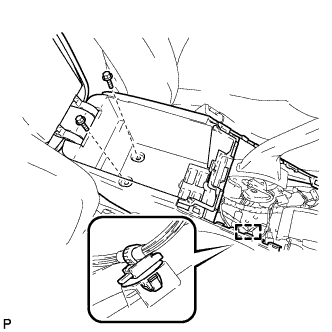 |
Remove the 2 bolts and detach the wire harness clamp.
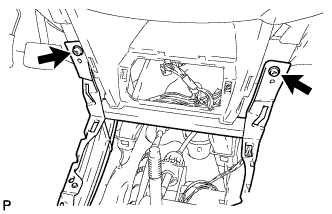 |
Remove the 2 screws.
Disconnect the connector and remove the rear console box.
| 19. REMOVE FRONT DOOR SCUFF PLATE LH |
for Short Body:
Remove the front door scuff plate .
for Long Body:
Remove the front door scuff plate .
| 20. REMOVE FRONT DOOR SCUFF PLATE RH |
| 21. REMOVE COWL SIDE TRIM BOARD LH |
for Short Body:
Remove the cowl side trim board .
for Long Body:
Remove the cowl side trim board .
| 22. REMOVE COWL SIDE TRIM BOARD RH |
| 23. REMOVE FRONT DOOR OPENING TRIM WEATHERSTRIP LH |
Remove the front door opening trim weatherstrip.
| 24. REMOVE FRONT DOOR OPENING TRIM WEATHERSTRIP RH |
Remove the front door opening trim weatherstrip.
| 25. REMOVE REAR DOOR SCUFF PLATE LH |
for Short Body:
Remove the rear door scuff plate .
for Long Body:
Remove the rear door scuff plate .
| 26. REMOVE REAR DOOR SCUFF PLATE RH |
| 27. REMOVE REAR DOOR OPENING TRIM WEATHERSTRIP LH |
Remove the rear door opening trim weatherstrip.
| 28. REMOVE REAR DOOR OPENING TRIM WEATHERSTRIP RH |
Remove the rear door opening trim weatherstrip.
| 29. REMOVE LOWER CENTER PILLAR GARNISH LH |
for Short Body:
Remove the lower center pillar garnish .
for Long Body:
Remove the lower center pillar garnish .
| 30. REMOVE LOWER CENTER PILLAR GARNISH RH |
| 31. REMOVE PACKAGE TRAY TRIM POCKET SUB-ASSEMBLY |
Remove the package tray trim pocket.
| 32. REMOVE TONNEAU COVER ASSEMBLY |
Remove the tonneau cover.
| 33. REMOVE REAR FLOOR NO. 1 BOARD |
Remove the rear floor No. 1 board.
| 34. REMOVE DECK BOARD ASSEMBLY |
Remove the deck board.
| 35. REMOVE REAR FLOOR NO. 3 BOARD |
Remove the rear floor No. 3 board.
| 36. REMOVE REAR FLOOR NO. 2 BOARD |
Remove the rear floor No. 2 board.
| 37. REMOVE JACK CARRIER ASSEMBLY (for Short Body) |
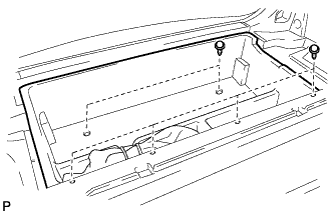 |
Using a clip remover, remove the 7 clips and remove the jack carrier.
| 38. REMOVE REAR FLOOR NO. 1 MAT SUPPORT SIDE PLATE |
for Short Body:
Remove the rear floor No. 1 mat support side plate .
for Long Body:
Remove the rear floor No. 1 mat support side plate .
| 39. REMOVE BACK DOOR WEATHERSTRIP |
Remove the back door weatherstrip.
| 40. REMOVE REAR FLOOR FINISH PLATE |
for Short Body:
Remove the rear floor finish plate .
for Long Body:
Remove the rear floor finish plate .
| 41. REMOVE RECLINING REMOTE CONTROL LEVER BEZEL LH |
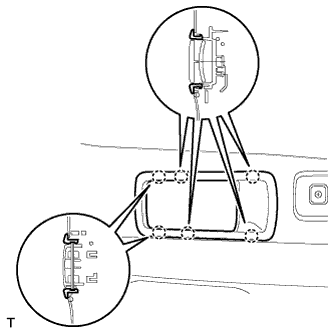 |
Using a screwdriver, detach the 6 claws and remove the bezel.
| 42. REMOVE RECLINING REMOTE CONTROL LEVER BEZEL RH |
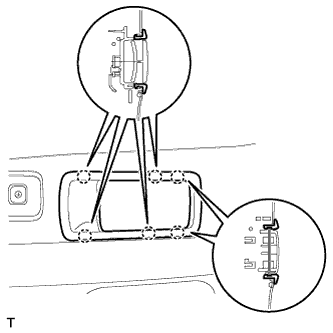 |
Using a screwdriver, detach the 6 claws and remove the bezel.
| 43. REMOVE TETHER ANCHOR BRACKET SUB-ASSEMBLY (for Long Body) |
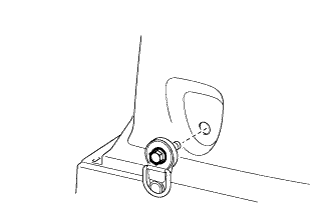 |
Remove the bolt and tether anchor bracket.
| 44. REMOVE CHILD RESTRAINT SEAT TETHER ANCHOR COVER |
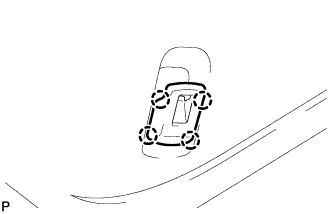 |
Using a screwdriver, detach the 4 claws and remove the cover.
| 45. REMOVE CHILD RESTRAINT SEAT TETHER ANCHOR BRACKET |
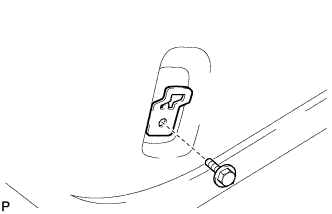 |
Remove the bolt, 2 washers, collar and bracket.
| 46. REMOVE DECK TRIM SIDE PANEL ASSEMBLY LH |
for Short Body:
Remove the deck trim side panel .
for Long Body:
Remove the deck trim side panel .
| 47. REMOVE DECK TRIM SIDE PANEL ASSEMBLY RH |
for Short Body:
Remove the deck trim side panel .
for Long Body:
Remove the deck trim side panel .
| 48. REMOVE FRONT FLOOR CARPET ASSEMBLY |
Partially remove the floor carpet.
| 49. REMOVE FUEL LID LOCK CONTROL CABLE SUB-ASSEMBLY |
Remove the bolt and fuel lid lock open lever.
Remove the tape and cable from the clamps as shown in the illustration.
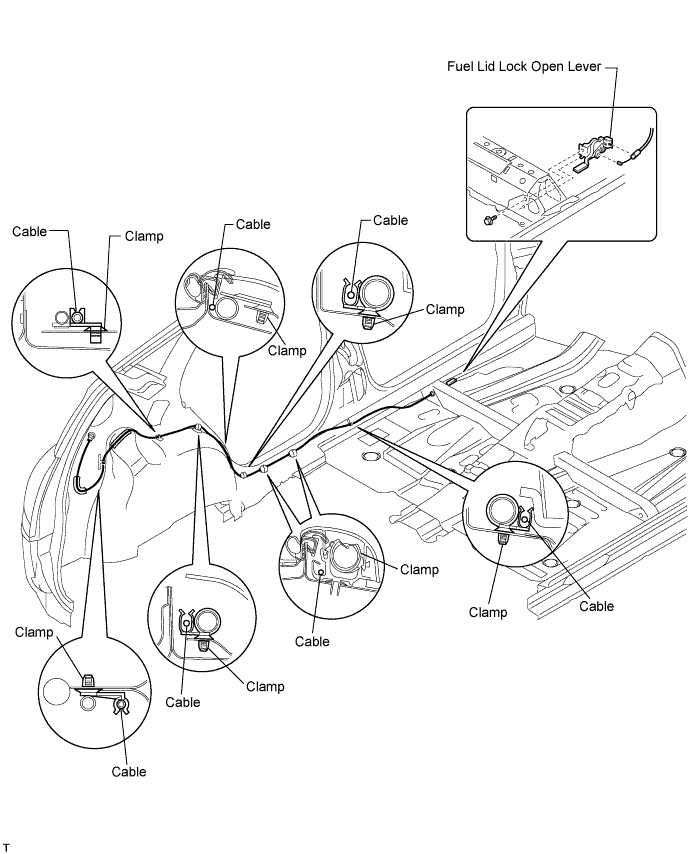
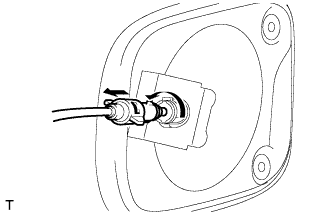 |
Turn the lock retainer counterclockwise and remove the cable from the retainer.
| 50. REMOVE FUEL FILLER OPENING LID LOCK RETAINER |
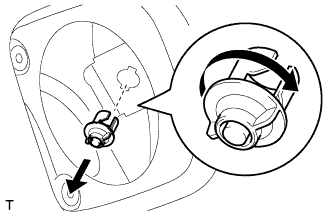 |
Turn the lock retainer clockwise and remove the lock retainer as shown in the illustration.