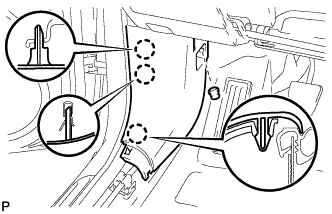
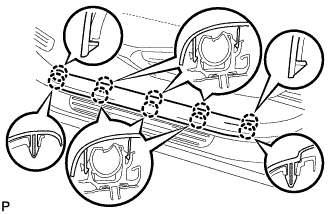
Home › BODY › INTERIOR › ROOF HEADLINING (for Long Body)

ROOF HEADLINING (for Long Body) > INSTALLATION

for Preparation Click here


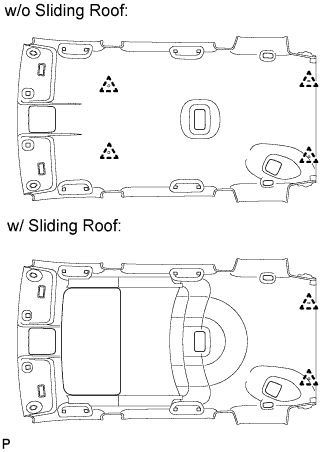
1. INSTALL NO. 1 ROOF SILENCER PAD
  1. w/o Sliding Roof:

    1. Install the 5 silencer pads.

  1. w/ Sliding Roof:

    1. Install the 2 silencer pads.


2. INSTALL NO. 3 ROOF SILENCER PAD
  1. Install the No. 3 silencer pad.


3. INSTALL ANTENNA CORD SUB-ASSEMBLY


  1. for Short Body (w/o Sliding Roof):


    1. Apply masking tape to the antenna cord to mark it.
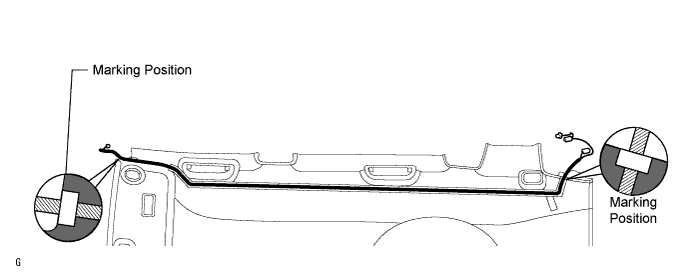

      B134704E01

      HINT:
      Apply the masking tape so that the edges of the masking tape and roof headlining are aligned as shown in the illustration.

    2. Remove the antenna cord from the roof headlining.

    3. Remove the double-sided tape from the roof headlining.
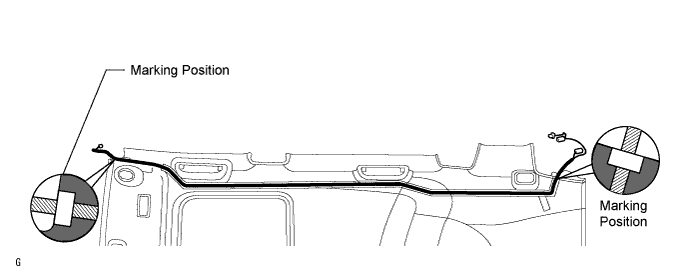


  1. for Short Body (w/ Sliding Roof):


    1. Apply masking tape to the antenna cord to mark it.


      B134706E01

      HINT:
      Apply the masking tape so that the edges of the masking tape and roof headlining are aligned as shown in the illustration.

    2. Remove the antenna cord from the roof headlining.

    3. Remove the double-sided tape from the roof headlining.
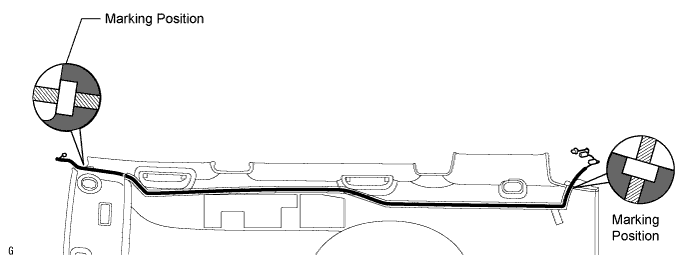


  1. for Long Body (w/o Sliding Roof):


    1. Apply masking tape to the antenna cord to mark it.


      B134708E01

      HINT:
      Apply the masking tape so that the edges of the masking tape and roof headlining are aligned as shown in the illustration.

    2. Remove the antenna cord from the roof headlining.

    3. Remove the double-sided tape from the roof headlining.
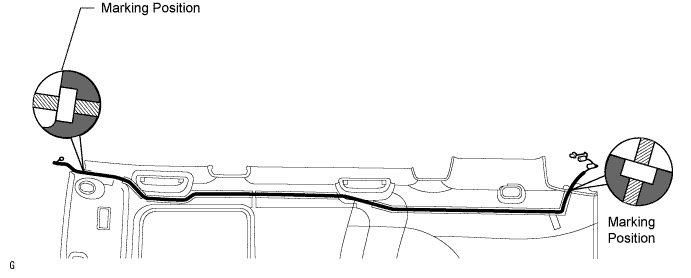


  1. for Long Body (w/ Sliding Roof):


    1. Apply masking tape to the antenna cord to mark it.


      B134710E01

      HINT:
      Apply the masking tape so that the edges of the masking tape and roof headlining are aligned as shown in the illustration.

    2. Remove the antenna cord from the roof headlining.

    3. Remove the double-sided tape from the roof headlining.
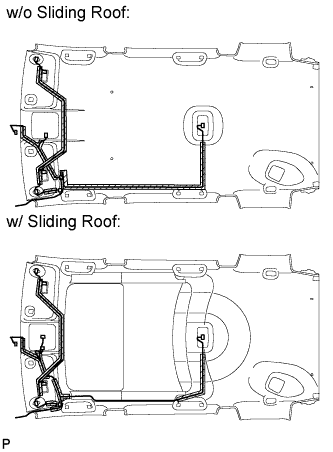


4. INSTALL NO. 1 ROOF WIRE


    B130238E03
  1. Only when replacing the roof headlining:

    1. Align the marking, and then install the wire harness with tape.

      HINT:
      Be careful that dirt or foreign objects do not stick to the adhesive part when peeling off the double-sided tape.

    2. Attach the roof wire harness along the adhesive part.

      NOTICE:
      The roof wire harness should be attached securely.


5. INSTALL NO. 1 ROOF HEADLINING SUPPORT
  1. Install the No. 1 roof headlining support.


6. INSTALL NO. 2 ROOF HEADLINING SUPPORT
  1. Install the No. 2 roof headlining support.


7. INSTALL NO. 3 ROOF HEADLINING SUPPORT
  1. Install the No. 3 roof headlining support.


8. INSTALL NO. 4 ROOF HEADLINING SUPPORT
  1. Install the No. 4 roof headlining support.


9. INSTALL ROOF HEADLINING ASSEMBLY


B130237E02
  1. w/o Sliding Roof:

    1. Install the headlining with the 4 clips.

  1. w/ Sliding Roof:

    1. Install the headlining with the 2 clips.

    2. Connect the connector to the sliding roof drive gear.


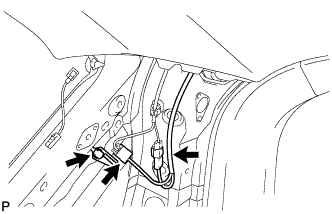
  1. Connect the antenna cord sub-assembly.


      B135485
    1. Install the bracket's bolt.

    2. Attach the clamp of the antenna cord.

    3. Connect the 2 antenna cord connectors to the rear pillar RH.


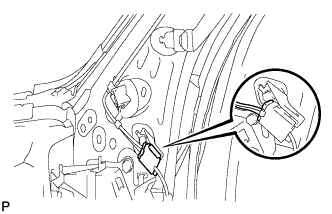
    4. B135492
    5. Connect the antenna cord connector to the front pillar RH.


    B131381
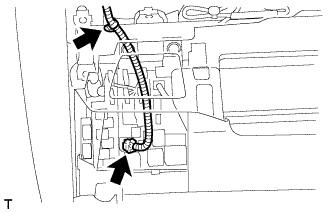
  1. Connect the No. 1 roof wire.

    1. Connect the connector to the roof wire.

    2. Attach the clamp of the roof wire.


10. INSTALL SUN ROOF OPENING TRIM MOULDING (w/ Sliding Roof)
  1. Install the sun roof opening trim moulding.
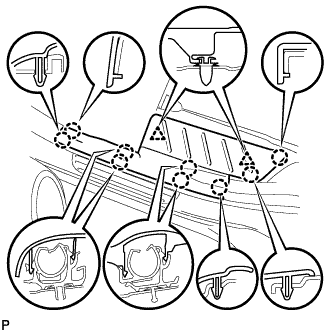


11. INSTALL SHOULDER BELT ANCHOR COVER RH
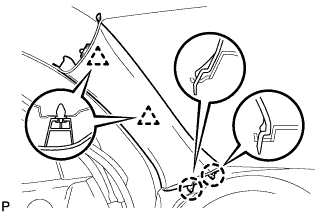

B133646E01
  1. Install the cover with the 4 claws.


12. INSTALL CHILD RESTRAINT SEAT TETHER ANCHOR COVER


B131611
  1. Install the cover with the 4 claws.


13. INSTALL REAR ASSIST GRIP ASSEMBLY


    B131004
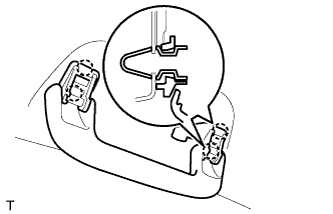
  1. Attach the 4 claws to install the assist grip.


14. INSTALL ASSIST GRIP COVER (for Rear Grip)
  1. Attach the 4 claws to install the 2 assist grip covers.


15. INSTALL ASSIST GRIP SUB-ASSEMBLY


    B131003
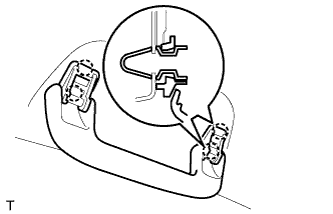
  1. Attach the 4 claws to install the assist grip.


16. INSTALL ASSIST GRIP COVER (for Front Grip)
  1. Attach the 4 claws to install the 2 assist grip covers.


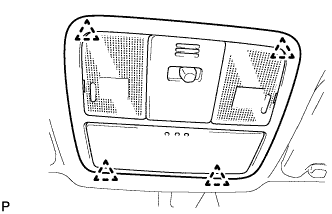
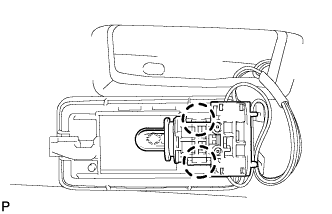
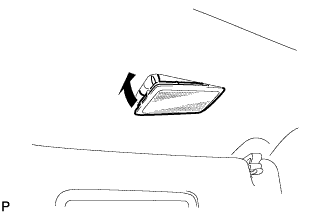
17. INSTALL ROOM LIGHT ASSEMBLY


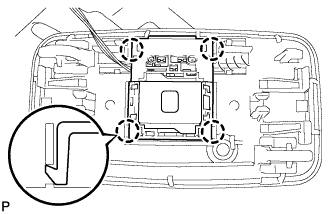
B132731
  1. Attach the 4 claws to install the room light switch base.


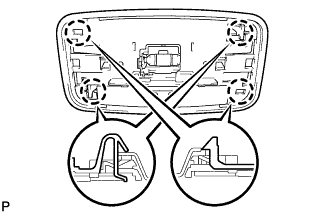
    B131450
  1. Attach the 4 claws to install the room light.


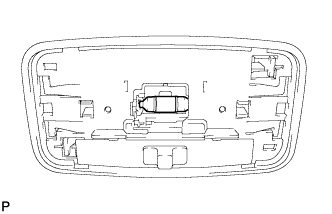
    B131449
  1. Install the bulb to the room light switch base.


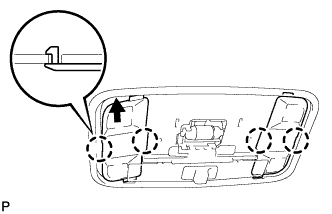
    B132732
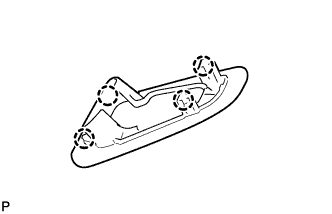
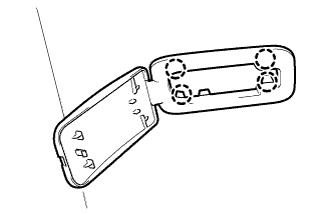
  1. Attach the 4 claws and install the 2 covers.


18. INSTALL MAP LIGHT ASSEMBLY


B131951
  1. Connect the light connector.

  1. Attach the 4 clips to install the map light.


19. INSTALL VANITY LIGHT ASSEMBLY


    B131425
  1. Attach the 2 claws and install the vanity light lens to the vanity light.


    B131424
  1. Install the vanity light.


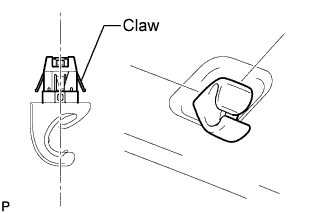
20. INSTALL VISOR HOLDER


    B122230E03
  1. Set the claws of the visor holder as shown in the illustration.

  1. Insert the visor holder to install it.


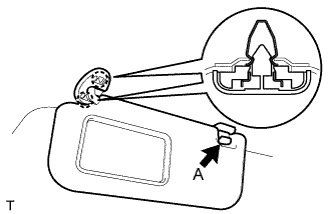
21. INSTALL VISOR ASSEMBLY LH


B131006E01
  1. Attach the 2 claws to install the visor.

  1. Install portion A of the visor to the visor holder.

  1. Attach the 4 claws to install the visor bracket cover.


22. INSTALL VISOR ASSEMBLY RH

HINT:
Use the same procedures described for the LH side.


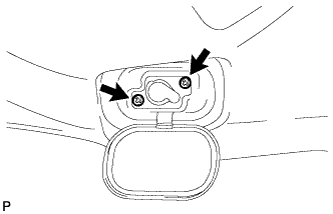
23. INSTALL REAR ROOM PARTITION NET HOOK LH


    B129710
  1. Install the net hook with the 2 screws.


24. INSTALL REAR ROOM PARTITION NET HOOK RH

HINT:
Use the same procedures described for the LH side.


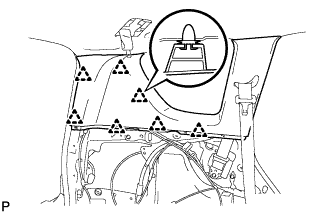
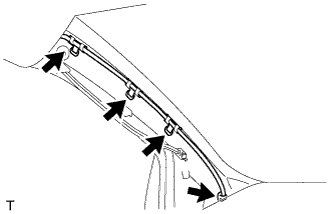
25. INSTALL INNER ROOF SIDE GARNISH ASSEMBLY LH


    B129708
  1. Attach the 7 clips to install the garnish.


26. INSTALL INNER ROOF SIDE GARNISH ASSEMBLY RH

HINT:
Use the same procedures described for the LH side.


27. INSTALL DECK TRIM SIDE PANEL ASSEMBLY LH


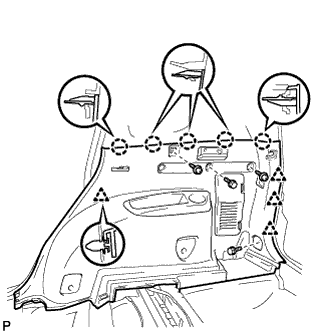
    B129706
  1. Install the belt hanger to the trim board.

  1. Connect the power outlet socket connector.

  1. Attach the 4 clips and 5 claws to install the trim board.

  1. Install the 2 screws and 2 bolts.


    B137546
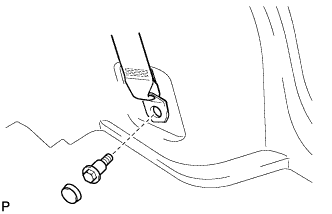
  1. Connect the rear No.1 seat belt's floor anchor.

    1. Connect the floor anchor with the bolt.

      Torque:
      42 N*m{ 428 kgf*cm , 31 ft.*lbf }

    2. Install the anchor cover.


28. INSTALL DECK TRIM SIDE PANEL ASSEMBLY RH


    B129707
  1. Install the belt hanger to the trim board.

  1. Attach the 4 clips and 5 claws to install the trim board.

  1. Install the 2 screws and 2 bolts.


    B137547
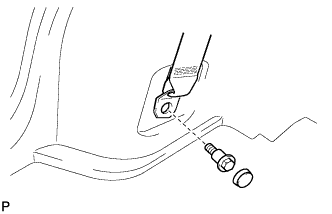
  1. Connect the rear No.1 seat belt's floor anchor.

    1. Connect the floor anchor with the bolt.

      Torque:
      42 N*m{ 428 kgf*cm , 31 ft.*lbf }

    2. Install the anchor cover.


29. INSTALL TETHER ANCHOR BRACKET SUB-ASSEMBLY


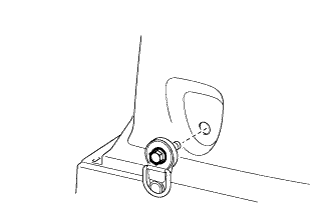
    B135674
  1. Install the tether anchor bracket with the bolt.

    Torque:
    42 N*m{ 428 kgf*cm , 31 ft.*lbf }


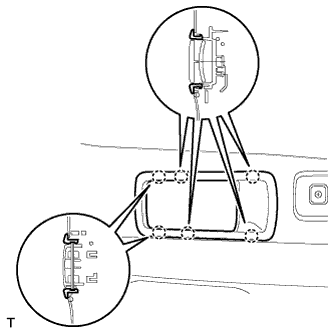
30. INSTALL RECLINING REMOTE CONTROL LEVER BEZEL LH


    B132537
  1. Attach the 6 claws to install the bezel.


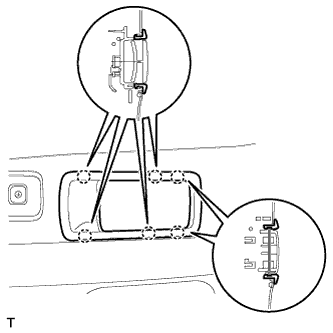
31. INSTALL RECLINING REMOTE CONTROL LEVER BEZEL RH


    B135482
  1. Attach the 6 claws to install the bezel.


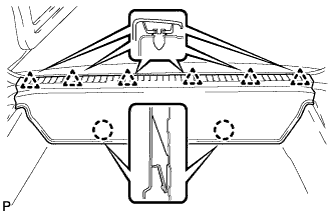
32. INSTALL REAR FLOOR FINISH PLATE


    B129704
  1. Attach the 2 claws and 6 clips to install the finish plate.


33. INSTALL BACK DOOR WEATHERSTRIP
  1. Install the back door weatherstrip.


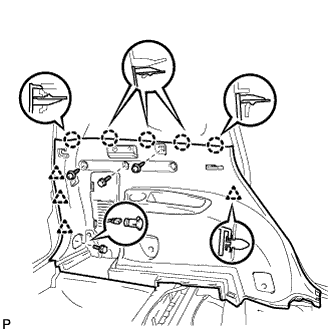
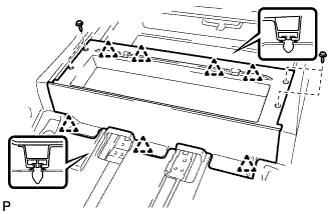
34. INSTALL REAR FLOOR NO. 1 MAT SUPPORT SIDE PLATE


B129705
  1. Attach the 7 clips to install the side plate.

  1. Install the 4 screws.


35. INSTALL REAR FLOOR NO. 3 BOARD
  1. Install the rear floor No. 3 board.


36. INSTALL REAR FLOOR NO. 2 BOARD
  1. Install the rear floor No. 2 board.


37. INSTALL DECK BOARD ASSEMBLY
  1. Install the deck board.


38. INSTALL REAR FLOOR NO. 1 BOARD
  1. Install the rear floor No. 1 board.


39. INSTALL TONNEAU COVER ASSEMBLY
  1. Install the tonneau cover.


40. INSTALL PACKAGE TRAY TRIM POCKET SUB-ASSEMBLY
  1. Install the package tray trim pocket.


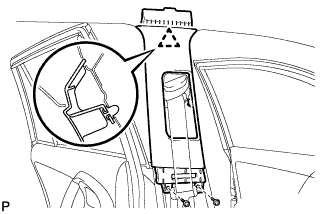
41. INSTALL CENTER PILLAR GARNISH LH


B129701
  1. Attach the clip to install the garnish.

  1. Install the 2 screws.


42. INSTALL CENTER PILLAR GARNISH RH

HINT:
Use the same procedures described for the LH side.


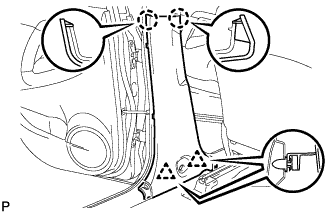
43. INSTALL LOWER CENTER PILLAR GARNISH LH


    B129700
  1. Attach the 2 claws and 2 clips to install the garnish.


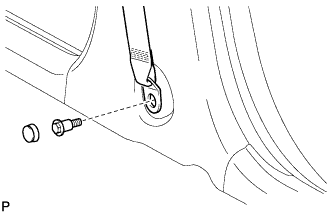
    B137545
  1. Connect the front seat outer belt's floor anchor.

    1. Connect the floor anchor with the bolt.

      Torque:
      42 N*m{ 428 kgf*cm , 31 ft.*lbf }

    2. Install the anchor cover.


44. INSTALL LOWER CENTER PILLAR GARNISH RH

HINT:
Use the same procedures described for the LH side.


45. INSTALL REAR DOOR OPENING TRIM WEATHERSTRIP LH
  1. Install the rear door opening trim weatherstrip.


46. INSTALL REAR DOOR OPENING TRIM WEATHERSTRIP RH
  1. Install the rear door opening trim weatherstrip.


47. INSTALL REAR DOOR SCUFF PLATE LH


    B129703
  1. Attach the 9 claws and 2 clips to install the scuff plate.


48. INSTALL REAR DOOR SCUFF PLATE RH

HINT:
Use the same procedures described for the LH side.


49. INSTALL UPPER INSTRUMENT PANEL SUB-ASSEMBLY
  1. Install the upper instrument panel sub-assembly (Click here).


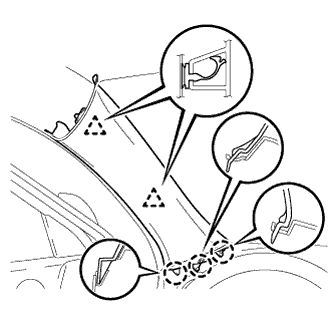
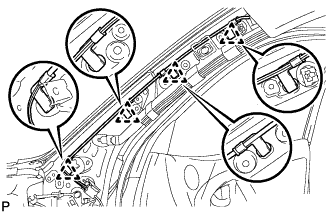
50. INSTALL FRONT PILLAR GARNISH LH
  1. w/ Curtain Shield Airbag:

    1. Remove the piece of cloth or nylon.


    B114316
  1. Install the 4 wire harness clamps.


    B146179
  1. w/ Curtain Shield Airbag:

    1. Install 2 new clips to the front pillar garnish.

    2. Attach the 3 claws and 2 clips to install the garnish.


  1. w/o Curtain Shield Airbag:


      B131215
    1. Attach the 2 clips and 2 claws to install the garnish.


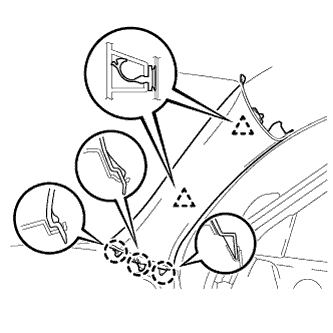
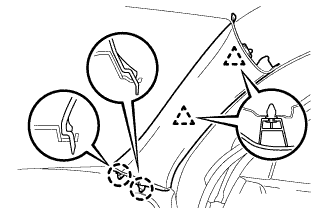
51. INSTALL FRONT PILLAR GARNISH RH
  1. w/ Curtain Shield Airbag:

    1. Remove the piece of cloth or nylon.


    B135443
  1. Install the 4 antenna cord clamps.


    B146181
  1. w/ Curtain Shield Airbag:

    1. Install 2 new clips to the front pillar garnish.

    2. Attach the 3 claws and 2 clips to install the garnish.


  1. w/o Curtain Shield Airbag:


      B131379
    1. Attach the 2 clips and 2 claws to install the garnish.


52. INSTALL FRONT DOOR OPENING TRIM WEATHERSTRIP LH
  1. Install the front door opening trim weatherstrip.


53. INSTALL FRONT DOOR OPENING TRIM WEATHERSTRIP RH
  1. Install the front door opening trim weatherstrip.


54. INSTALL COWL SIDE TRIM BOARD LH


B129697
  1. Attach the 3 claws to install the trim board.

  1. Install the cap nut.


55. INSTALL COWL SIDE TRIM BOARD RH

HINT:
Use the same procedures described for the LH side.


56. INSTALL FRONT DOOR SCUFF PLATE LH


    B129699
  1. Attach the 10 claws to install the scuff plate.


57. INSTALL FRONT DOOR SCUFF PLATE RH

HINT:
Use the same procedures described for the LH side.


58. CONNECT CABLE TO NEGATIVE BATTERY TERMINAL