 |
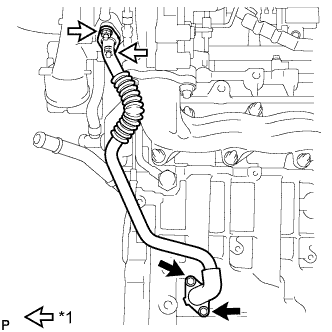
Remove the 2 nuts, 2 bolts, turbo oil outlet pipe and 2 gaskets.
| *1 | Nut |
TURBOCHARGER > REMOVAL |
| 1. REMOVE EGR COOLER WITH PIPE ASSEMBLY |
Remove the EGR cooler with pipe assembly (Click here).
| 2. REMOVE TURBO OIL OUTLET PIPE |
|
Remove the 2 nuts, 2 bolts, turbo oil outlet pipe and 2 gaskets.
| *1 | Nut |
| 3. REMOVE NO. 1 TURBO INSULATOR |
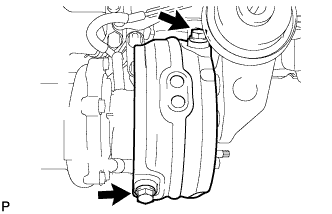 |
Remove the 2 bolts and No. 1 turbo insulator.
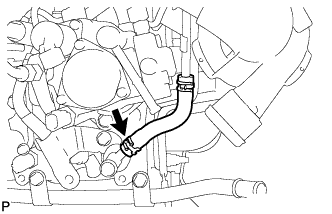
| 4. DISCONNECT NO. 3 WATER BY-PASS HOSE |
 |
| 5. REMOVE NO. 5 WATER BY-PASS PIPE |
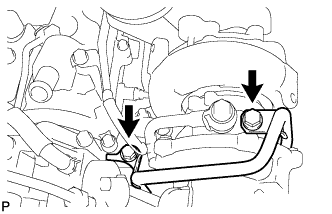 |
Remove the 2 bolts and No. 5 water by-pass pipe.
| 6. REMOVE NO. 2 TURBO OIL PIPE |
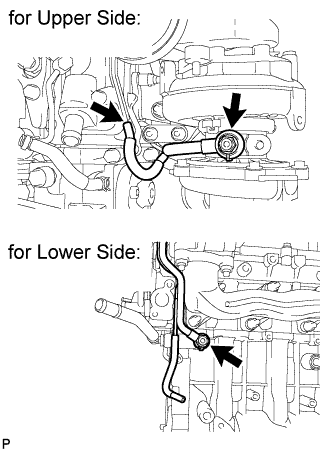 |
Disconnect the vacuum hose.
Remove the 2 union bolts, 2 gaskets and No. 2 turbo oil pipe.
| 7. REMOVE TURBOCHARGER STAY |
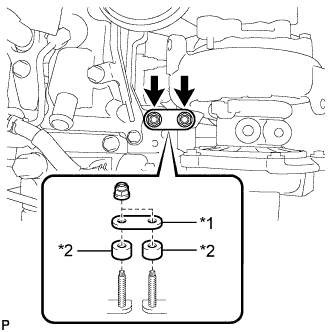 |
Remove the 2 nuts, turbocharger stay and 2 collars.
| *1 | Turbocharger Stay |
| *2 | Collar |
| 8. REMOVE TURBOCHARGER SUB-ASSEMBLY |
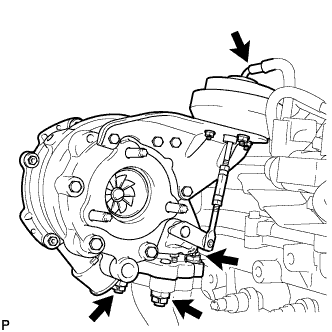 |
Disconnect the vacuum hose.
Remove the 3 nuts, turbocharger and gasket.
| 9. REPLACE STUD BOLT |
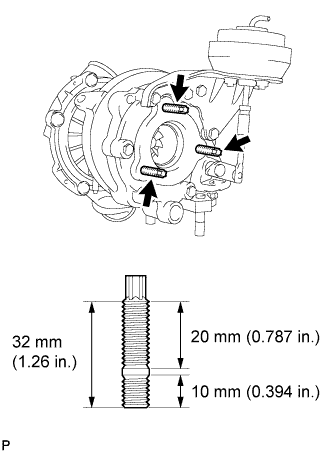 |
For turbocharger:
Using an E8 "TORX" wrench, replace the 3 stud bolts.
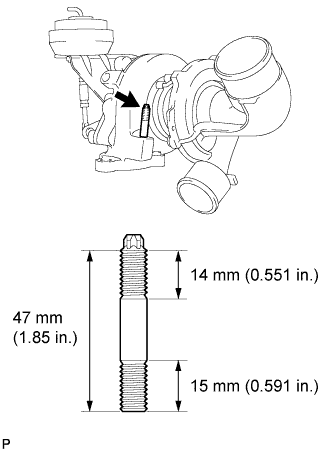 |
For turbocharger:
Using an E8 "TORX" wrench, replace the stud bolt.
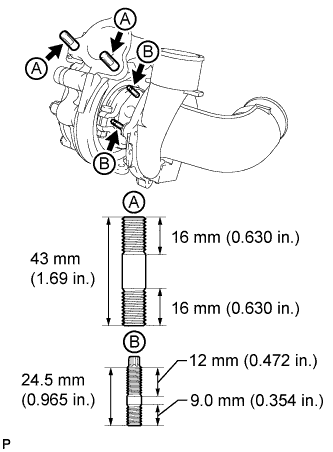 |
For turbocharger:
Replace the 2 stud bolts labeled A shown in the illustration.
For turbocharger:
Using an E5 "TORX" wrench, replace the 2 stud bolts labeled B shown in the illustration.