 |
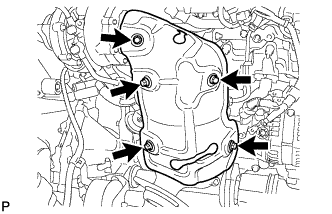
Remove the 5 bolts and insulator.
EXHAUST MANIFOLD CONVERTER > REMOVAL |
| 1. REMOVE ENGINE ASSEMBLY |
Remove the engine assembly (Click here).
| 2. REMOVE NO. 1 MANIFOLD CONVERTER INSULATOR |
|
Remove the 5 bolts and insulator.
| 3. REMOVE MANIFOLD STAY |
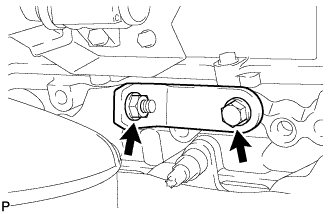 |
Remove the bolt, nut and manifold stay.
| 4. REMOVE NO. 2 MANIFOLD STAY |
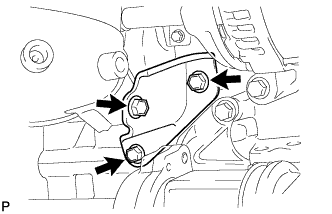 |
Remove the 3 bolts and No. 2 manifold stay.
| 5. REMOVE NO. 2 EXHAUST MANIFOLD STAY |
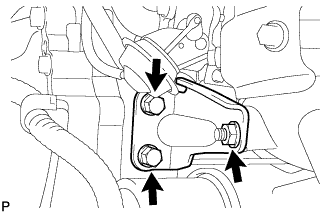 |
Remove the 2 bolts, nut and No. 2 exhaust manifold stay.
| 6. REMOVE EXHAUST MANIFOLD CONVERTER SUB-ASSEMBLY |
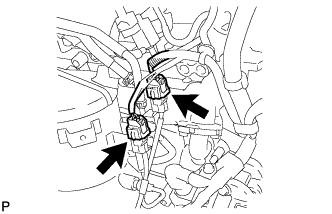 |
Disconnect the 2 connectors.
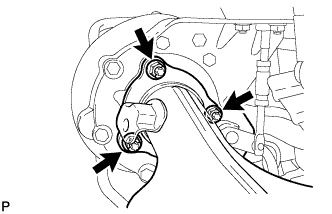 |
Remove the 3 nuts, exhaust manifold converter and gasket.
| 7. REMOVE VACUUM TRANSMITTING HOSE ASSEMBLY |
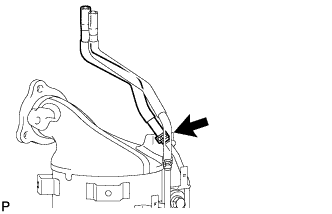 |
| 8. REMOVE NO. 2 VACUUM TRANSMITTING HOSE ASSEMBLY |
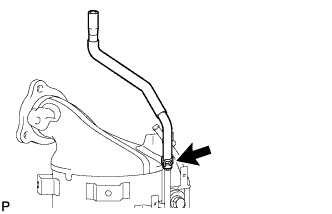 |
| 9. REMOVE EXHAUST GAS TEMPERATURE SENSOR (for Upper Side) |
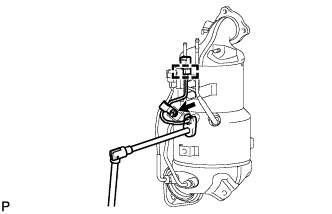 |
Detach the sensor connector clamp.
Using a 14 mm union nut wrench, loosen the union nut.
Remove the nut, clamp and sensor.
| 10. REMOVE EXHAUST GAS TEMPERATURE SENSOR (for Lower Side) |
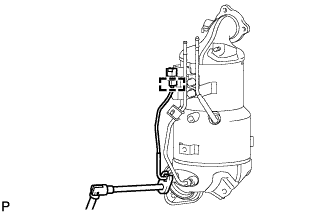 |
Detach the sensor connector clamp.
Using a 14 mm union nut wrench, remove the sensor.
| 11. REMOVE NO. 1 VACUUM PIPE |
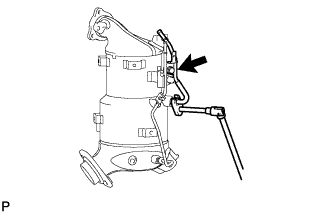 |
Using a 17 mm union nut wrench, loosen the union nut.
Remove the bolt and No. 1 vacuum pipe.
| 12. REMOVE NO. 2 VACUUM PIPE |
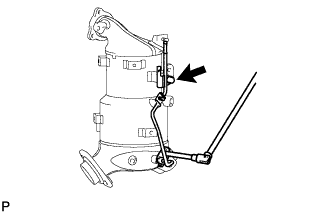 |
Using a 14 mm union nut wrench, loosen the union nut.
Remove the bolt and No. 2 vacuum pipe.
| 13. REMOVE NO. 2 MANIFOLD CONVERTER INSULATOR |
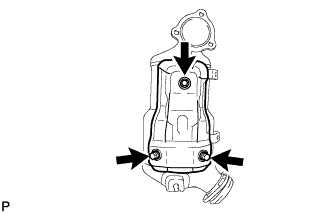 |
Remove the 3 bolts and No. 2 manifold converter insulator.