AUTOMATIC TRANSAXLE ASSEMBLY > INSTALLATION |
| 1. INSTALL TORQUE CONVERTER CLUTCH ASSEMBLY |
|
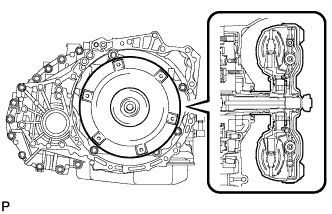
Mesh the splines of the input shaft and turbine runner.
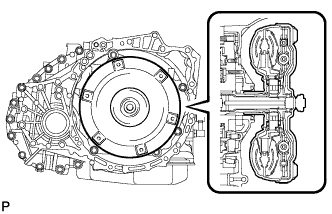 |
Mesh the splines of the stator shaft and stator while turning the torque converter clutch.
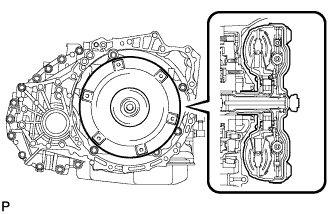 |
Turn the torque converter clutch to insert the key of the oil pump drive gear into the slot in the torque converter clutch.
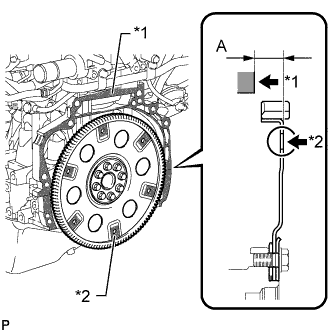 |
Using a vernier caliper and straightedge, measure dimension A between the transaxle fitting surface of the engine*1 and the converter clutch fitting surface of the drive plate*2. (#)
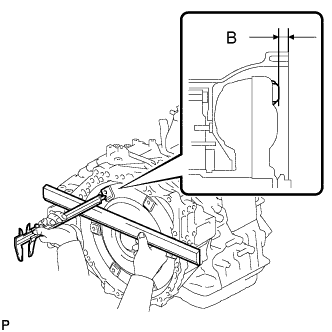 |
Using a vernier caliper and straightedge, measure dimension B shown in the illustration. Check that B is more than A (measured in (#)).
| 2. INSTALL TCM |
Install the TCM to the transaxle.
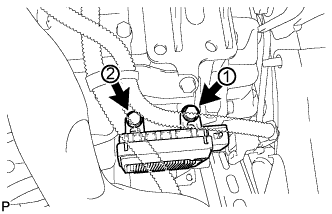 |
Install and tighten the 2 bolts in the order shown in the illustration.
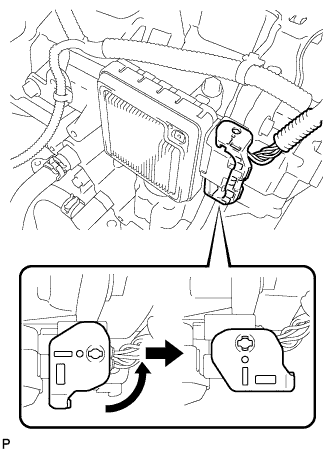 |
Connect the TCM connector.
Turn the lock lever until the claw of the TCM connector makes a connection sound to secure the connector.
| 3. INSTALL SPEEDOMETER DRIVEN HOLE COVER SUB-ASSEMBLY |
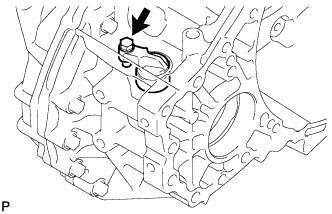 |
Coat a new O-ring with ATF and install it to the speedometer driven hole cover.
Install the speedometer driven hole cover with the bolt.
| 4. INSTALL NO. 1 TRANSMISSION CONTROL CABLE BRACKET |
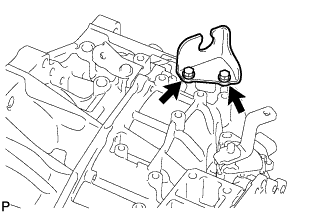 |
Install the No. 1 transmission control cable bracket with the 2 bolts.
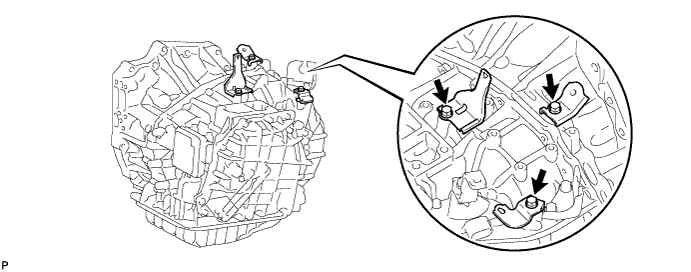
| 5. INSTALL WIRE HARNESS CLAMP BRACKET |
Install the 2 wire harness clamp brackets and air tube support with the 3 bolts.
| 6. INSTALL TRANSFER ASSEMBLY |
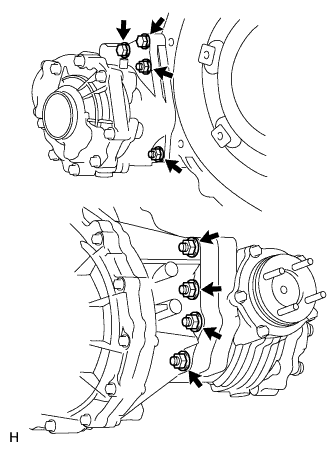 |
Install the transfer to the transaxle with the 6 nuts and 2 bolts.
| 7. INSTALL AUTOMATIC TRANSAXLE ASSEMBLY |
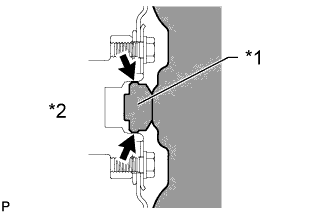 |
Apply clutch spline grease to the surface of the torque converter centerpiece that contacts the crankshaft.
| *1 | Torque Converter Clutch Centerpiece |
| *2 | Crankshaft |
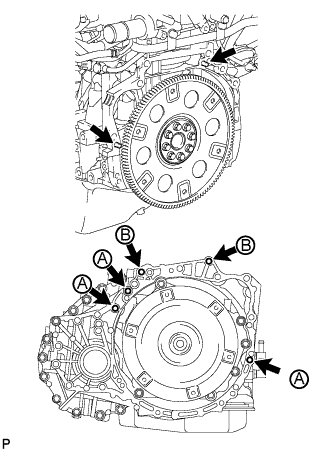 |
Confirm that the 2 knock pins are on the surface of the engine block that contacts the transaxle.
Maintain the engine and transaxle in a horizontal position, align the knock pins with each hole on the transaxle and install the transaxle with the 5 bolts shown in the illustration.
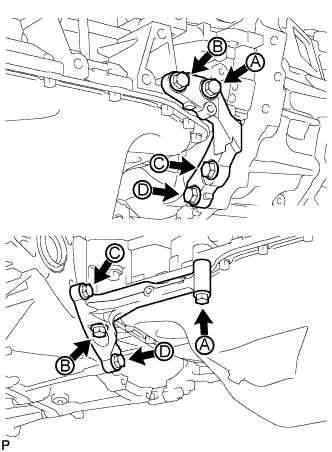 |
Temporarily install the stiffener plate LH and RH with the 8 bolts.
While holding one stiffener plate against the transaxle, tighten bolt A, and then tighten bolts B, C and D. Perform the same procedure for the other stiffener plate.
| 8. INSTALL DRIVE PLATE AND TORQUE CONVERTER CLUTCH SETTING BOLT |
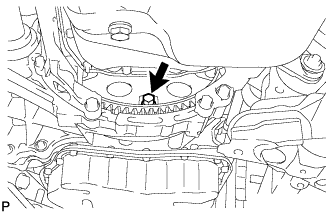 |
Turn the crankshaft to gain access to the installation locations of the 6 torque converter clutch setting bolts and install each bolt while holding the crankshaft pulley bolt with a wrench.
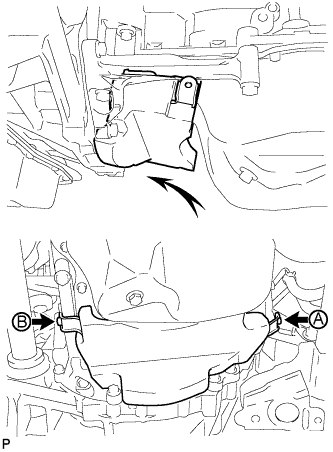 |
Install the oil pan insulator and temporarily install the 2 bolts.
Tighten bolt A, and then tighten bolt B.
| 9. INSTALL NO. 1 AIR TUBE |
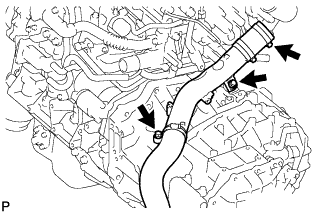 |
Install the No. 1 air tube with the 2 bolts and tighten the clamp.
| 10. INSTALL ENGINE MOUNTING BRACKET LH |
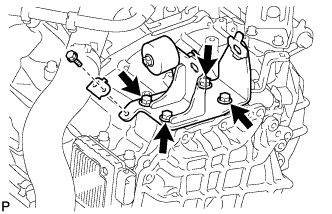 |
Install the engine mounting bracket LH to the transaxle with the 4 bolts.
Install the wire harness clamp bracket to the engine mounting bracket with the bolt.
| 11. INSTALL REAR ENGINE MOUNTING BRACKET |
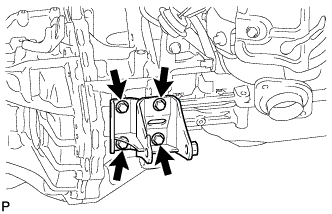 |
Install the rear engine mounting bracket to the transaxle with the 4 bolts.
| 12. INSTALL FRONT ENGINE MOUNTING BRACKET |
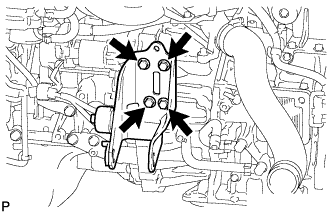 |
Install the front engine mounting bracket to the transaxle with the 4 bolts.
| 13. INSTALL BREATHER TUBE BRACKET |
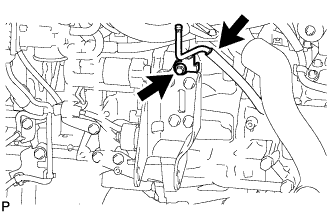 |
Install the breather tube bracket with the bolt.
Connect the breather hose to the breather tube.
| 14. INSTALL NO. 1 OIL COOLER INLET HOSE AND NO. 1 OIL COOLER OUTLET HOSE |
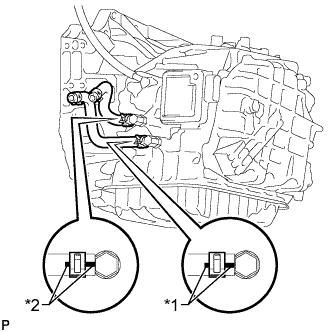 |
Install the 2 oil cooler hoses to the transaxle.
| *1 | Light Blue Paint Mark |
| *2 | Pink Paint Mark |
| 15. INSTALL GROUND CABLE |
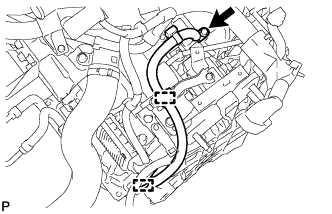 |
Install the ground cable to the transaxle with the bolt and attach the 2 clamps.
| 16. CONNECT WIRE HARNESS |
Connect the park/neutral position switch connector and TCM connector, and attach the 6 wire harness clamps to the transaxle.
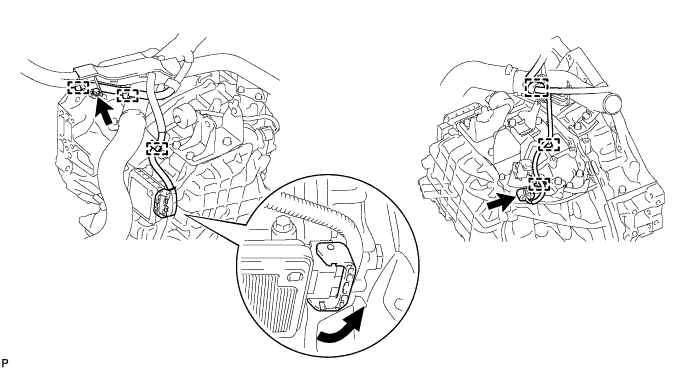
Install the bolt.
| 17. INSTALL STARTER ASSEMBLY |
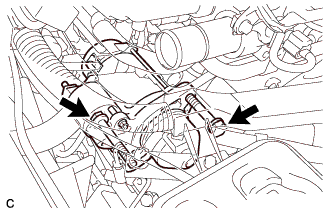 |
Install the starter with the 2 bolts.
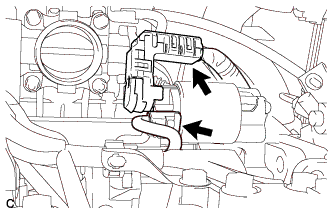 |
Install the starter wire with the nut.
Close the terminal cap.
Connect the starter connector.
| 18. INSTALL ENGINE ASSEMBLY WITH TRANSAXLE |
Install the engine with transaxle (Click here).
| 19. CHECK AUTOMATIC TRANSAXLE SYSTEM |