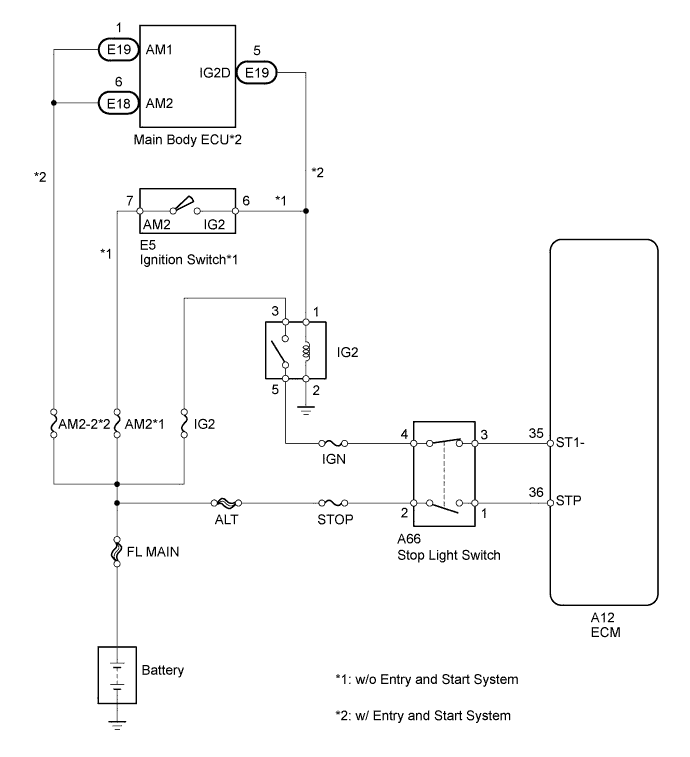
DTC P0724 Brake Switch "B" Circuit High |
| DTC No. | DTC Detection Condition | Trouble Area |
| P0724 | The stop light switch remains on even when the vehicle is driven in a GO (30 km/h (18.63 mph) or more) and STOP (less than 3 km/h (1.86 mph)) pattern 5 times (2 trip detection logic). |
|
| 1.READ VALUE USING INTELLIGENT TESTER (STOP LIGHT SWITCH) |
Connect the intelligent tester to the DLC3.
Turn the ignition switch to ON.
Turn the tester on.
Enter the following menus: Powertrain / Engine and ECT / Data List / Stop Light Switch.
Read the value displayed on the tester when the brake pedal is depressed and released.
| Brake Pedal | Display |
| Released | OFF |
| Depressed | ON |
|
| ||||
| OK | ||
 | ||
| ||
| 2.INSPECT STOP LIGHT SWITCH ASSEMBLY |
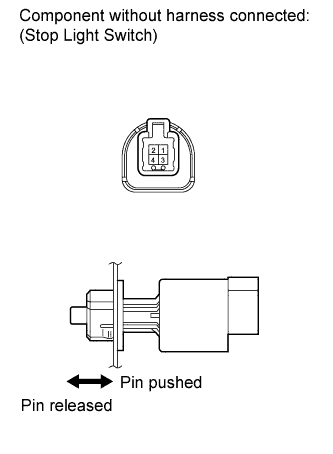 |
Disconnect the stop light switch assembly connector.
Remove the stop light switch assembly.
Measure the resistance according to the value(s) in the table below.
| Tester Connection | Switch Condition | Specified Condition |
| 1 - 2 | Switch pin released | Below 1 Ω |
| Switch pin pushed | 10 kΩ or higher | |
| 3 - 4 | Switch pin released | 10 kΩ or higher |
| Switch pin pushed | Below 1 Ω |
Reinstall the stop light switch assembly.
Reconnect the stop light switch assembly connector.
|
| ||||
| OK | |
 |
| 3.CHECK HARNESS AND CONNECTOR (ECM - STOP LIGHT SWITCH ASSEMBLY) |
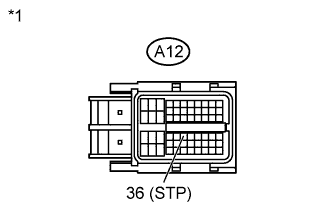 |
Disconnect the ECM connector.
Measure the voltage according to the value(s) in the table below.
| Tester Connection | Condition | Specified Condition |
| A12-36 (STP) - Body ground | Brake pedal depressed | 11 to 14 V |
| A12-36 (STP) - Body ground | Brake pedal released | Below 1.5 V |
| *1 | Front view of wire harness connector (to ECM) |
Reconnect the ECM connector.
|
| ||||
| OK | ||
| ||
| ||

