Home › BODY ELECTRICAL › AUDIO / VISUAL › RADIO ANTENNA CORD

RADIO ANTENNA CORD > INSTALLATION

for Preparation Click here


1. INSTALL NO. 3 ANTENNA CORD SUB-ASSEMBLY


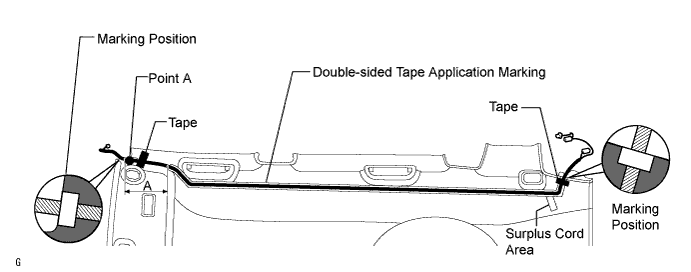
  1. for Short Body (w/o Sliding Roof):


    1. Apply new double-sided tape as shown in the illustration.

      B135634E01

      HINT:
      There are no installation markings in area A in the illustration. Therefore, apply the double-sided tape toward point A.

    2. Align the antenna cord masking tape and the edge of the roof headlining. Attach the antenna cord along the double-sided tape.

      HINT:
      Place any extra antenna cord length in the surplus cord area shown in the illustration.

    3. Apply tape to both ends of the antenna cord to fix the cord in place.
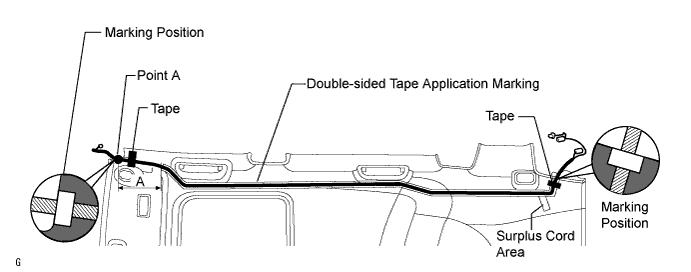


  1. for Short Body (w/ Sliding Roof):


    1. Apply new double-sided tape as shown in the illustration.


      B135636E01

      HINT:
      There are no installation markings in area A in the illustration. Therefore, apply the double-sided tape toward point A.

    2. Align the antenna cord masking tape and the edge of the roof headlining. Attach the antenna cord along the double-sided tape.

      HINT:
      Place any extra antenna cord length in the surplus cord area shown in the illustration.

    3. Apply tape to both ends of the antenna cord to fix the cord in place.
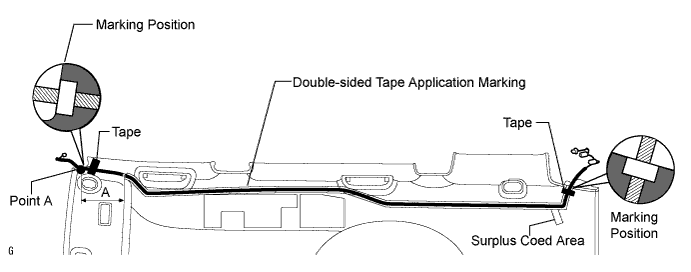


  1. for Long Body (w/o Sliding Roof):


    1. Apply new double-sided tape as shown in the illustration.


      B135635E01

      HINT:
      There are no installation markings in area A in the illustration. Therefore, apply the double-sided tape toward point A.

    2. Align the antenna cord masking tape and the edge of the roof headlining. Attach the antenna cord along the double-sided tape.

      HINT:
      Place any extra antenna cord length in the surplus cord area shown in the illustration.

    3. Apply tape to both ends of the antenna cord to fix the cord in place.
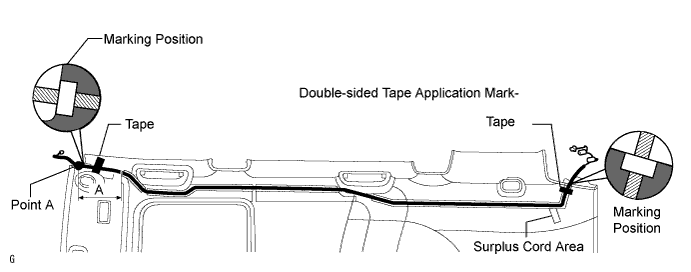


  1. for Long Body (w/ Sliding Roof):


    1. Apply new double-sided tape as shown in the illustration.


      B135637E01

      HINT:
      There are no installation markings in area A in the illustration. Therefore, apply the double-sided tape toward point A.

    2. Align the antenna cord masking tape and the edge of the roof headlining. Attach the antenna cord along the double-sided tape.

      HINT:
      Place any extra antenna cord length in the surplus cord area shown in the illustration.

    3. Apply tape to both ends of the antenna cord to fix the cord in place.


2. INSTALL ROOF HEADLINING ASSEMBLY
  1. for Short Body:
    Install the roof headlining (Click here).

  1. for Long Body:
    Install the roof headlining (Click here).


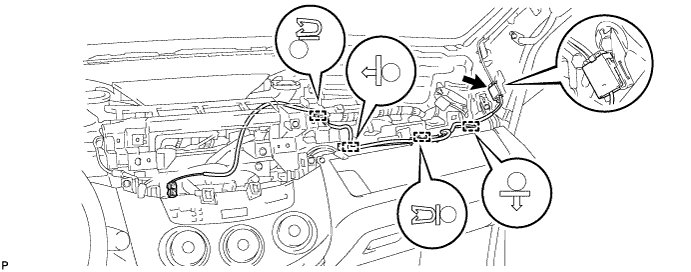
3. INSTALL ANTENNA CORD SUB-ASSEMBLY


  1. for 3ZR-FAE (w/Radio Receiver):


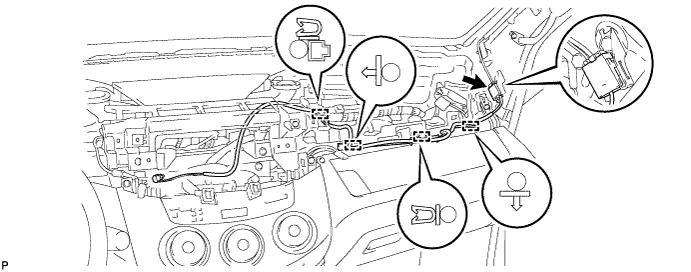
    1. Install the antenna cord with the 4 clamps.


      B223293

    2. Connect the connector.


  1. except 3ZR-FAE & for 3ZR-FAE (w/o Radio Receiver):


    1. Install the antenna cord with the 4 clamps.


      B222152

    2. Connect the connector.


4. INSTALL UPPER INSTRUMENT PANEL
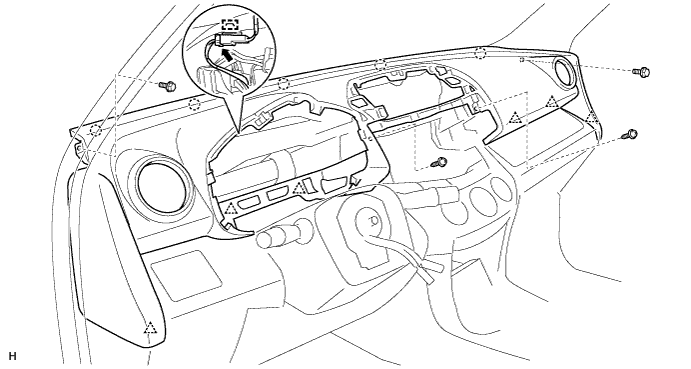
  1. Attach the 6 clips and 5 claws to install the instrument panel.

  1. Connect the connector and attach the clamp.

  1. Install the 2 bolts and 2 screws.


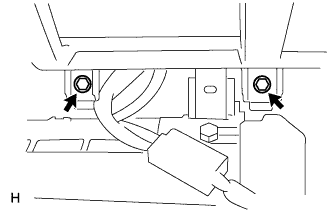
  1. Connect the passenger airbag connector.


    B208364


    B129886
  1. Install the 2 bolts to the passenger airbag.

    Torque:
    20 N*m{ 204 kgf*cm , 15 ft.*lbf }


5. INSTALL FRONT PILLAR GARNISH LH
  1. for Short Body:
    Install the front pillar garnish .

  1. for Long Body:
    Install the front pillar garnish .


6. INSTALL FRONT PILLAR GARNISH RH
  1. for Short Body:
    Install the front pillar garnish .

  1. for Long Body:
    Install the front pillar garnish .


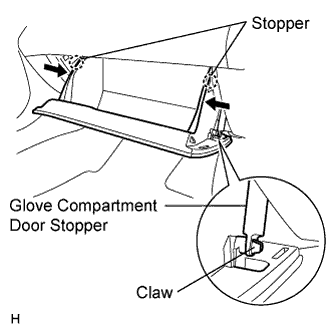
7. INSTALL GLOVE COMPARTMENT DOOR ASSEMBLY


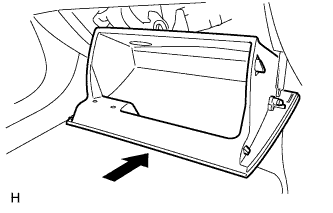
    B129887
  1. Attach the 2 hinges to install the door.


    B129889E03
  1. Attach the claw to the glove compartment door stopper.

  1. While pushing in the sides of the glove compartment door in the direction indicated by the arrows in the illustration, close the door to engage it to the 2 stoppers.


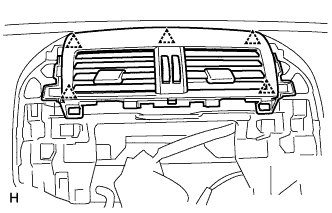
8. INSTALL INSTRUMENT PANEL REGISTER ASSEMBLY CENTER


B129890
  1. Attach the 5 clips to install the instrument panel register.


9. INSTALL NAVIGATION RECEIVER ASSEMBLY WITH BRACKET (w/ Navigation System)
  1. for HDD:

    1. Install the navigation receiver assembly with bracket .

  1. for DVD:

    1. Install the navigation receiver assembly with bracket .


10. INSTALL STEREO OPENING COVER (w/o Radio Receiver)


B129890
  1. Attach the 5 clips to install the instrument panel register.


11. INSTALL RADIO RECEIVER ASSEMBLY WITH BRACKET (w/ Radio Receiver)
  1. Remove the radio receiver assembly with bracket. (Click here).


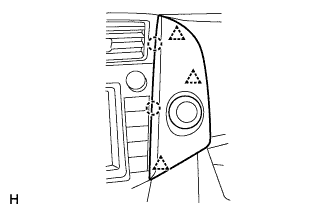
12. INSTALL NO. 1 INSTRUMENT CLUSTER FINISH PANEL CENTER


B210523
  1. Connect the connector.

  1. Attach the 3 clips and 2 claws to install the cluster finish panel.


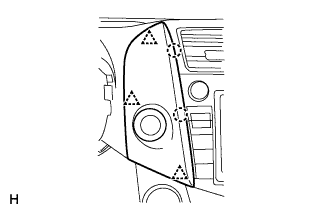
13. INSTALL NO. 2 INSTRUMENT CLUSTER FINISH PANEL CENTER


B210524
  1. Connect the connector.

  1. Attach the 3 clips and 2 claws to install the cluster finish panel.


14. INSTALL COMBINATION METER ASSEMBLY


    B129873
  1. Connect the connector.

  1. Attach the 2 clips to install the combination meter.

  1. Install the 2 screws.


15. INSTALL INSTRUMENT CLUSTER FINISH PANEL SUB-ASSEMBLY


    B129872
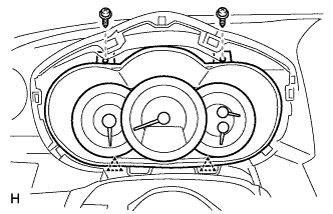
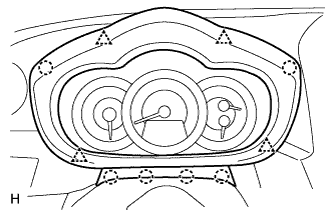
  1. Attach the 4 clips and 6 claws to install the instrument cluster finish panel.


16. CONNECT CABLE TO NEGATIVE BATTERY TERMINAL