 |
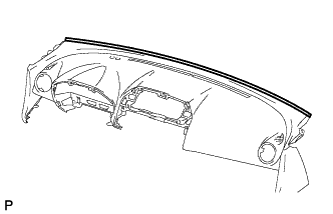
Install the cushion.
- HINT:
- The No. 1 instrument panel cushion can be reused. However, if sufficient adhesion cannot be attained, replace the No. 1 instrument panel cushion with a new one.
UPPER INSTRUMENT PANEL > REASSEMBLY |
| 1. INSTALL NO. 1 INSTRUMENT PANEL CUSHION |
|
Install the cushion.
| 2. INSTALL NO. 4 INSTRUMENT PANEL CUSHION |
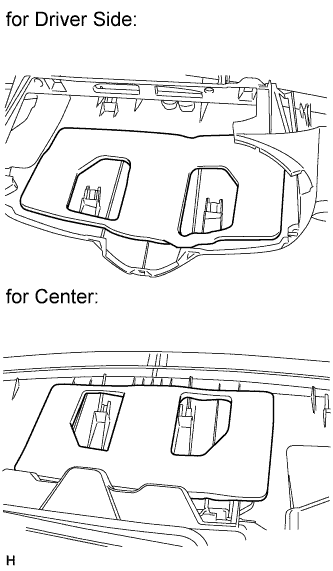 |
Install the 2 cushions.
| 3. INSTALL LOWER NO. 1 INSTRUMENT PANEL CUSHION |
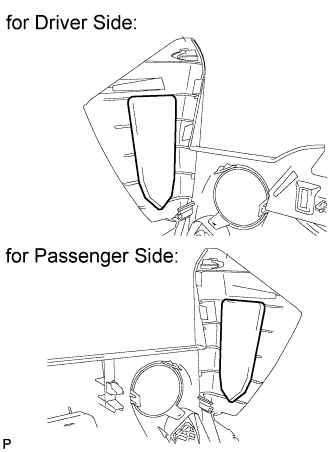 |
Install the 2 cushions.
| 4. INSTALL METER MOUNTING BRACKET |
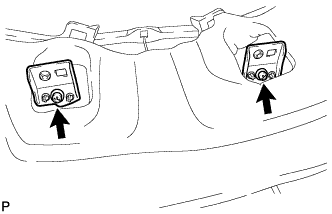 |
Install the 2 brackets with the 2 screws.
| 5. INSTALL COOLER (SOLAR SENSOR) THERMISTOR (for Automatic Air Conditioning System) |
Attach the 2 claws to install the thermistor.
| 6. INSTALL AUTOMATIC LIGHT CONTROL SENSOR (w/ Automatic Light Control System) |
Attach the 2 claws to install the sensor.
| 7. INSTALL NO. 2 INSTRUMENT PANEL WIRE |
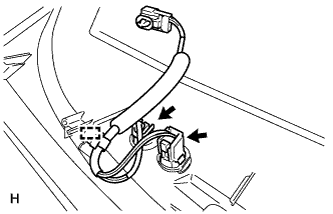 |
Attach the wire harness clamp to install the instrument panel wire.
Connect the connectors.
| 8. INSTALL FRONT PASSENGER AIRBAG ASSEMBLY |
Attach the rear side hook of the front passenger airbag to the rear side airbag door.
Bend the front side hook so that it attaches to the front side airbag door.
Install the instrument panel upper (Click here).
Install the 2 bolts to the reinforcement.
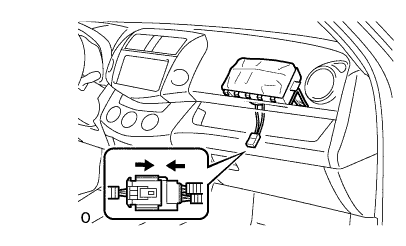 |
Connect the connector to the airbag.
Attach the wire harness clamp to the bracket.
| 9. INSTALL NO. 1 INSTRUMENT PANEL FINISH CUSHION |
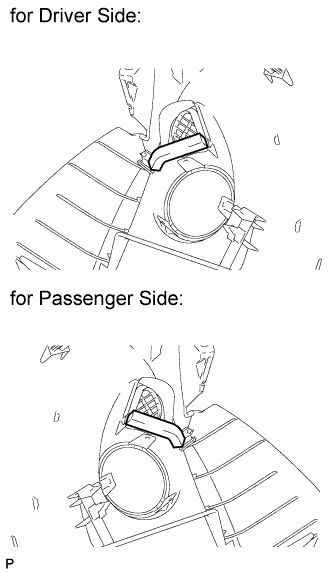 |
Install the 2 cushions.
| 10. INSTALL NO. 2 INSTRUMENT PANEL REGISTER ASSEMBLY |
| 11. INSTALL NO. 1 INSTRUMENT PANEL REGISTER ASSEMBLY |
| 12. INSTALL NAVIGATION ANTENNA ASSEMBLY (w/ Navigation System) |
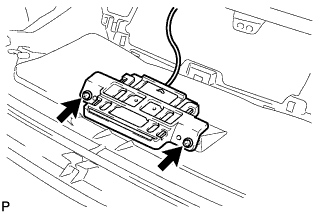 |
Install the navigation antenna with the 2 screws.
| 13. INSTALL NO. 3 HEATER TO REGISTER DUCT |
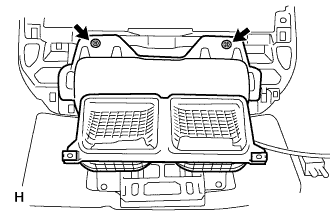 |
Install the duct with the 2 screws.
| 14. INSTALL NO. 2 HEATER TO REGISTER DUCT |
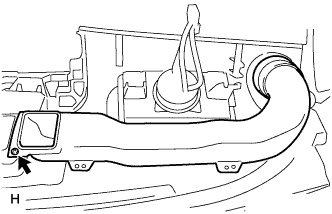 |
Install the duct with the screw.
| 15. INSTALL NO. 1 HEATER TO REGISTER DUCT |
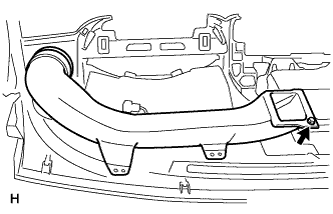 |
Install the duct with the screw.
| 16. INSTALL NO. 2 SIDE DEFROSTER NOZZLE DUCT |
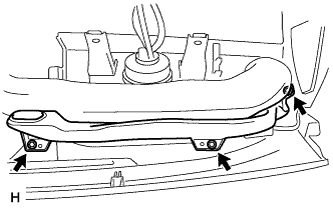 |
Install the duct with the 3 screws.
| 17. INSTALL NO. 1 SIDE DEFROSTER NOZZLE DUCT |
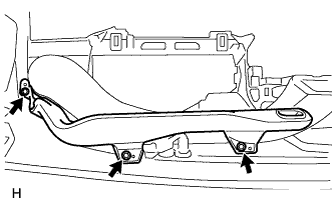 |
Install the duct with the 3 screws.