AUTOMATIC TRANSAXLE ASSEMBLY > REMOVAL |
| 1. REMOVE ENGINE ASSEMBLY WITH TRANSAXLE |
Remove the engine with transaxle (Click here).
| 2. DRAIN AUTOMATIC TRANSAXLE FLUID |
Remove the drain plug and gasket, and drain ATF.
Install a new gasket and the drain plug.
| 3. REMOVE STARTER ASSEMBLY |
|
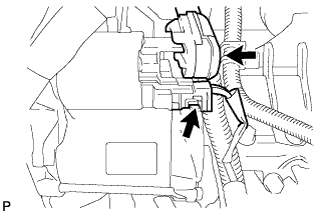
Disconnect the starter connector.
Open the terminal cap, and remove the nut and disconnect the starter wire.
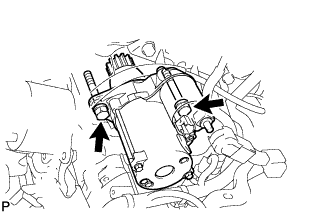 |
Remove the 2 bolts and starter.
| 4. DISCONNECT WIRE HARNESS |
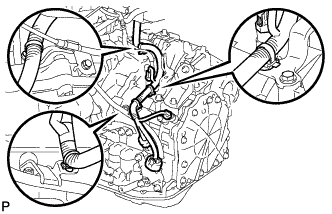 |
Disconnect the park/neutral position switch connector.
Disconnect the transaxle wire connector.
Disconnect the speed sensor connectors.
Disconnect the wire harness clamps.
| 5. REMOVE TRANSMISSION OIL COOLER HOSE AND TUBE |
Remove the oil cooler hoses and tube (Click here).
| 6. REMOVE ENGINE MOUNTING BRACKET RR |
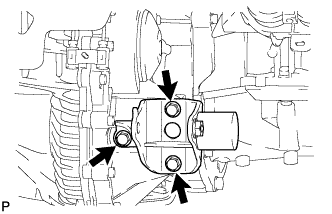 |
Remove the 3 bolts and mounting bracket.
| 7. REMOVE ENGINE MOUNTING BRACKET FR |
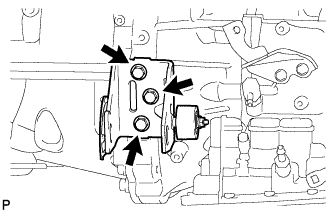 |
Remove the 3 bolts and mounting bracket.
| 8. REMOVE ENGINE MOUNTING BRACKET LH |
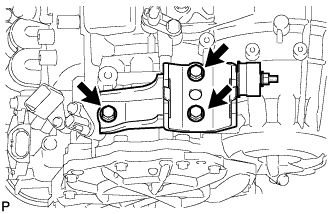 |
Remove the 3 bolts and mounting bracket.
| 9. REMOVE AUTOMATIC TRANSAXLE ASSEMBLY |
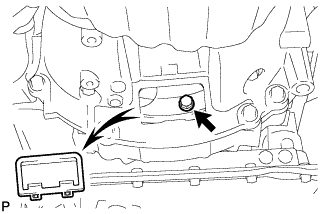 |
Remove the flywheel housing under cover.
Turn the crankshaft to gain access and remove the 6 bolts while holding the crankshaft pulley bolt with a wrench.
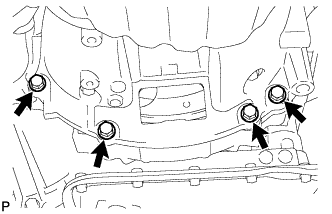 |
Remove the 4 lower side mounting bolts.
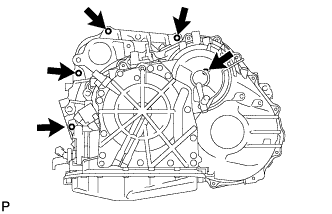 |
Remove the 5 upper side mounting bolts.
Separate and remove the automatic transaxle.
| 10. REMOVE TRANSMISSION OIL FILLER TUBE SUB-ASSEMBLY |
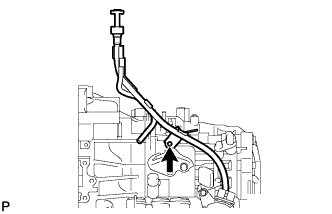 |
Remove the ATF dipstick.
Remove the bolt and oil filler tube.
| 11. REMOVE NO. 1 TRANSMISSION CONTROL CABLE BRACKET |
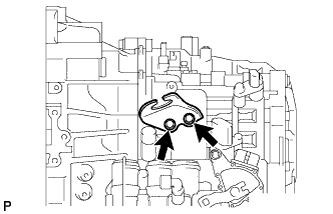 |
Remove the 2 bolts and cable bracket.
| 12. REMOVE TORQUE CONVERTER CLUTCH ASSEMBLY |