 |
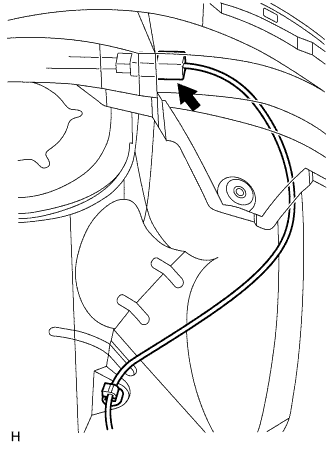
Disconnect the sensor connector.
DIFFERENTIAL OIL SEAL > REPLACEMENT |
| 1. DRAIN TRANSAXLE OIL |
Remove the filler plug and gasket.
Remove the drain plug and gasket, and then drain the manual transaxle oil.
Install a new gasket and the drain plug.
| 2. DRAIN TRANSFER OIL |
Remove the drain plug and gasket, and then drain the manual transaxle oil.
Install a new gasket and the drain plug.
| 3. REMOVE FRONT WHEELS |
| 4. REMOVE NO. 1 ENGINE UNDER COVER |
| 5. REMOVE FRONT EXHAUST PIPE |
for 1AZ-FE:
Remove front exhaust pipe .
for 2AZ-FE:
Remove front exhaust pipe .
| 6. REMOVE FRONT SPEED SENSOR LH |
|
Disconnect the sensor connector.
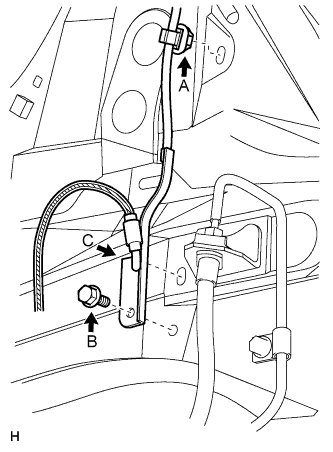 |
Remove the sensor clip (labeled A), bolt (labeled B) and sensor clamp (labeled C).
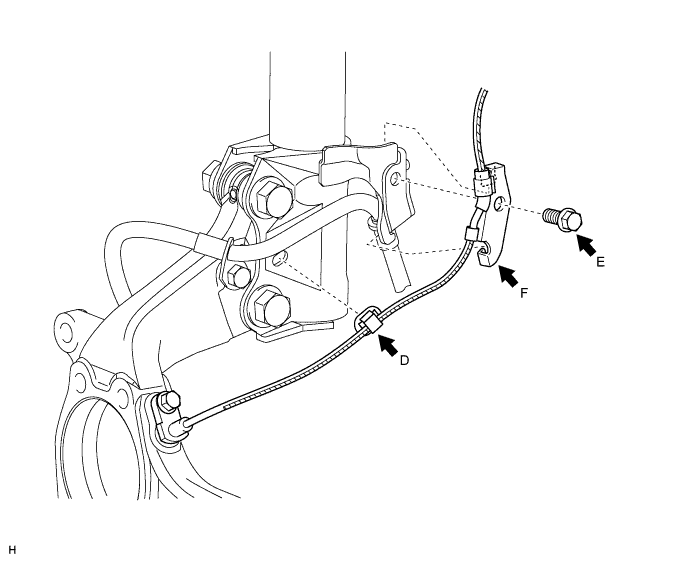
Remove the sensor clip (labeled D), bolt (labeled E) and sensor clamp (labeled F).
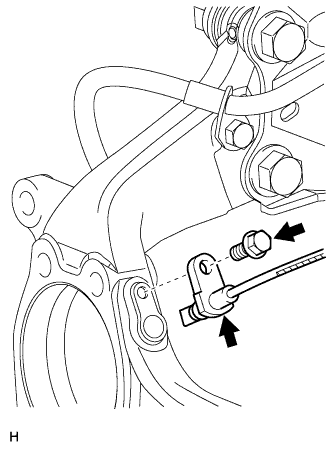 |
Remove the bolt and sensor from the knuckle.
| 7. REMOVE FRONT SPEED SENSOR RH |
| 8. DISCONNECT FRONT STABILIZER LINK ASSEMBLY LH |
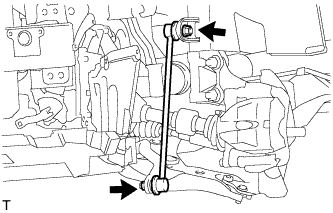 |
Remove the 2 nuts and stabilizer link.
| 9. DISCONNECT FRONT STABILIZER LINK ASSEMBLY RH |
| 10. DISCONNECT FRONT SUSPENSION NO. 1 LOWER ARM SUB-ASSEMBLY LH |
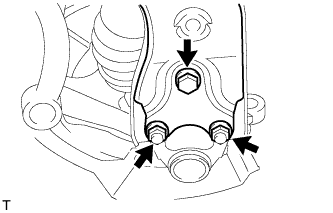 |
Remove the bolt and 2 nuts.
Disconnect the lower arm from the ball joint.
| 11. DISCONNECT FRONT SUSPENSION NO. 1 LOWER ARM SUB-ASSEMBLY RH |
| 12. REMOVE FRONT DRIVE SHAFT ASSEMBLY LH |
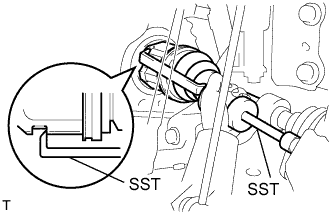 |
Using SST, remove the front drive shaft.
| 13. REMOVE FRONT DRIVE SHAFT ASSEMBLY RH |
| 14. REMOVE TRANSFER ASSEMBLY |
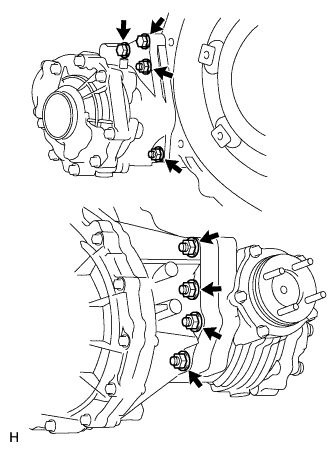 |
except K111F:
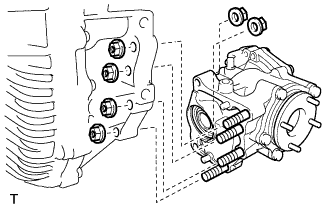
Remove the 6 nuts, 2 bolts and transfer from the transaxle.
 |
for K111F:
Remove the 6 nuts and transfer from the transaxle.
| 15. REMOVE TRANSAXLE CASE OIL SEAL LH |
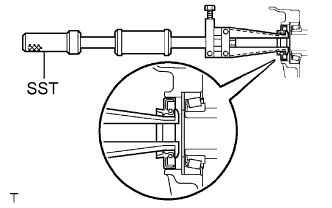 |
Using SST, tap out the transaxle case oil seal.
| 16. REMOVE TRANSAXLE CASE OIL SEAL RH |
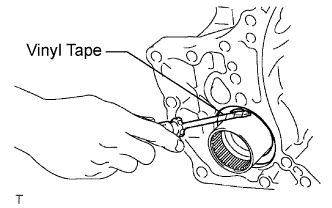 |
Remove the transaxle case oil seal RH (Outside).
Using a screwdriver with its tip wrapped with vinyl tape, pry out the oil seal.
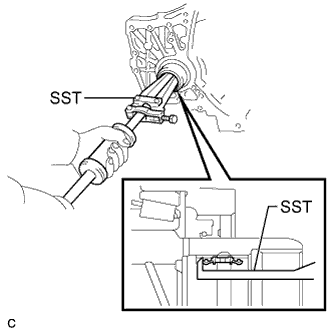 |
Remove the transaxle case oil seal RH (Inside).
Using SST, tap out the oil seal.
| 17. INSTALL TRANSAXLE CASE OIL SEAL LH |
Coat the lip of a new oil seal with MP grease.
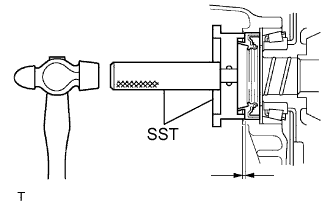 |
Using SST and a hammer, tap in the oil seal.
| 18. INSTALL TRANSAXLE CASE OIL SEAL RH |
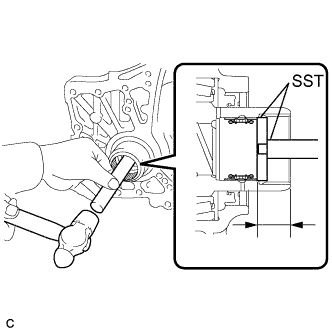 |
Install the transaxle case oil seal RH (Inside).
Coat the lip of the oil seal with MP grease.
Using SST and a hammer, tap in the oil seal.
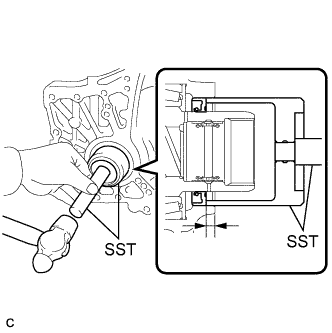 |
Install the transaxle case oil seal RH (Outside).
Coat the lip of a new oil seal with MP grease.
Using SST and a hammer, tap in the oil seal.
| 19. INSTALL TRANSFER ASSEMBLY |
|
except K111F:
Install the transfer to the transaxle with the 6 nuts and 2 bolts.
|
for K111F:
Install the transfer to the transaxle with the 6 nuts and 2 bolts.
| 20. INSTALL FRONT DRIVE SHAFT ASSEMBLY LH |
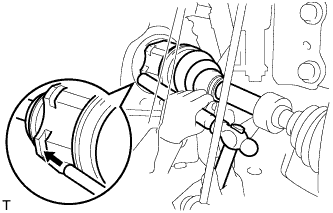 |
Coat the splines of the inboard joint shaft with gear oil.
Align the shaft splines and tap in the drive shaft with a brass bar and hammer.
| 21. INSTALL FRONT DRIVE SHAFT ASSEMBLY RH |
| 22. CONNECT FRONT SUSPENSION NO. 1 LOWER ARM SUB-ASSEMBLY LH |
Connect the lower arm to the ball joint with the 2 bolts and nut.
| 23. CONNECT FRONT SUSPENSION NO. 1 LOWER ARM SUB-ASSEMBLY RH |
| 24. CONNECT FRONT STABILIZER LINK ASSEMBLY LH |
Install the link with the 2 nuts.
| 25. INSTALL FRONT STABILIZER LINK ASSEMBLY RH |
| 26. INSTALL FRONT SPEED SENSOR LH |
|
Set the sensor into the knuckle, and then install the sensor with the bolt.
Install the sensor clamp and sensor clip as follows.
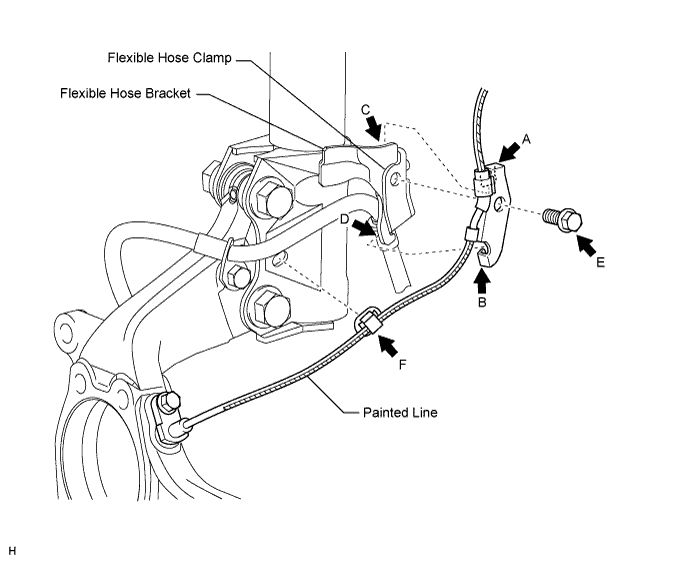
Simultaneously perform the following: 1) hang the hook part of the sensor clamp (labeled A) on the part of the flexible hose bracket (labeled C); and 2) insert the hook part of the sensor clamp (labeled B) to the part of the flexible hose bracket (labeled D).
Install the sensor clamp to the flexible hose clamp and flexible hose bracket with the bolt (labeled E).
Insert the sensor clip (labeled F) into the hole on the absorber lower bracket.
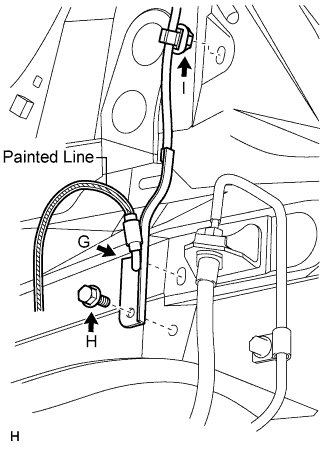 |
Install the sensor clamp and sensor clip as follows.
Set the sensor clamp (labeled G) on the side member, and then install the bolt (labeled H).
Insert the sensor clip (labeled I) into the hole on the apron.
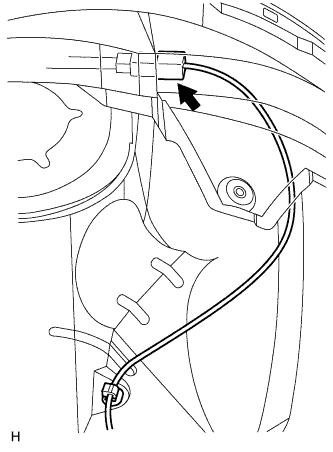 |
Connect the sensor connector.
| 27. INSTALL FRONT SPEED SENSOR RH |
| 28. INSTALL FRONT EXHAUST PIPE |
for 1AZ-FE:
Install front exhaust pipe .
for 2AZ-FE:
Install front exhaust pipe (Click here).
| 29. INSTALL NO. 1 ENGINE UNDER COVER |
| 30. INSTALL FRONT WHEELS |
| 31. ADD TRANSAXLE OIL |
| 32. INSPECT MANUAL TRANSAXLE OIL |
Stop the vehicle in a level place.
Remove the transaxle filler plug and gasket.
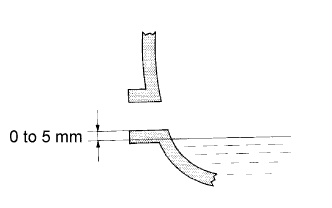 |
Check that the oil level is between 0 to 5 mm (0 to 0.20 in.) from the bottom lip of the filler plug opening. If the result is not as specified, add transaxle oil.
Check for oil leakage if the oil level is low.
Install the transaxle filler plug and a new gasket.
| 33. ADD TRANSFER OIL |
| 34. INSPECT TRANSFER OIL |
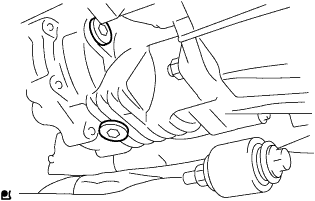 |
Remove the transfer case plug No. 2 (for filler) and gasket.
Check that the oil level is between 0 to 5.0 mm (0 to 0.20 in.) from the bottom lip of the case plug (for filler) hole.
If the result is not as specified, add transfer oil.
When the oil level is too low, check for oil leakage.
Install a new gasket into the case plug (for filler) and then install the plug.
| 35. INSPECT FRONT WHEEL ALIGNMENT |
Inspect wheel alignment (Click here).