FRONT DRIVE SHAFT ASSEMBLY (for 4WD) > INSTALLATION |
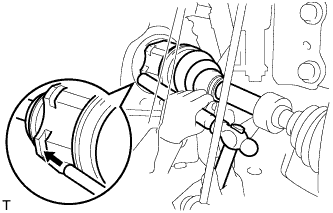
| 1. INSTALL FRONT DRIVE SHAFT ASSEMBLY LH |
|
Coat the splines of the inboard joint shaft with gear oil.
Align the shaft splines and tap in the drive shaft with a brass bar and hammer.
| 2. INSTALL FRONT DRIVE SHAFT ASSEMBLY RH |
Coat the splines of the inboard joint shaft with gear oil.
Align the shaft splines and securely insert the drive shaft.
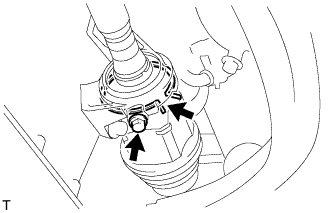 |
Squeeze the ends of the snap ring and install it to the bearing bracket.
Install a new bearing bracket bolt.
| 3. CONNECT STEERING KNUCKLE WITH AXLE HUB LH |
Align the matchmarks and connect the steering knuckle with axle hub.
| 4. CONNECT STEERING KNUCKLE WITH AXLE HUB RH |
| 5. CONNECT FRONT SUSPENSION LOWER NO. 1 ARM SUB-ASSEMBLY LH |
Connect the lower arm to the ball joint with the 2 bolts and nut.
| 6. CONNECT FRONT SUSPENSION LOWER NO. 1 ARM SUB-ASSEMBLY RH |
| 7. INSTALL FRONT STABILIZER LINK ASSEMBLY LH |
Install the link with the 2 nuts.
| 8. INSTALL FRONT STABILIZER LINK ASSEMBLY RH |
| 9. CONNECT TIE ROD END SUB-ASSEMBLY LH |
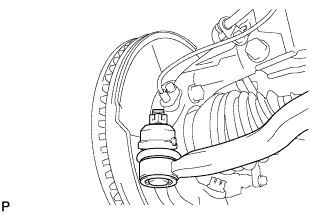 |
Connect the tie rod end to the steering knuckle with the castle nut.
Install a new cotter pin.
| 10. CONNECT TIE ROD END SUB-ASSEMBLY RH |
| 11. CONNECT FRONT DISC BRAKE CYLINDER ASSEMBLY LH |
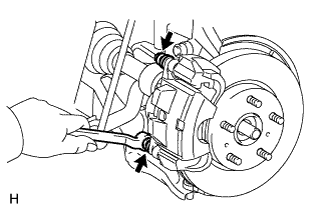 |
Install the cylinder with the 2 bolts.
| 12. CONNECT FRONT DISC BRAKE CYLINDER ASSEMBLY RH |
| 13. INSTALL FRONT SPEED SENSOR LH |
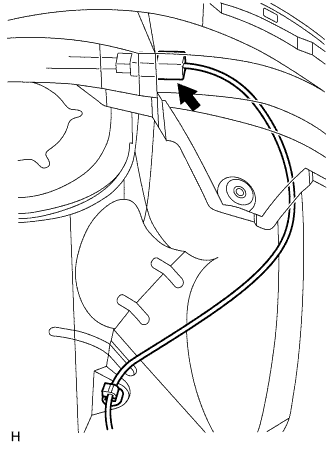 |
Disconnect the sensor connector.
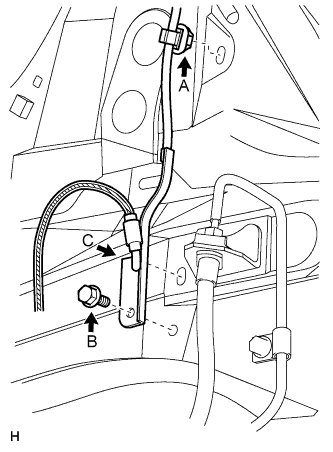 |
Remove the sensor clip (labeled A), bolt (labeled B) and sensor clamp (labeled C).
Remove the sensor clip (labeled D), bolt (labeled E) and sensor clamp (labeled F).
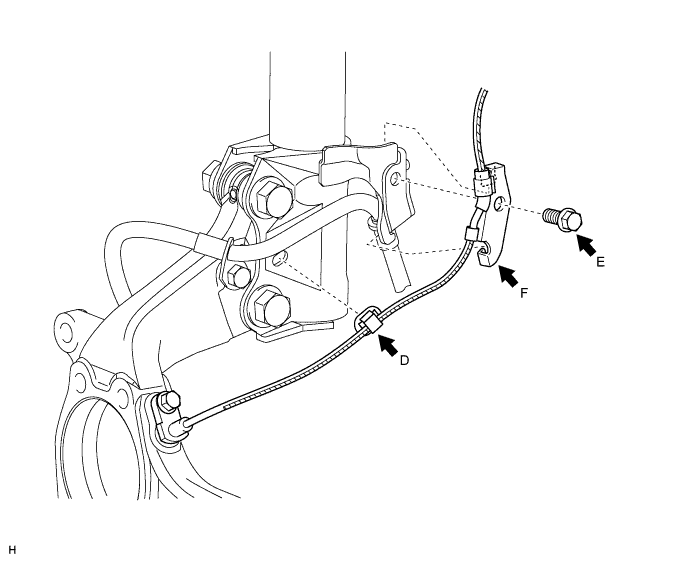
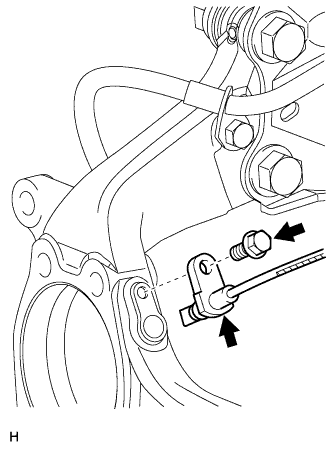 |
Remove the bolt and sensor from the knuckle.
| 14. INSTALL FRONT SPEED SENSOR RH |
| 15. INSTALL FRONT AXLE HUB NUT |
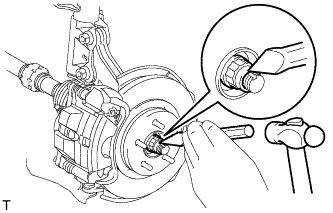 |
Clean the threaded parts on the drive shaft and axle hub nut using a non-residue solvent.
Install a new hub nut.
Using a chisel and hammer, stake the hub nut.
| 16. INSTALL FRONT WHEEL |
| 17. ADD AUTOMATIC TRANSAXLE FLUID (for Automatic Transaxle) |
for U140F:
Add automatic transaxle fluid .
for U151F:
Add automatic transaxle fluid .
| 18. ADD TRANSAXLE OIL (for Manual Transaxle) |
for E352F/E359F:
Add transaxle oil .
for EB61F:
Add transaxle oil .
| 19. INSPECT FOR OIL LEAK |
| 20. INSPECT AND ADJUST FRONT WHEEL ALIGNMENT |
Inspect and adjust the front wheel alignment (Click here).