 |
Apply MP grease to the lip of a new oil seal.
- NOTICE:
- Do not allow foreign matter to contact the lip of the oil seal.
- Do not allow MP grease to contact the dust seal.
REAR CRANKSHAFT OIL SEAL > INSTALLATION |
| 1. INSTALL ENGINE REAR OIL SEAL |
|
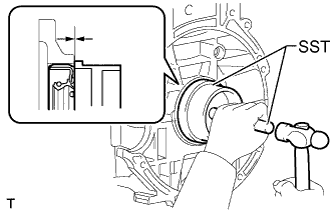
Apply MP grease to the lip of a new oil seal.
Using SST and a hammer, tap in the oil seal until its surface is flush with the edges of the cylinder block and crankcase.
| 2. INSTALL DRIVE PLATE AND RING GEAR SUB-ASSEMBLY (for CVT) |
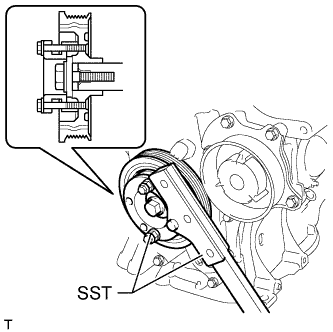 |
Using SST, hold the crankshaft.
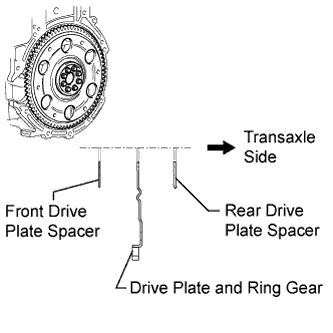 |
Install the front spacer, drive plate and rear spacer onto the crankshaft.
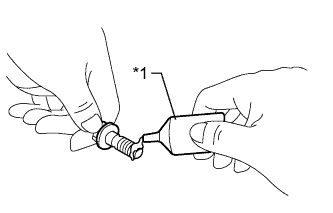 |
Clean the bolts and bolt holes.
Apply adhesive to 2 or 3 threads at the end of the 8 bolts.
| *1 | Adhesive |
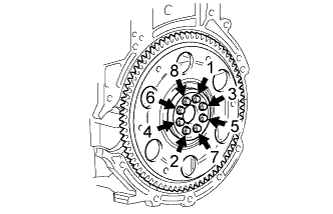 |
Uniformly install and tighten the 8 bolts in several steps in the sequence shown in the illustration.
| 3. INSTALL FLYWHEEL SUB-ASSEMBLY (for Manual Transaxle) |
|
Using SST, hold the crankshaft.
|
Clean the bolts and bolt holes.
Apply adhesive to 2 or 3 threads at the end of the 8 bolts.
| *1 | Adhesive |
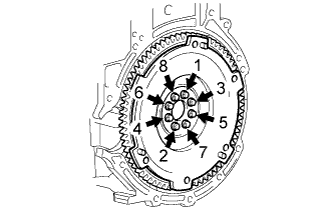 |
Uniformly install and tighten the 8 bolts in several steps in the sequence shown in the illustration.
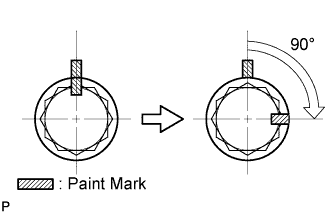 |
Mark the top of the bolts with paint.
Retighten the 8 bolts an additional 90° in the same sequence.
Check that the paint marks are now at a 90° angle to the top.
| 4. INSTALL CLUTCH DISC ASSEMBLY (for Manual Transaxle) |
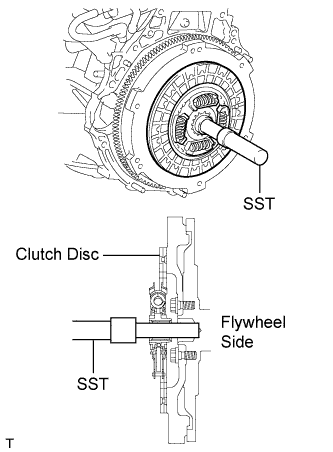 |
Insert SST into the clutch disc assembly, and then attach them both to the flywheel sub-assembly.
| 5. INSTALL CLUTCH RELEASE WITH BEARING CYLINDER ASSEMBLY (for Manual Transaxle) |
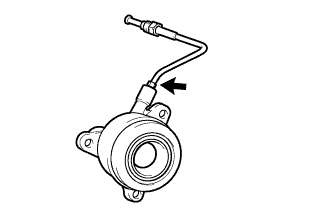 |
Temporarily install the clutch release cylinder to bleeder tube to a new clutch release with bearing cylinder assembly.
Clean and degrease all installation surfaces for the clutch release with bearing cylinder assembly.
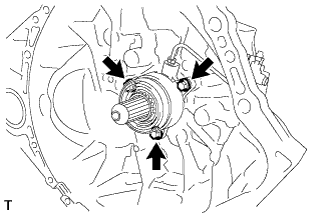 |
Install the clutch release with bearing cylinder assembly with 3 new bolts.
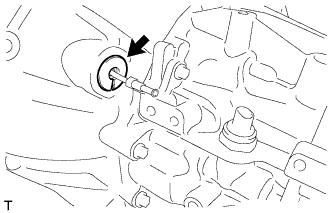 |
Install the clutch tube boot to the manual transaxle assembly.
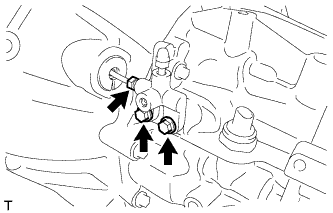 |
Temporarily install the clutch release cylinder to bleeder tube to the clutch release bleeder sub-assembly.
Temporarily install the clutch release bleeder sub-assembly with the 2 bolts.
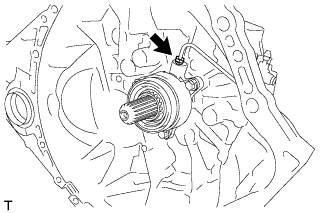 |
Using a union nut wrench, install the clutch release cylinder to bleeder tube to the clutch release with bearing cylinder assembly.
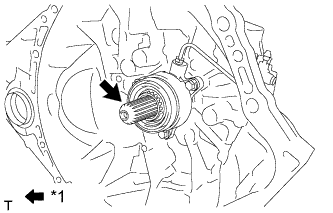 |
Apply clutch spline grease to the input shaft spline.
| *1 | Clutch Spline Grease |
| 6. REMOVE CLUTCH RELEASE BLEEDER SUB-ASSEMBLY (for Manual Transaxle) |
|
Separate the clutch release cylinder to bleeder tube from the clutch release bleeder sub-assembly.
Remove the 2 bolts and clutch release bleeder sub-assembly.
| 7. INSPECT CLUTCH PIPE LINE (for Manual Transaxle) |
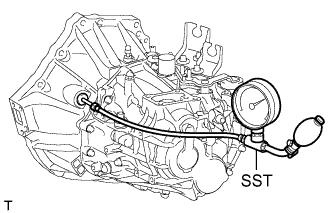 |
Using SST, apply a pressure of 100 kPa (1.0 kgf/cm2, 15 psi) to the clutch pipe location shown in the illustration and confirm that pressure is maintained for 15 seconds or more.
| 8. INSTALL CLUTCH RELEASE BLEEDER SUB-ASSEMBLY (for Manual Transaxle) |
|
Temporarily install the clutch release cylinder to bleeder tube to the clutch release bleeder sub-assembly.
Install the clutch release bleeder sub-assembly with the 2 bolts.
Using a union nut wrench, install the clutch release cylinder to bleeder tube.
| 9. INSTALL CLUTCH ORIFICE ASSEMBLY (for Manual Transaxle) |
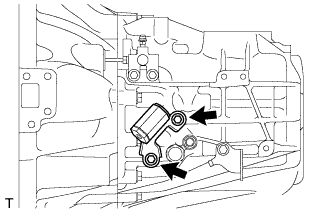 |
Install the clutch orifice assembly with the 2 bolts.
| 10. INSTALL CLUTCH RELEASE CYLINDER TO ACCUMULATOR TUBE (for Manual Transaxle) |
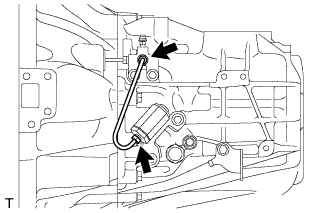 |
Using a union nut wrench, install the clutch release cylinder to accumulator tube.
| 11. INSTALL ORIFICE TO FLEXIBLE HOSE TUBE (for Manual Transaxle) |
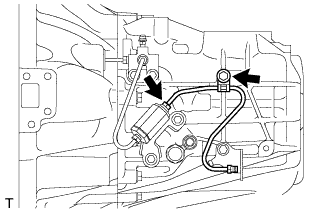 |
Temporarily tighten the orifice to flexible hose tube onto the clutch orifice assembly.
Install the orifice to flexible hose tube with the bolt.
Using a union nut wrench, install the orifice to flexible hose tube.
| 12. INSTALL CLUTCH COVER ASSEMBLY (for Manual Transaxle) |
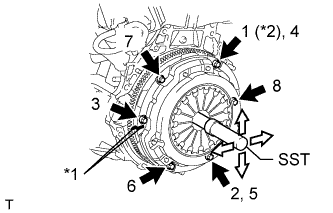 |
| *1 | Matchmark |
| *2 | Temporarily Install |
Align the matchmark on the clutch cover assembly with the one on the flywheel sub-assembly.
Following the order shown in the illustration, tighten the 6 bolts, starting with the bolt located near the knock pin at the top.
| 13. INSPECT AND ADJUST CLUTCH COVER ASSEMBLY (for Manual Transaxle) |
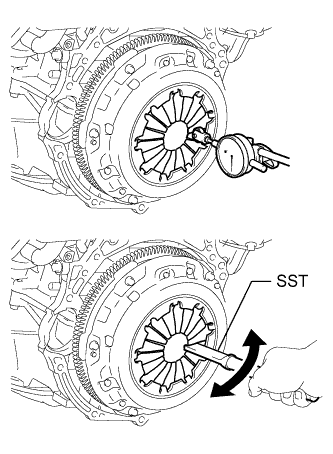 |
Using a dial indicator with a roller instrument, check the diaphragm spring tip alignment.
| 14. INSTALL MANUAL TRANSAXLE ASSEMBLY (for Manual Transaxle) |
for 2WD:
Install the manual transaxle assembly (Click here).
for 4WD:
Install the manual transaxle assembly (Click here).
| 15. INSTALL CONTINUOUSLY VARIABLE TRANSAXLE ASSEMBLY (for CVT) |
Install the continuously variable transaxle assembly (Click here).
| 16. INSTALL ENGINE ASSEMBLY WITH TRANSAXLE |
Install the engine assembly with transaxle (Click here).