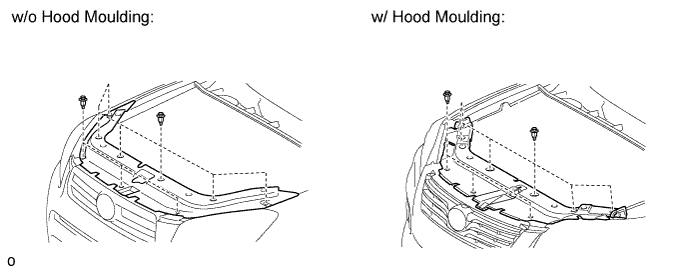
Remove the 9 clips and radiator support opening cover.
ENGINE ASSEMBLY > REMOVAL |
| 1. DISCHARGE FUEL SYSTEM PRESSURE |
Discharge fuel system pressure (Click here).
| 2. DISCONNECT CABLE FROM NEGATIVE BATTERY TERMINAL |
| 3. POSITION FRONT WHEELS FACING STRAIGHT AHEAD |
| 4. REMOVE FRONT WHEEL |
| 5. REMOVE RADIATOR SUPPORT OPENING COVER |
Remove the 9 clips and radiator support opening cover.
| 6. REMOVE NO. 1 ENGINE UNDER COVER |
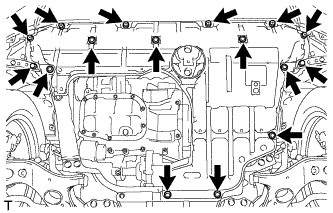 |
Remove the 6 screws, 10 clips and under cover.
| 7. REMOVE REAR ENGINE UNDER COVER RH |
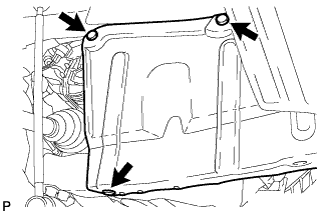 |
Remove the 3 clips and under cover.
| 8. REMOVE REAR ENGINE UNDER COVER LH |
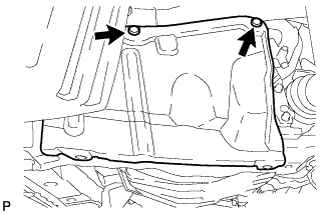 |
Remove the 2 clips and under cover.
| 9. REMOVE NO. 2 ENGINE UNDER COVER |
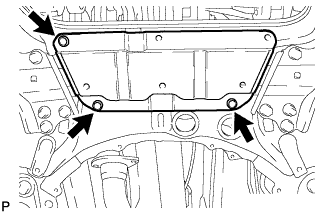 |
Remove the 3 clips and under cover.
| 10. REMOVE FRONT FLOOR COVER |
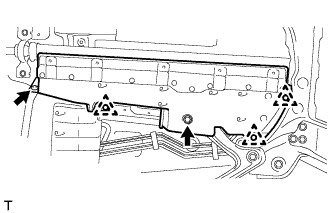 |
Remove the nut, bolt, 3 clips and floor cover.
| 11. DRAIN ENGINE COOLANT |
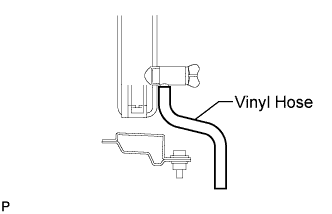 |
Install a vinyl hose to the drain cock plug on the radiator side.
Loosen the radiator drain cock plug.
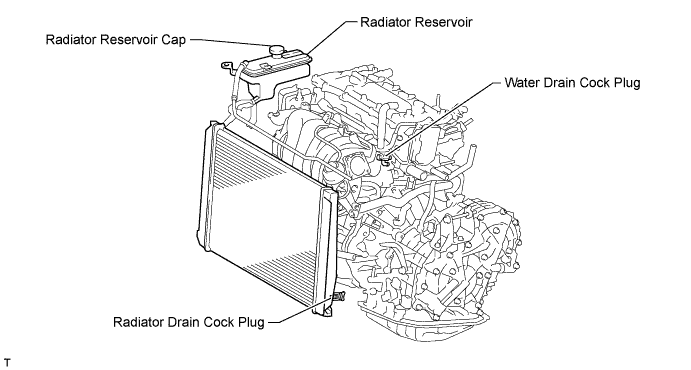
Remove the radiator reservoir cap.
Loosen the water drain cock plug.
| 12. DRAIN ENGINE OIL |
Remove the oil filler cap.
Remove the 2 clips and open the oil pan drain service cover.
Remove the oil pan drain plug and gasket, and drain the engine oil into a container.
| 13. DRAIN MANUAL TRANSAXLE OIL (for Manual Transaxle) |
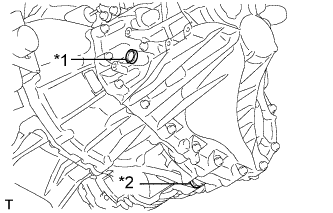 |
Remove the filler plug and gasket.
| *1 | Filler Plug |
| *2 | Drain Plug |
Remove the drain plug and gasket to drain the manual transaxle oil.
Install a new gasket and the drain plug.
| 14. DRAIN CONTINUOUSLY VARIABLE TRANSAXLE FLUID (for CVT) |
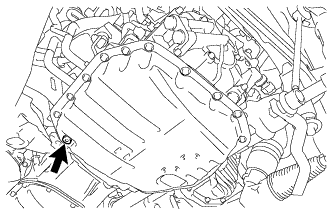 |
Using a 6 mm socket hexagon wrench, remove the overflow plug and gasket from the continuously variable transaxle assembly.
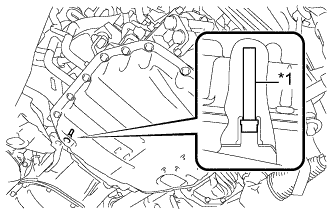 |
Using a 6 mm socket hexagon wrench, remove the No. 1 transmission oil filler tube from the continuously variable transaxle assembly and drain the continuously variable transaxle fluid.
| *1 | No. 1 Transmission Oil Filler Tube |
Using a 6 mm socket hexagon wrench, install the No. 1 transmission oil filler tube to the continuously variable transaxle assembly.
Temporarily install the gasket and overflow plug.
| 15. DRAIN TRANSFER OIL (for 4WD) |
Remove the drain plug and gasket, and drain the oil.
Install a new gasket and the drain plug.
| 16. REMOVE NO. 2 CYLINDER HEAD COVER |
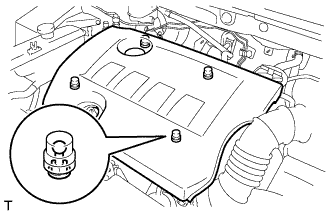 |
Hold the rear of the cover and raise it to detach the 2 clips on the rear of the cover. Continue to raise the cover to detach the 2 clips on the front of the cover and remove the cover.
| 17. REMOVE RADIATOR RESERVOIR ASSEMBLY |
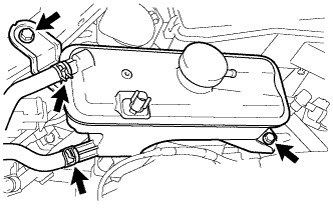 |
Disconnect the No. 1 and No. 2 water by-pass hoses.
Remove the 2 bolts and radiator reservoir.
| 18. REMOVE V-RIBBED BELT |
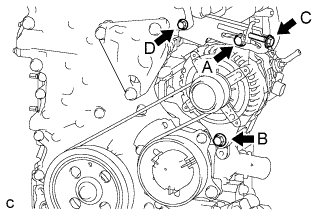 |
Loosen bolts A and B.
Loosen bolt C and remove the V-ribbed belt.
| 19. REMOVE GENERATOR ASSEMBLY |
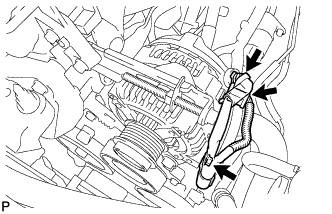 |
Remove the terminal cap.
Remove the nut and disconnect the wire harness from terminal B.
Disconnect the connector and wire harness clamp.
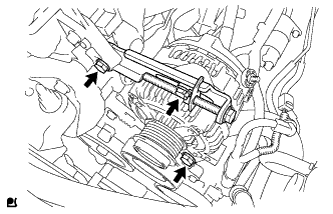 |
Loosen the 3 bolts.
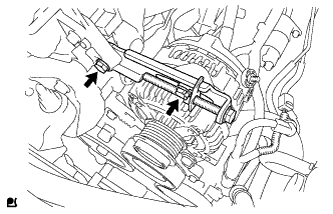 |
Remove the 2 bolts and adjusting bar.
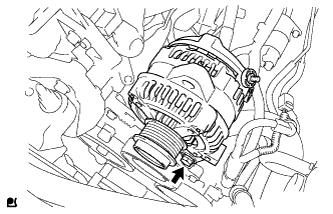 |
Remove the bolt and generator.
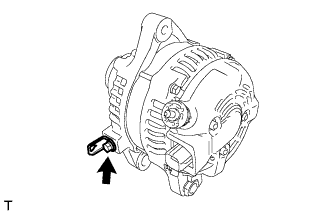 |
Remove the bolt and wire harness clamp bracket.
| 20. DISCONNECT NO. 2 RADIATOR HOSE |
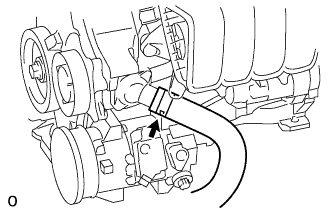 |
Disconnect the radiator hose from the water inlet.
| 21. DISCONNECT COMPRESSOR WITH PULLEY ASSEMBLY (w/ Air Conditioning System) |
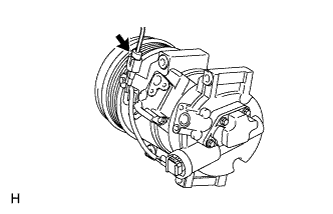 |
Disconnect the connector.
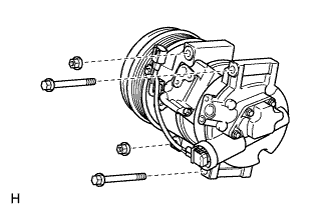 |
Remove the 2 bolts and 2 nuts.
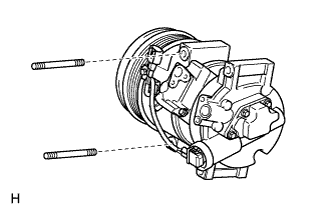 |
Using an E8 "TORX" socket wrench, remove the 2 stud bolts and disconnect the compressor with pulley assembly.
| 22. REMOVE BATTERY CLAMP SUB-ASSEMBLY |
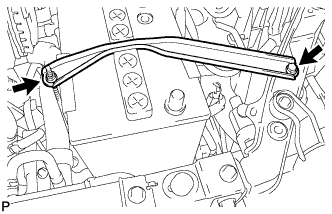 |
Remove the bolt and loosen the nut.
Detach the hook of the battery clamp from the front battery bracket, and then remove the battery clamp.
| 23. REMOVE BATTERY |
| 24. REMOVE BATTERY TRAY |
| 25. REMOVE FRONT BATTERY BRACKET |
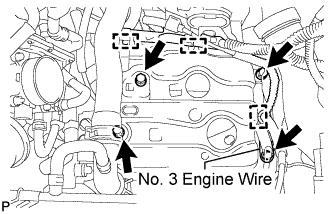 |
Detach the 3 wire harness clamps.
Remove the 4 bolts, disconnect the No. 3 engine wire and remove the front battery bracket.
| 26. REMOVE BATTERY BRACKET REINFORCEMENT |
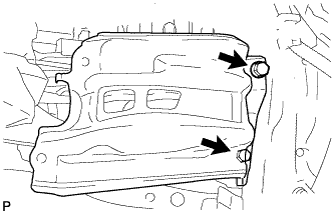 |
Remove the 2 bolts and battery bracket reinforcement.
| 27. REMOVE AIR CLEANER CAP SUB-ASSEMBLY |
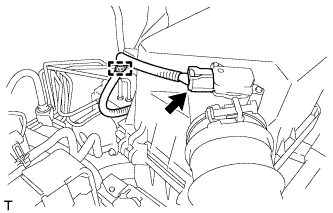 |
Disconnect the mass air flow meter connector.
Detach the clamp.
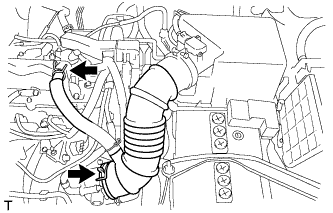 |
Disconnect the No. 2 ventilation hose from the cylinder head cover.
Squeeze the taps of the air cleaner hose clamp, and then disconnect the air cleaner hose from the throttle body.
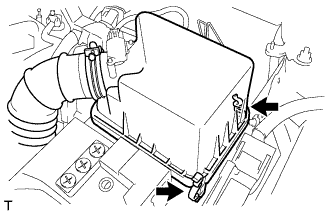 |
Detach the 2 hook clamps, and then remove the air cleaner cap and hose.
| 28. REMOVE AIR CLEANER CASE |
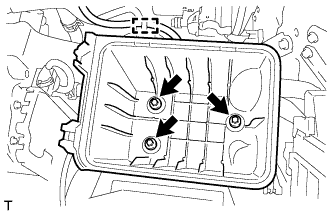 |
Disconnect the wire harness clamp from the air cleaner case.
Remove the 3 bolts and air cleaner case.
| 29. REMOVE ECM |
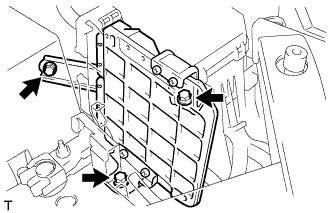 |
Remove the 3 bolts of the ECM with brackets.
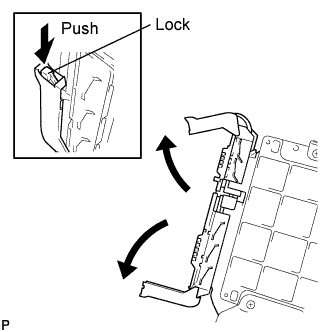 |
Disconnect the 2 ECM connectors.
Raise the 2 levers while pushing the locks on the 2 levers, and disconnect the 2 ECM connectors.
Remove the ECM with brackets.
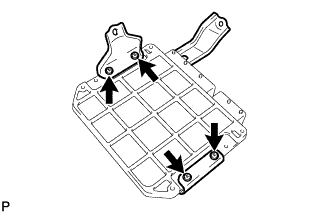 |
Remove the 4 screws and 2 ECM brackets.
| 30. DISCONNECT NO. 1 RADIATOR HOSE |
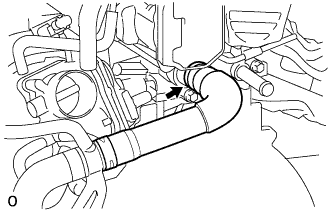 |
Disconnect the radiator hose from the cylinder head.
| 31. DISCONNECT FUEL TUBE SUB-ASSEMBLY |
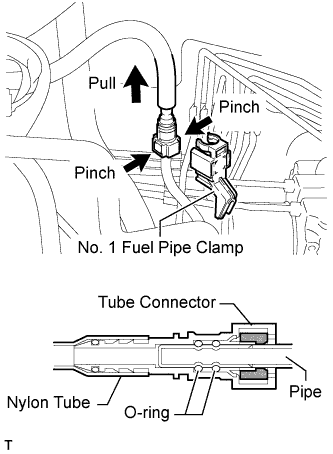 |
Remove the No. 1 fuel pipe clamp.
Pinch the tube connector and then pull the fuel tube connector off of the fuel pipe.
| 32. DISCONNECT WIRE HARNESS AND HOSE |
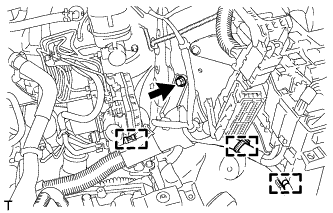 |
Remove the bolt. Then disconnect the 3 clamps and engine wire.
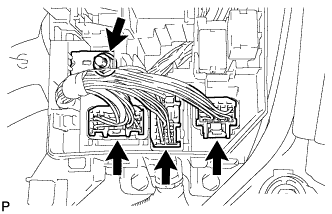 |
Remove the nut and disconnect the engine wire.
Disconnect the 3 relay block connectors.
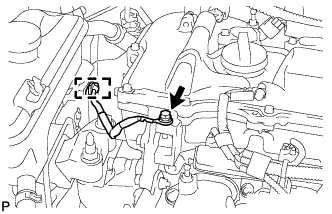 |
Remove the bolt. Then disconnect the clamp and ground wire.
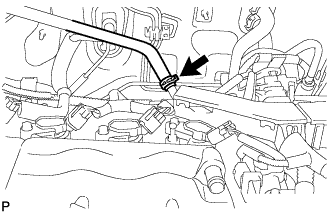 |
Disconnect the connector tube hose.
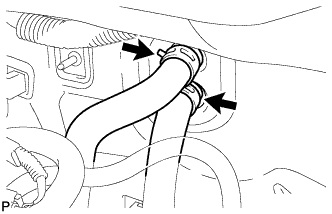 |
Disconnect the 2 heater hoses.
| 33. DISCONNECT TRANSMISSION CONTROL CABLE ASSEMBLY (for Manual Transaxle) |
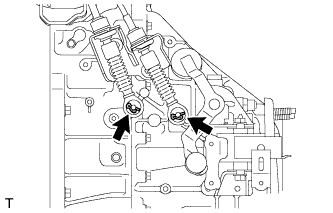 |
Removal the 2 clips and washers, and disconnect the top ends of the control cable from the transaxle.
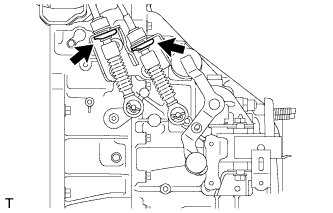 |
Remove the 2 clips and disconnect the control cable from the control cable bracket.
| 34. DISCONNECT TRANSMISSION CONTROL CABLE ASSEMBLY (for CVT) |
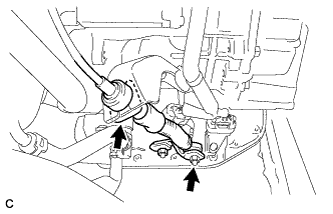 |
Remove the nut and disconnect the control cable from the control shaft lever.
Remove the clip and disconnect the transmission control cable from the control cable bracket.
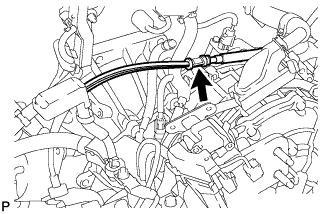 |
Disconnect the control cable from the control cable support.
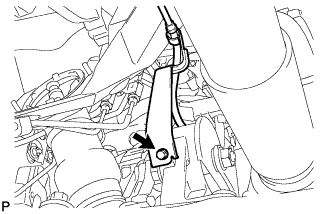 |
Remove the bolt and disconnect the clamp of the control cable.
| 35. DISCONNECT CLUTCH TUBE (for Manual Transaxle) |
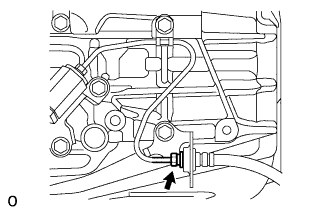 |
Using a 10 mm union nut wrench, disconnect the clutch hose from the flexible hose tube.
Remove the clip and disconnect the clutch hose.
| 36. REMOVE COLUMN HOLE COVER SILENCER SHEET |
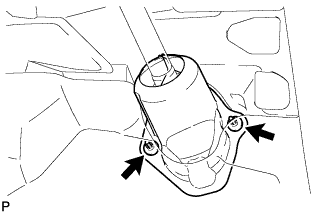 |
Turn back the floor carpet and remove the 2 clips and silencer sheet.
| 37. DISCONNECT NO. 2 STEERING INTERMEDIATE SHAFT ASSEMBLY |
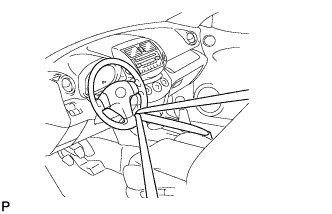 |
Use a seat belt to fix the steering wheel in place to avoid breakage of the spiral cable.
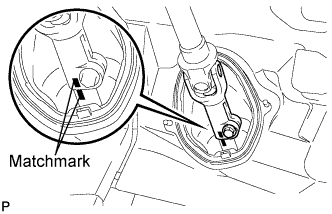 |
Place matchmarks on the No. 2 steering intermediate shaft and steering intermediate shaft.
Remove the bolt and disconnect the No. 2 steering intermediate shaft.
| 38. DISCONNECT NO. 1 STEERING COLUMN HOLE COVER SUB-ASSEMBLY |
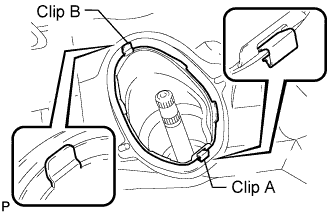 |
Remove the clip A, detach the clip B from the body and disconnect the No. 1 steering column hole cover.
| 39. REMOVE FRONT AXLE SHAFT NUT LH |
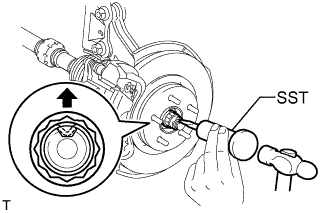 |
Using SST and a hammer, unstake the staked part of the nut.
While applying the brakes, remove the lock axle hub nut.
| 40. REMOVE FRONT AXLE SHAFT NUT RH |
| 41. REMOVE FRONT AXLE HUB SUB-ASSEMBLY LH |
Remove the front axle hub sub-assembly LH (Click here).
| 42. REMOVE FRONT AXLE HUB SUB-ASSEMBLY RH |
| 43. REMOVE DRIVE SHAFT |
for 2WD:
Remove the front drive shafts .
for 4WD:
Remove the front drive shafts .
| 44. REMOVE FRONT EXHAUST PIPE ASSEMBLY |
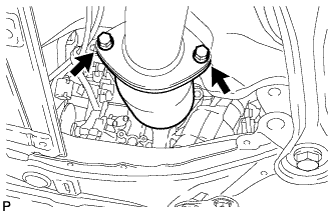 |
Remove the 2 bolts and disconnect the front exhaust pipe from the center exhaust pipe.
Remove the gasket from the exhaust pipe.
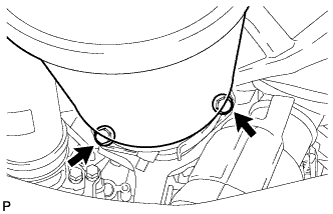 |
Remove the 2 bolts, 2 compression springs and front exhaust pipe.
| 45. DISCONNECT HEATED OXYGEN SENSOR (for 4WD) |
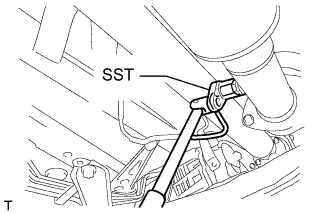 |
Disconnect the grommet from the floor panel.
Using SST, loosen the sensor, and then disconnect the sensor by hand.
| 46. REMOVE PROPELLER WITH CENTER BEARING SHAFT ASSEMBLY (for 4WD) |
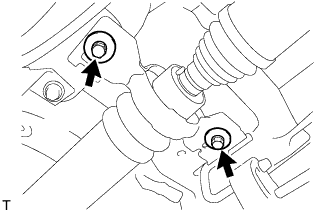 |
Remove the 2 bolts and 2 adjusting washers, and disconnect the propeller with center bearing shaft.
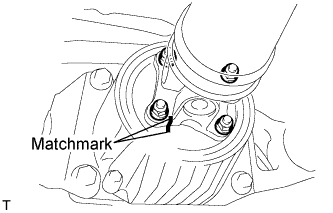 |
Place matchmarks on the differential carrier and propeller shaft.
Remove the 4 nuts and 4 washers, and disconnect the propeller shaft and differential carrier.
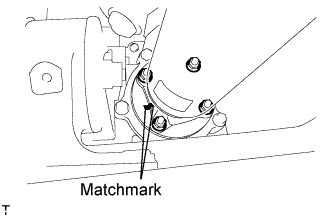 |
Place matchmarks on the transfer and propeller shaft.
Remove the 4 nuts and 4 washers, and disconnect the propeller shaft from the transfer.
| 47. REMOVE DRIVE PLATE AND TORQUE CONVERTER SETTING BOLT (for CVT) |
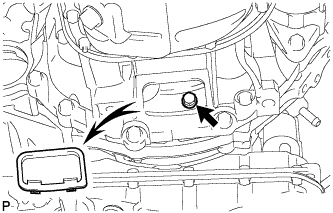 |
Remove the flywheel housing under cover.
Turn the crankshaft to gain access to the 6 bolts and remove each bolt while holding the crankshaft pulley bolt with a wrench.
| 48. REMOVE FRONT SUSPENSION MEMBER REINFORCEMENT LH |
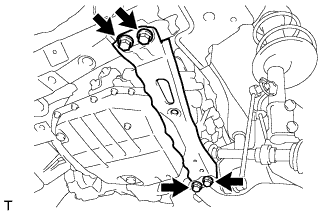 |
Remove the 4 bolts and reinforcement.
| 49. REMOVE FRONT SUSPENSION MEMBER REINFORCEMENT RH |
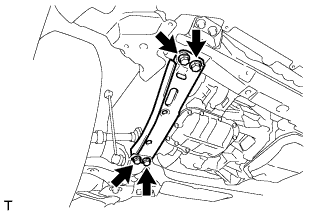 |
Remove the 4 bolts and reinforcement.
| 50. REMOVE FRONT CROSSMEMBER SUB-ASSEMBLY |
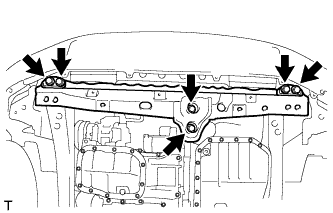 |
Remove the 6 bolts and crossmember.
| 51. REMOVE FRONT ENGINE MOUNTING INSULATOR |
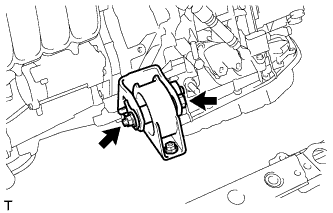 |
Remove the bolt, nut and engine mounting insulator.
| 52. REMOVE ENGINE AND TRANSAXLE |
Set an engine lifter underneath the engine.
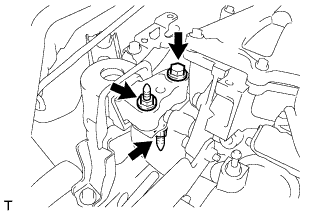 |
Remove the bolt and 2 nuts, and disconnect the engine mounting insulator RH.
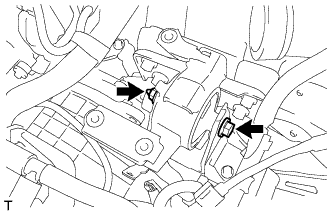 |
Remove the bolt and nut, and disconnect the engine mounting insulator LH.
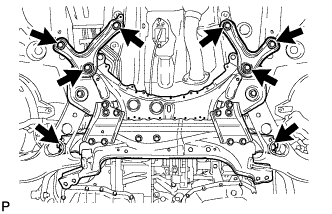 |
Remove the 6 bolts and front suspension member brace rear RH and LH.
Remove the 2 bolts and front suspension crossmember.
Operate the engine lifter and slowly remove the engine from the vehicle.
| 53. INSTALL ENGINE HANGER |
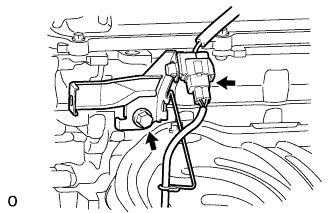 |
Disconnect the air fuel ratio sensor connector and remove the bolt and air fuel ratio sensor bracket.
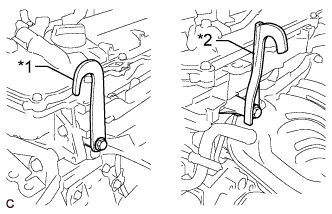 |
Install the No. 1 and No. 2 engine hangers with 2 bolts as shown in the illustration.
| *1 | No. 1 Engine Hanger |
| *2 | No. 2 Engine Hanger |
| No. 1 Engine Hanger | 12281-37021 |
| No. 2 Engine Hanger | 12282-37011 |
| Bolt | 91552-81050 |
Attach an engine sling device and hang the engine with a chain block.
| 54. REMOVE STEERING GEAR HEAT INSULATOR (for RHD) |
Remove the bolt and heat insulator from the steering gear.
| 55. REMOVE NO. 1 STEERING COLUMN HOLE COVER SUB-ASSEMBLY |
Remove the clamp and disconnect the steering column hole cover from the steering gear.
| 56. REMOVE FRONT SUSPENSION CROSSMEMBER SUB-ASSEMBLY |
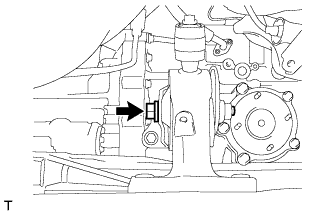 |
Remove the bolt and front suspension crossmember from the engine.
| 57. REMOVE STARTER ASSEMBLY |
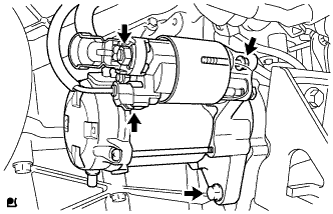 |
Disconnect the terminal cap.
Remove the nut and disconnect the starter wire.
Disconnect the connector.
Remove the 2 bolts and starter.
| 58. REMOVE FLYWHEEL HOUSING SIDE COVER |
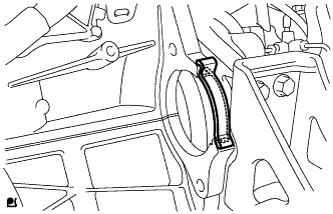 |
Remove the flywheel housing side cover from the cylinder block.
| 59. REMOVE CONTINUOUSLY VARIABLE TRANSAXLE ASSEMBLY (for CVT) |
Remove the continuously variable transaxle assembly (Click here).
| 60. REMOVE MANUAL TRANSAXLE ASSEMBLY (for Manual Transaxle) |
for 2WD:
Remove the manual transaxle assembly (Click here).
for 4WD:
Remove the manual transaxle assembly (Click here).
| 61. REMOVE DRIVE PLATE AND RING GEAR SUB-ASSEMBLY (for CVT) |
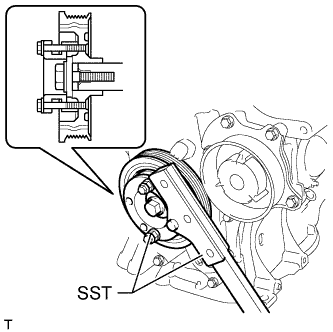 |
Using SST, hold the crankshaft.
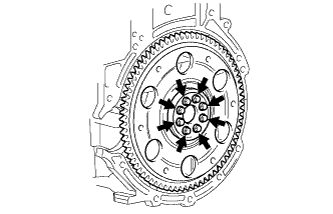 |
Remove the 8 bolts, rear spacer, drive plate and front spacer.
| 62. REMOVE CLUTCH COVER ASSEMBLY (for Manual Transaxle) |
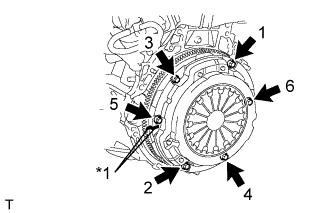 |
Put matchmarks on the clutch cover assembly and flywheel sub-assembly.
| *1 | Matchmark |
Loosen each set bolt one turn at a time in the order shown in the illustration until the spring tension is released.
Remove the set bolts and pull off the clutch cover assembly.
| 63. REMOVE CLUTCH DISC ASSEMBLY (for Manual Transaxle) |
| 64. REMOVE ORIFICE TO FLEXIBLE HOSE TUBE (for Manual Transaxle) |
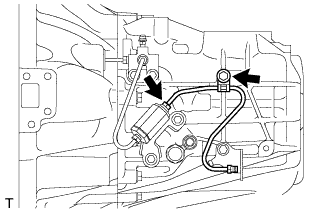 |
Using a union nut wrench, separate the orifice to flexible hose tube from the clutch orifice assembly.
Remove the bolt and orifice to flexible hose tube.
| 65. REMOVE CLUTCH RELEASE CYLINDER TO ACCUMULATOR TUBE (for Manual Transaxle) |
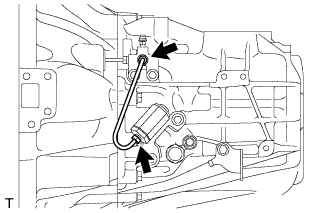 |
Using a union nut wrench, remove the clutch release cylinder to accumulator tube.
| 66. REMOVE CLUTCH ORIFICE ASSEMBLY (for Manual Transaxle) |
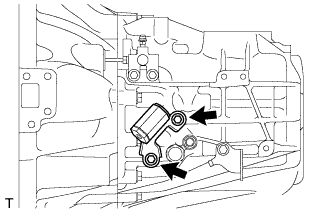 |
Remove the 2 bolts and clutch orifice assembly.
| 67. REMOVE CLUTCH RELEASE BLEEDER SUB-ASSEMBLY (for Manual Transaxle) |
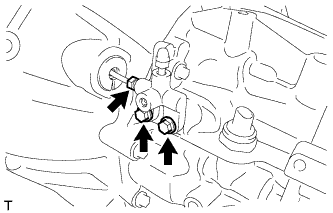 |
Using a union nut wrench, separate the clutch release bleeder sub-assembly from the clutch release cylinder to bleeder tube.
Remove the 2 bolts and clutch release bleeder sub-assembly from the manual transaxle assembly.
| 68. REMOVE CLUTCH RELEASE WITH BEARING CYLINDER ASSEMBLY (for Manual Transaxle) |
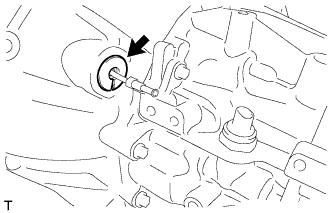 |
Remove the clutch tube boot from the manual transaxle assembly.
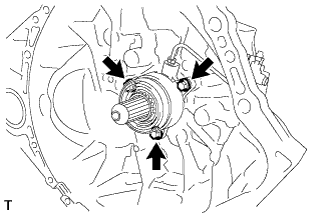 |
Remove the 3 bolts and clutch release with bearing cylinder assembly and clutch release cylinder to bleeder tube.
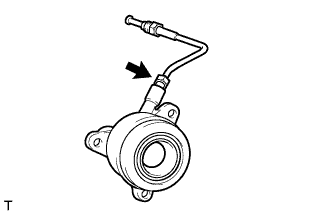 |
Using a union nut wrench, remove the clutch release cylinder to bleeder tube from the clutch release with bearing cylinder assembly.
| 69. REMOVE FLYWHEEL SUB-ASSEMBLY (for Manual Transaxle) |
|
Using SST, hold the crankshaft.
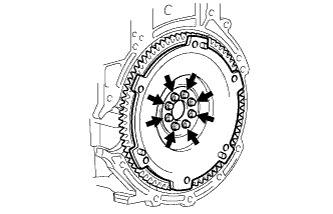 |
Remove the 8 bolts and flywheel.
| 70. INSTALL ENGINE ON ENGINE STAND |
Install the engine onto an engine stand with the bolts.
Remove the 2 bolts, and 2 engine hangers.
| 71. REMOVE ENGINE WIRE |
Remove the engine wire from the engine.
| 72. REMOVE DRIVE SHAFT BEARING BRACKET |
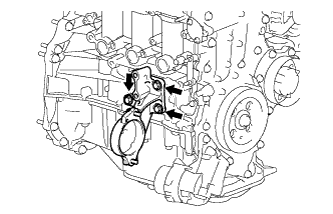 |
Remove the 3 bolts and bearing bracket.
| 73. REMOVE REAR ENGINE MOUNTING INSULATOR |
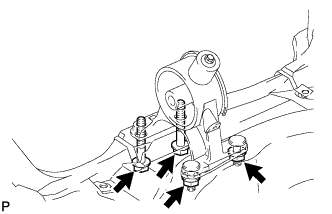 |
Remove the 2 bolts, 2 nuts and engine mounting insulator.
| 74. REMOVE ENGINE MOUNTING INSULATOR SUB-ASSEMBLY RH |
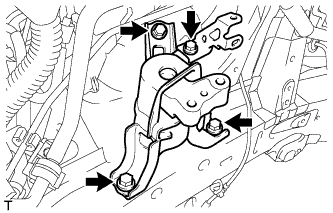 |
Remove the bolt and radiator reservoir bracket.
Remove the 3 bolts and engine mounting insulator.
| 75. REMOVE ENGINE MOUNTING INSULATOR LH |
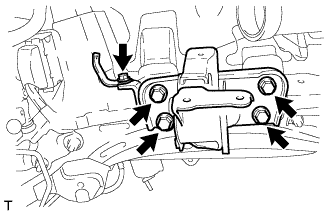 |
Remove the bolt and wire harness clamp bracket.
Remove the 4 bolts and engine mounting insulator.