CLUTCH UNIT (for 3ZR-FAE) > REMOVAL |
| 1. REMOVE MANUAL TRANSAXLE ASSEMBLY |
for EB61:
Remove the manual transaxle assembly (Click here).
for EB61F:
Remove the manual transaxle assembly (Click here).
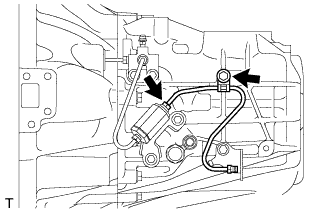
| 2. REMOVE ORIFICE TO FLEXIBLE HOSE TUBE |
|
Using a union nut wrench, separate the orifice to flexible hose tube from the clutch orifice assembly.
Remove the bolt and orifice to flexible hose tube.
| 3. REMOVE CLUTCH RELEASE CYLINDER TO ACCUMULATOR TUBE |
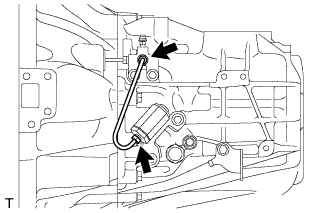 |
Using a union nut wrench, remove the clutch release cylinder to accumulator tube.
| 4. REMOVE CLUTCH ORIFICE ASSEMBLY |
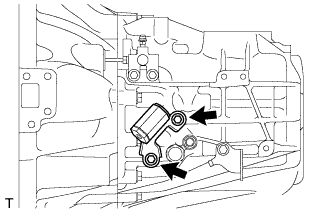 |
Remove the 2 bolts and clutch orifice assembly.
| 5. REMOVE CLUTCH RELEASE BLEEDER SUB-ASSEMBLY |
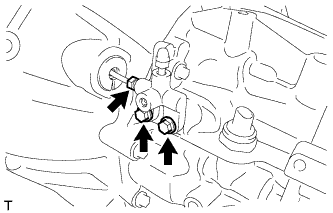 |
Using a union nut wrench, separate the clutch release bleeder sub-assembly from the clutch release cylinder to bleeder tube.
Remove the 2 bolts and clutch release bleeder sub-assembly from the manual transaxle assembly.
| 6. REMOVE CLUTCH RELEASE WITH BEARING CYLINDER ASSEMBLY |
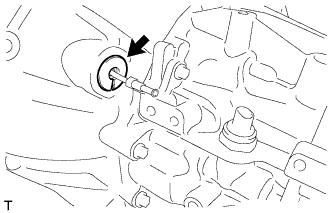 |
Remove the clutch tube boot from the manual transaxle assembly.
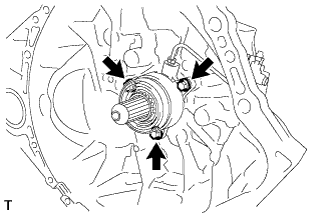 |
Remove the 3 bolts and clutch release with bearing cylinder assembly and clutch release cylinder to bleeder tube.
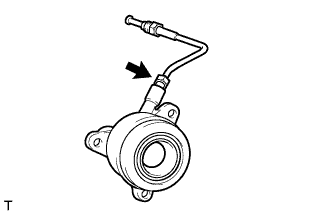 |
Using a union nut wrench, remove the clutch release cylinder to bleeder tube from the clutch release with bearing cylinder assembly.
| 7. REMOVE CLUTCH COVER ASSEMBLY |
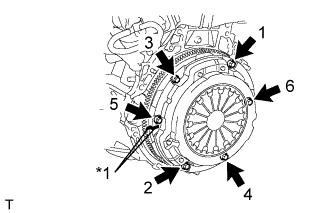 |
Put matchmarks on the clutch cover assembly and flywheel sub-assembly.
| *1 | Matchmark |
Loosen each set bolt one turn at a time in the order shown in the illustration until the spring tension is released.
Remove the set bolts and pull off the clutch cover assembly.
| 8. REMOVE CLUTCH DISC ASSEMBLY |