WINDOW / GLASS POWER WINDOW CONTROL SYSTEM(w/o Jam Protection Function) TERMINALS OF ECU
CHECK POWER WINDOW REGULATOR MASTER SWITCH ASSEMBLY
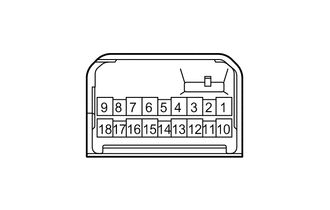
Disconnect the J5 power window regulator master switch assembly connector.
Measure the voltage and resistance according to the value(s) in the table below.
- HINT:
-
Measure the values on the wire harness side with the connector disconnected.
| Terminal No. (Symbol) | Wiring Color | Terminal Description | Condition | Specified Condition |
|---|---|---|---|---|
| J5-1 (E) - Body ground | W-B - Body ground | Ground | Always | Below 1 Ω |
| J5-6 (B) - J5-1 (E) | L - W-B | Power supply | Ignition switch ON | 11 to 14 V |
| Ignition switch off | Below 1 V |
Reconnect the J5 power window regulator master switch assembly connector.
Measure the voltage according to the value(s) in the table below.
| Terminal No. (Symbol) | Wiring Color | Terminal Description | Condition | Specified Condition |
|---|---|---|---|---|
| J5-3 (U) - J5-1 (E) | R - W-B | Power window motor UP output | Ignition switch ON, driver door power window switch OFF → UP (Manual operation) | 11 to 14 V → Below 1 V |
| J5-4 (D) - J5-1 (E) | GR - W-B | Power window motor DOWN output | Ignition switch ON, driver door power window switch OFF → DOWN (Manual operation) | 11 to 14 V → Below 1 V |
| J5-16 (U) - J5-1 (E) | G - W-B | Power window motor UP output | Ignition switch ON, front passenger door power window switch OFF → UP (Manual operation) | Below 1 V → 11 to 14 V |
| J5-15 (D) - J5-1 (E) | BR - W-B | Power window motor DOWN output | Ignition switch ON, front passenger door power window switch OFF → DOWN (Manual operation) | Below 1 V → 11 to 14 V |
| J5-12 (U) - J5-1 (E) | R - W-B | Power window motor UP output | Ignition switch ON, rear LH door power window switch OFF → UP (Manual operation) | Below 1 V → 11 to 14 V |
| J5-13 (D) - J5-1 (E) | BE - W-B | Power window motor DOWN output | Ignition switch ON, rear LH door power window switch OFF → DOWN (Manual operation) | Below 1 V → 11 to 14 V |
| J5-10 (U) - J5-1 (E) | G - W-B | Power window motor UP output | Ignition switch ON, rear RH door power window switch OFF → UP (Manual operation) | Below 1 V → 11 to 14 V |
| J5-18 (D) - J5-1 (E) | BR - W-B | Power window motor DOWN output | Ignition switch ON, rear RH door power window switch OFF → DOWN (Manual operation) | Below 1 V → 11 to 14 V |
CHECK MAIN BODY ECU (MULTIPLEX NETWORK BODY ECU) AND INSTRUMENT PANEL JUNCTION BLOCK ASSEMBLY
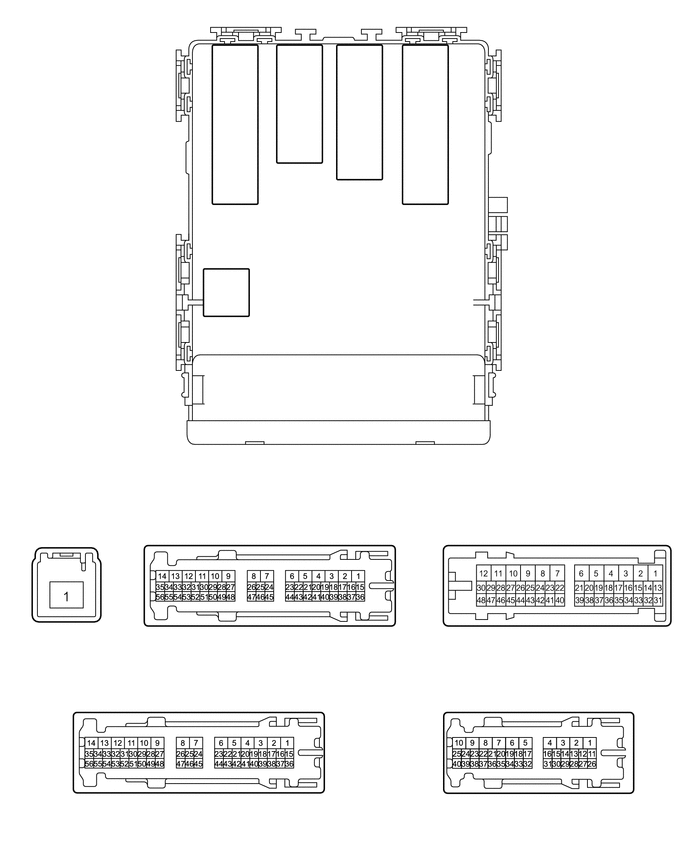
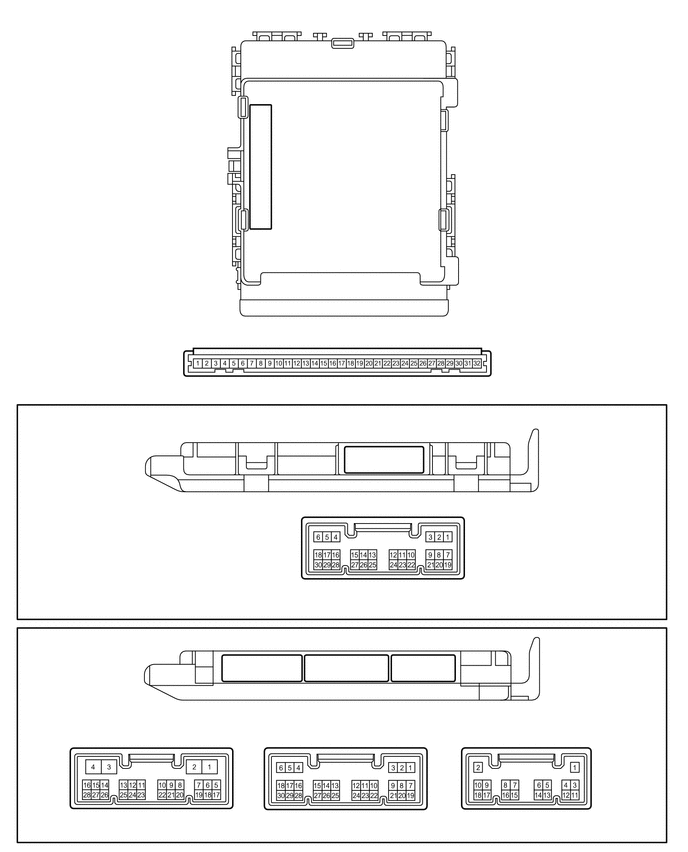
| *A | Main Body ECU (Multiplex Network Body ECU) with 1 Connector | *B | Main Body ECU (Multiplex Network Body ECU) with 3 Connectors |
| *1 | Main Body ECU (Multiplex Network Body ECU) | - | - |
Remove the main body ECU (multiplex network body ECU).
Click herePower Source / Network>POWER DISTRIBUTION>MAIN BODY ECU>REMOVAL
Connect the instrument panel junction block assembly connectors.
Measure the voltage and resistance according to the value(s) in the table below.
| Terminal No. (Symbol) | Wiring Color | Terminal Description | Condition | Specified Condition |
|---|---|---|---|---|
| A-11 (GND1) - Body ground | None - Body ground | Ground | Always | Below 1 Ω |
| A-30 (BECU) - Body ground | None - Body ground | Battery power supply | Always | 11 to 14 V |
| A-29 (ACC) - Body ground | None - Body ground | ACC power supply | Ignition switch ACC | 11 to 14 V |
| Ignition switch off | Below 1 V | |||
| A-32 (IG) - Body ground | None - Body ground | Ignition switch power supply | Ignition switch ON | 11 to 14 V |
| Ignition switch off | Below 1 V |
Install the main body ECU (multiplex network body ECU).
Click herePower Source / Network>POWER DISTRIBUTION>MAIN BODY ECU>INSTALLATION
Measure the voltage according to the value(s) in the table below.
| Terminal No. (Symbol) | Wiring Color | Terminal Description | Switch Condition | Specified Condition |
|---|---|---|---|---|
| G78-2 (KOFF) - Body ground | R - Body ground | Power window relay operation signal | Ignition switch ON | 11 to 14 V |
| Ignition switch off | Below 1 V |