WINDOW / GLASS POWER WINDOW CONTROL SYSTEM(w/o Jam Protection Function) Power Windows do not Operate at All
DESCRIPTION
The power windows operate by using the power window regulator master switch assembly, power window regulator switch assembly, rear power window regulator switch assembly LH or rear power window regulator switch assembly RH.
The power window regulator master switch assembly, power window regulator switch assembly, rear power window regulator switch assembly LH and rear power window regulator switch assembly RH connect the same power supply and ground lines.
WIRING DIAGRAM
Refer to System Diagram.
CAUTION / NOTICE / HINT
- NOTICE:
-
Inspect the fuses for circuits related to this system before performing the following procedure.
PROCEDURE
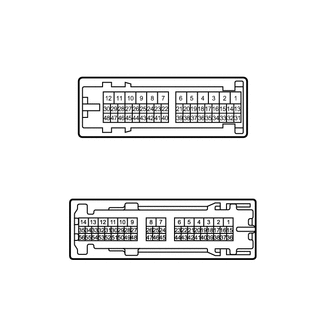
| *a | Component with harness connected
(Instrument Panel Junction Block Assembly) |
Measure the resistance according to the value(s) in the table below.
- Standard Resistance:
Tester Connection Condition Specified Condition 3D-9 - Body ground Always Below 1 Ω
Measure the voltage according to the value(s) in the table below.
- Standard Voltage:
Tester Connection Switch Condition Specified Condition 3C-44 - Body ground Ignition switch ON 11 to 14 V Ignition switch off Below 1 V
- Result:
Proceed to OK NG
OK
NG
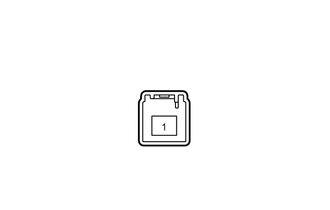
| *a | Component with harness connected
(Instrument Panel Junction Block Assembly) |
Measure the voltage according to the value(s) in the table below.
- Standard Voltage:
Tester Connection Condition Specified Condition 3A-1 - Body ground Always 11 to 14 V
- Result:
Proceed to OK NG
OK
NG
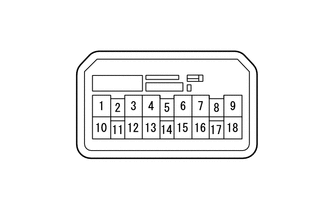
| *a | Front view of wire harness connector
(to Power Window Regulator Master Switch Assembly) |
Disconnect the power window regulator master switch assembly connector.
Measure the resistance according to the value(s) in the table below.
- Standard Resistance:
Tester Connection Condition Specified Condition J5-1(E) - Body ground Always Below 1 Ω
Measure the voltage according to the value(s) in the table below.
- Standard Voltage:
Tester Connection Switch Condition Specified Condition J5-6 (B) - Body ground Ignition switch ON 11 to 14 V Ignition switch off Below 1 V
- Result:
Proceed to OK NG
OK
NG
Remove the power window regulator master switch assembly.
Click hereVehicle Exterior>WINDOW / GLASS>POWER WINDOW MASTER SWITCH>REMOVAL
Inspect the power window regulator master switch assembly.
Click hereVehicle Exterior>WINDOW / GLASS>POWER WINDOW MASTER SWITCH>INSPECTION
- Result:
Proceed to OK NG
OK
NG
Disconnect the G78 main body ECU (multiplex network body ECU) connector.
Disconnect the 3C and 3D instrument panel junction block assembly connectors.
Measure the resistance according to the value(s) in the table below.
- Standard Resistance:
Tester Connection Condition Specified Condition G78-2 (KOFF) - 3C-44 Always Below 1 Ω 3D-9 - Body ground Always Below 1 Ω G78-2 (KOFF) or 3C-44 - Body ground Always 10 kΩ or higher
- Result:
Proceed to OK NG
OK
NG
Disconnect the 3C instrument panel junction block assembly connector.
Disconnect the J5 power window regulator master switch assembly connector.
Measure the resistance according to the value(s) in the table below.
- Standard Resistance:
Tester Connection Condition Specified Condition 3C-11 - J5-6 (B) Always Below 1 Ω J5-1 (E) - Body ground Always Below 1 Ω 3C-11 or J5-6 (B) - Body ground Always 10 kΩ or higher
- Result:
Proceed to OK NG
OK
NG