MIRROR (EXT) OUTER REAR VIEW MIRROR DISASSEMBLY
CAUTION / NOTICE / HINT
- HINT:
- ·
Use the same procedure for the RH and LH sides.
·The procedure listed below is for the LH side.
PROCEDURE

 87961
1.REMOVE OUTER MIRROR LH
87945
2.REMOVE OUTER MIRROR COVER LH
8794BA
3.REMOVE NO. 3 OUTER MIRROR COVER LH
81740
4.REMOVE SIDE TURN SIGNAL LIGHT ASSEMBLY LH
5.REMOVE OUTER MIRROR LIGHT BULB (w/ Foot light)
86790F
6.REMOVE SIDE TELEVISION CAMERA ASSEMBLY LH (w/ Panoramic View Monitor System)
87948
7.REMOVE OUTER MIRROR HOLE COVER LH
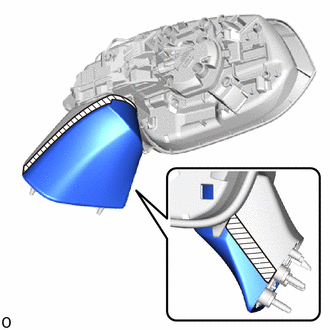

|
Protective Tape |
Apply protective tape around the outer mirror hole cover LH.
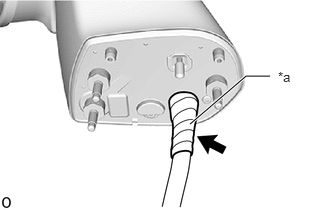
| *a | Vinyl Tape |
Remove the vinyl tape.
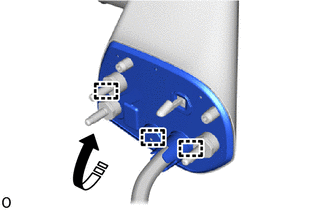

|
Remove in this Direction |
Detach the guide and fold back the gasket as shown in the illustration.
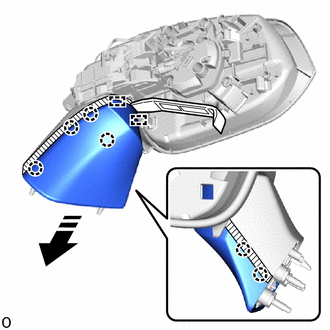
|
|
Remove in this Direction |
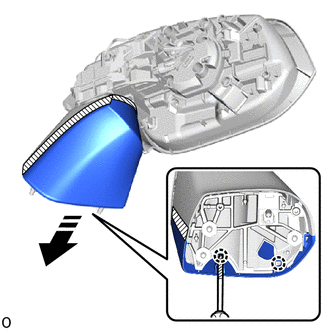
Using moulding remover A, detach the claw and rib as shown in the illustration.
|
|
Remove in this Direction |
|
|
Protective Tape |
Using a screwdriver, detach the claw and remove the outer mirror hole cover LH as shown in the illustration.
- HINT:
-
Tape the screwdriver tip before use.
87966
8.REMOVE OUTER MIRROR RETRACTOR LH (w/o Foot light)
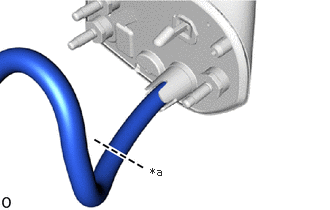
| *a | Cut here |
Cut the harness sub-assembly at the location shown in the illustration.
|
|
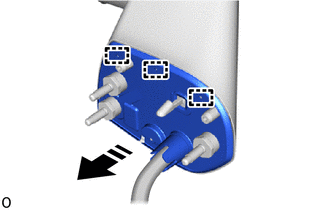
Remove in this Direction |
Detach the guide and remove the gasket as shown in the illustration.
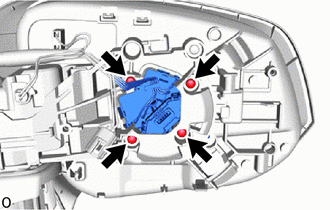
Remove the 4 screws and actuator sub-assembly.
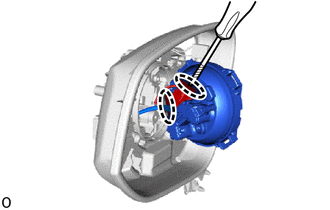

|
Insert Driver Here |
Using a screwdriver, disconnect the actuator sub-assembly connector.
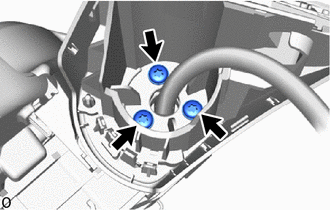
Using a T25 "TORX" socket wrench, remove the 3 "TORX" screws and base sub-assembly.
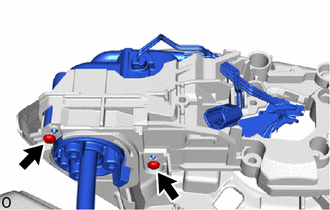
Remove the 2 screws.
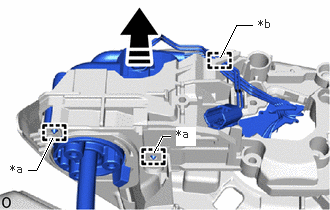
| *a | Guide |
| *b | Harness Clamp |
|
|
Remove in this Direction |
Detach the guide and harness clamp to remove the frame sub-assembly together with harness sub-assembly as shown in the illustration.