LIGHTING (EXT) HEADLIGHT ASSEMBLY(for Single Beam Headlight) DISASSEMBLY
CAUTION / NOTICE / HINT
The necessary procedures (adjustment, calibration, initialization or registration) that must be performed after parts are installed, removed or replaced during the headlight ECU sub-assembly LH removal/installation are shown below.
| Replacement Part or Procedure | Necessary Procedures | Effects/Inoperative Functions when not Performed | Link |
|---|---|---|---|
| Headlight ECU sub-assembly LH | ·
Vehicle information registration for the headlight ECU sub-assembly LH ·
Initialization of the headlight ECU sub-assembly LH |
Automatic headlight beam level control system | ( ) |
- NOTICE:
-
Even if the headlight ECU sub-assembly RH is replaced with a new one, vehicle information registration and initialization are not necessary.
- HINT:
- ·
Use the same procedure for the RH and LH sides.
·The procedure listed below is for the LH side.
PROCEDURE

 1. PRECAUTION
- NOTICE:
- ·
Handle components indoors as much as possible to prevent foreign matter from entering and adhering to headlight assembly components.
·Do not reuse parts which have reduced fastening ability due to thread damage.
·Do not touch the inner surface of the lens and metallic surfaces as much as possible, or they may become dirty.
·Do not allow metallic surfaces to become dirty, as such surfaces become damaged even if they are only lightly wiped with a soft cloth.
·When installing components, make sure that the wire harness is not pinched or pulled.
·Do not use solvent to clean components. Only clean them with a dry cloth.
81510C
2.REMOVE FRONT TURN SIGNAL LIGHT BULB
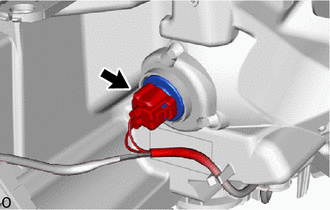
Disconnect the connector.
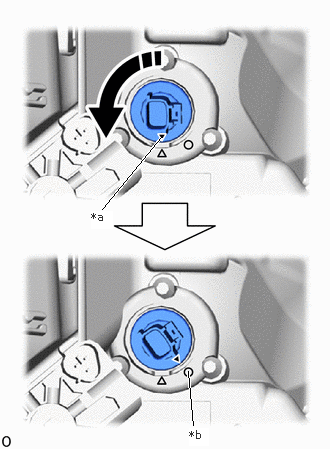
| *a | Matchmark |
| *b | Unlock Position Mark |

|
Turn in this Direction |
Turn the bulb socket counterclockwise until the matchmark is aligned with the unlock position mark and remove it.
|
|
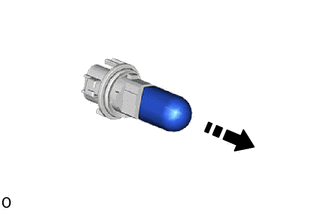
Remove in this Direction |
Remove the front turn signal light bulb from the bulb socket.
81194A
3.REMOVE HEADLIGHT PROTECTOR LH
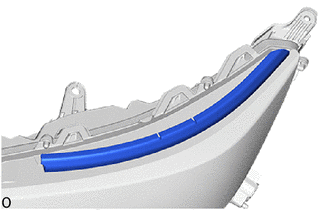
Remove the headlight protector LH.
- NOTICE:
-
The headlight protector LH must not be reused.
81056A
4.REMOVE HEADLIGHT ECU SUB-ASSEMBLY LH
81134
5.REMOVE HEADLIGHT GASKET
8110B
6.REMOVE HEADLIGHT LENS SUB-ASSEMBLY LH
- NOTICE:
- ·
Perform work using clean rubber gloves.
·Do not touch the inner surface of the lens and metallic surfaces as much as possible, or they may become dirty.
·Do not allow metallic surfaces to become dirty, as such surfaces become damaged even if they are only lightly wiped with a soft cloth.
·Do not use solvent to clean components. Only clean them with a dry cloth.
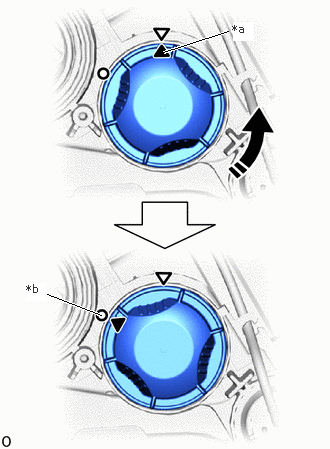
| *a | Matchmark |
| *b | Unlock Position Mark |
|
|
Turn in this Direction |
Turn the headlight back cover counterclockwise until the matchmark is aligned with the unlock position mark and remove it.
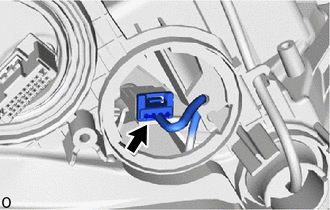
Disconnect the connector.
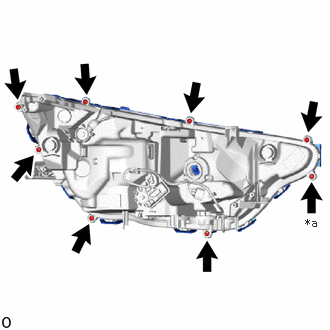
| *a | "TORX" Screw |
Remove the 7 screws.
Using a T20H "TORX" driver, remove the "TORX" screw.
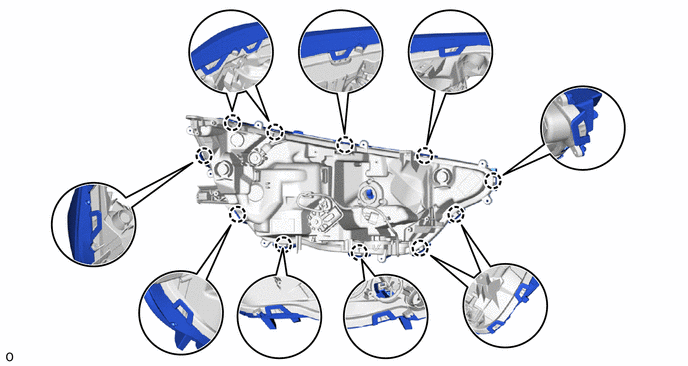
Detach the claw.
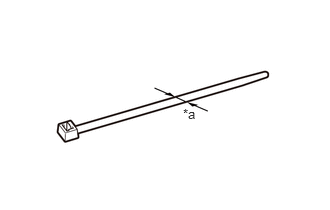
| *a | 7.6 mm (0.299 in.) |
Prepare a cable tie with a width of 7.6 mm (0.299 in.).
- HINT:
-
Cable ties with a narrow width (2.5 mm (0.098 in.) etc.) are difficult to pull out through the headlight lens gasket.
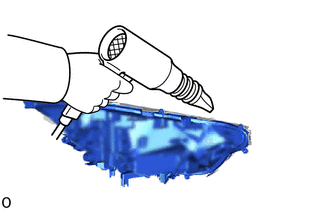
Using a dryer, warm the area around the cable tie insertion area on the headlight lens gasket at the rear of the headlight housing.
- NOTICE:
-
To prevent the headlight housing from deformation or damage, do not heat one part intensively and do not heat with a temperature of 120°C or higher.
- HINT:
-
The headlight lens gasket becomes soft and easy to pull through when warmed.
Insert a cable tie between the headlight lens LH sub-assembly LH and headlight housing and pull out the headlight lens gasket as shown in the illustration.
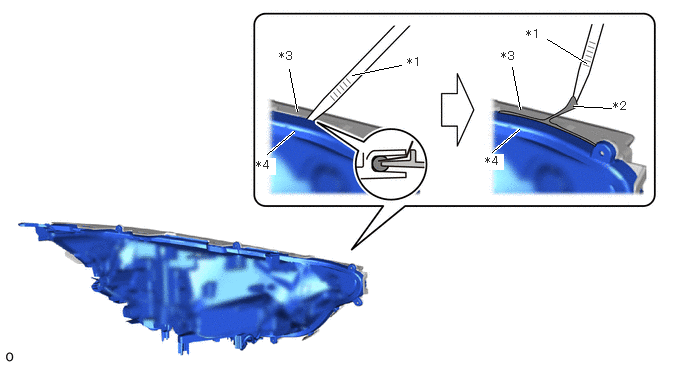
| *1 | Cable Tie | *2 | Headlight Lens Gasket |
| *3 | Headlight Lens Sub-assembly LH | *4 | Headlight Housing |
- NOTICE:
-
Do not damage the groove in the headlight housing or the surface of the headlight lens LH sub-assembly LH.
Pull out the headlight lens gasket until there is no contact between the headlight lens sub-assembly LH and the headlight housing.
- HINT:
-
If the headlight lens gasket is disconnected while being pulled out, insert a cable tie between the headlight lens LH sub-assembly LH and headlight housing and pull out the headlight lens gasket again.
Lift up the headlight lens LH sub-assembly LH directly upwards to remove it.
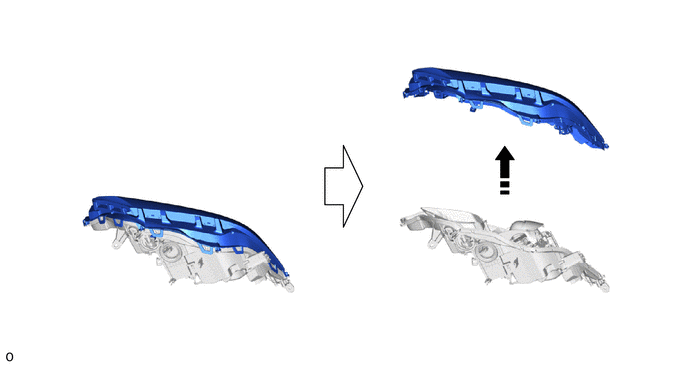
|
|
Remove in this Direction | - | - |
81132B
7.REMOVE HEADLIGHT LENS GASKET
- NOTICE:
- ·
The headlight lens gasket must not be reused.
·Perform work using clean rubber gloves.
·Do not touch the inner surface of the lens and metallic surfaces as much as possible, or they may become dirty.
·Do not allow metallic surfaces to become dirty, as such surfaces become damaged even if they are only lightly wiped with a soft cloth.
·If there are fingerprints on the inner surface of the lens, lightly wipe with a soft cloth.
·Do not use solvent to clean components. Only clean them with a dry cloth.
Remove the remaining headlight lens gasket from the headlight lens and headlight housing.
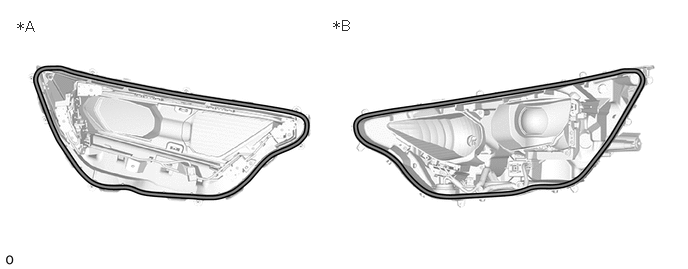
| *A | Headlight Lens Side | *B | Headlight Housing Side |

|
Headlight Lens Gasket | - | - |
81160A
8.REMOVE HEADLIGHT LED UNIT ASSEMBLY LH
- NOTICE:
- ·
Prevention of static electricity is required during this procedure.
·Use static electricity countermeasures SST (desktop antistatic mat set) and observe all precautions to prevent damage to the system by electrostatic discharge (ESD).
·Perform work using clean rubber gloves.
·Do not touch the headlight LED unit assembly LH with bare hands.
·Do not allow metallic surfaces to become dirty, as such surfaces become damaged even if they are only lightly wiped with a soft cloth.
·If there are fingerprints on the inner surface of the lens, lightly wipe with a soft cloth.
·Do not use solvent to clean components. Only clean them with a dry cloth.
·Remove the headlight LED unit assembly LH only when replacing it.
·The headlight LED unit assembly LH must not be reused.
- SST
- 09890-47010 (09891-04020, 09891-04010, 09891-04030, 09891-04040)
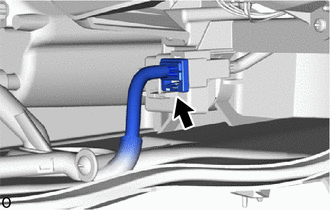
Disconnect the connector.
Remove the 2 screws.
Push and detach the claw to remove the headlight unit bezel.
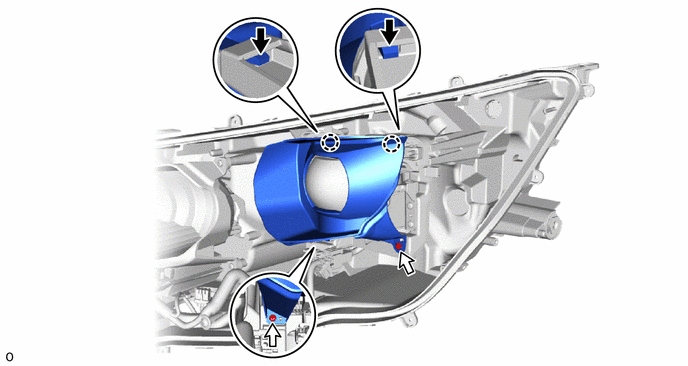

|
Push Here | - | - |
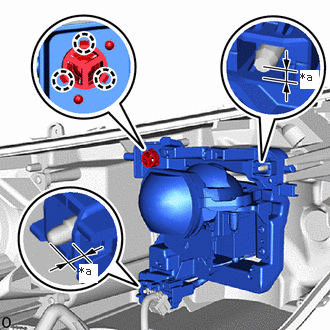
| *a | Protrusion Amount Measurement Area |
Using a vernier caliper, measure and record the dimensions of the protrusion of the aiming screws for beam axis vertical and horizontal adjustments.
Detach the claw to disconnect the headlight LED unit assembly LH from the pivot collar.
|
|
Loosen in this Direction |
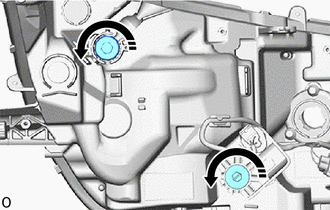
Hold the headlight LED unit assembly LH with one hand to prevent it from tipping over and loosen the aiming screws for beam axis vertical and horizontal adjustments counterclockwise until the headlight LED unit assembly LH is removed.

|
Protective Tape |
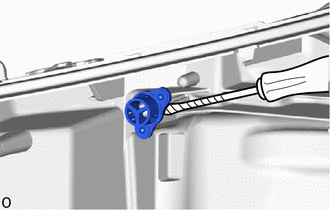
Using a clip remover, remove the pivot collar.
- HINT:
-
Tape the clip remover tip before use.