EXTERIOR PANELS / TRIM ROOF RACK DISASSEMBLY
CAUTION / NOTICE / HINT
- HINT:
- ·
Use the same procedure for the RH and LH sides.
·The procedure listed below is for the LH side.
·If the roof rack leg is left on the vehicle side, perform procedures 1 through 5 and procedures 10 through 12.
·If removing together with the roof rack leg, perform procedures 6 through 12.
PROCEDURE

 1.REMOVE ROOF HEADLINING ASSEMBLY
- HINT:
-
Perform this procedure only if the roof rack leg is left on the vehicle.
-
Click hereVehicle Interior>INTERIOR PANELS / TRIM>ROOF HEADLINING>REMOVAL
63472
2.REMOVE FRONT ROOF RACK LEG LH
- HINT:
-
Perform this procedure only if the roof rack leg is left on the vehicle.
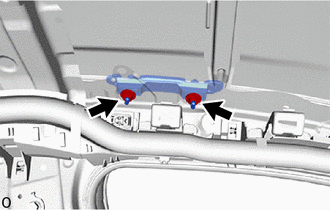
Remove the 2 nuts and front roof rack leg LH.
63474
3.REMOVE REAR ROOF RACK LEG LH
- HINT:
-
Perform this procedure only if the roof rack leg is left on the vehicle.
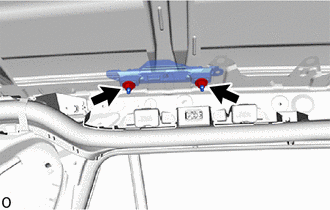
Remove the 2 nuts and rear roof rack leg LH.
63436B
4.REMOVE NO. 1 ROOF CARRIER SEAL LH
- HINT:
- ·
Perform this procedure only if the roof rack leg is left on the vehicle.
·When removing the No. 1 roof carrier seal LH, if the double-sided tape is difficult to remove, heat the adhesive of the No. 1 roof carrier seal LH using a heat light.
- Standard:
Item Temperature No. 1 Roof Carrier Seal LH 20 to 30°C (68 to 86°F)
- CAUTION:
-
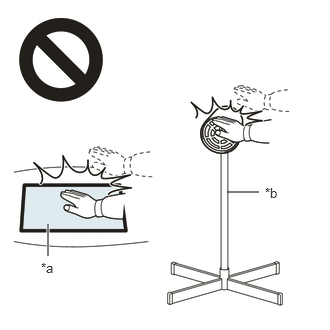 2.365,2 2.698,2 false 0.5,2.333 0.5,2.667 true 0.427,2.708 0.74,2.865 0.313,0.156 10 false *a 2.76,1.927 3.073,2.083 0.313,0.156 10 false *b
*a Heated Part *b Heat Light
- ·
Do not touch the heat light and heated parts.
·Touching the heat light may result in burns.
·Touching heated parts for a long time may result in burns.
- NOTICE:
-
Do not heat the No. 1 roof carrier seal LH excessively.
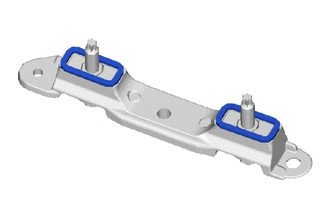
Remove the 2 No. 1 roof carrier seals LH.
63437D
5.REMOVE NO. 2 ROOF CARRIER SEAL LH
- HINT:
- ·
Perform this procedure only if the roof rack leg is left on the vehicle.
·When removing the No. 2 roof carrier seal LH, if the double-sided tape is difficult to remove, heat the adhesive of the No. 2 roof carrier seal LH using a heat light.
- Standard:
Item Temperature No. 2 Roof Carrier Seal LH 20 to 30°C (68 to 86°F)
- CAUTION:
-
2.365,2 2.698,2 false 0.5,2.333 0.5,2.667 true 0.427,2.708 0.74,2.865 0.313,0.156 10 false *a 2.76,1.927 3.073,2.083 0.313,0.156 10 false *b
*a Heated Part *b Heat Light
- ·
Do not touch the heat light and heated parts.
·Touching the heat light may result in burns.
·Touching heated parts for a long time may result in burns.
- NOTICE:
-
Do not heat the No. 2 roof carrier seal LH excessively.
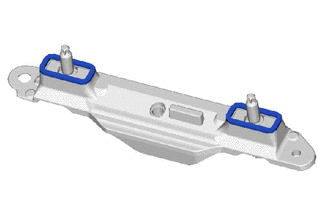
Remove the 2 No. 2 roof carrier seals LH.
75632A
6.REMOVE NO. 1 ROOF SIDE GARNISH LID LH
- HINT:
-
Perform this procedure only if removing together with the roof rack leg.
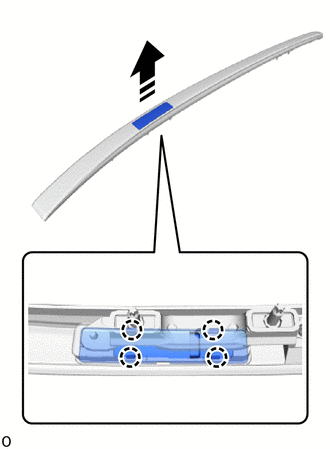

|
Remove in this Direction |
w/o Roof Carrier:
Detach the claw and remove the No. 1 roof side garnish lid LH as shown in the illustration.
75634
7.REMOVE NO. 2 ROOF SIDE GARNISH LID LH
- HINT:
-
Perform this procedure only if removing together with the roof rack leg.
w/o Roof Carrier:
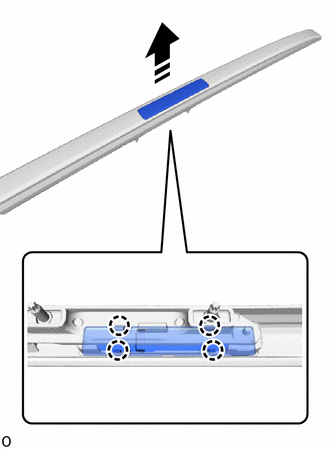
|
|
Remove in this Direction |
Detach the claw and remove the No. 2 roof side garnish lid LH as shown in the illustration.
63472
8.REMOVE FRONT ROOF RACK LEG LH
- HINT:
-
Perform this procedure only if removing together with the roof rack leg.
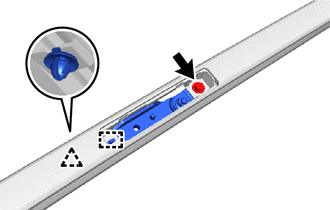
Remove the bolt.
Detach the clip and guide to remove the front roof rack leg LH.
63474
9.REMOVE REAR ROOF RACK LEG LH
- HINT:
-
Perform this procedure only if removing together with the roof rack leg.
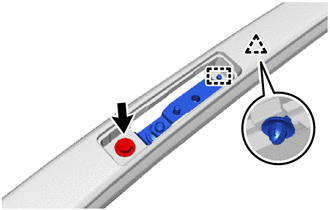
Remove the bolt.
Detach the clip and guide to remove the rear roof rack leg LH.
75566D
10.REMOVE FRONT ROOF SIDE GARNISH PROTECTOR LH
for Panoramic moon roof:
- HINT:
-
When removing the front roof side garnish protector LH, if the double-sided tape is difficult to remove, heat the adhesive of the front roof side garnish protector LH using a heat light.
- Standard Value:
Part Temperature Front Roof Side Garnish Protector LH 20 to 30°C (68 to 86°F)
- CAUTION:
-
2.365,2 2.698,2 false 0.5,2.333 0.5,2.667 true 0.427,2.708 0.74,2.865 0.313,0.156 10 false *a 2.76,1.927 3.073,2.083 0.313,0.156 10 false *b
*a Heated Part *b Heat Light
- ·
Do not touch the heat light and heated parts.
·Touching the heat light may result in burns.
·Touching heated parts for a long time may result in burns.
- NOTICE:
-
Do not heat the front roof side garnish protector LH excessively.
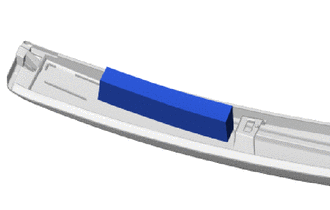
Remove the front roof side garnish protector LH.
63439A
11.REMOVE NO. 3 ROOF CARRIER SEAL LH
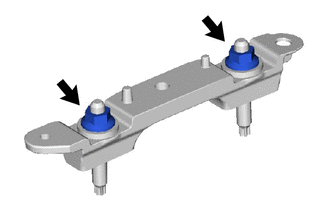
Remove the 2 nuts.
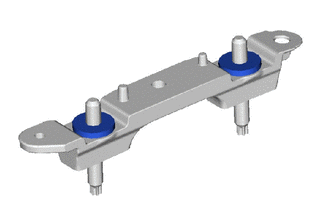
Remove the 2 No. 3 roof carrier seals LH.
63439E
12.REMOVE NO. 4 ROOF CARRIER SEAL LH
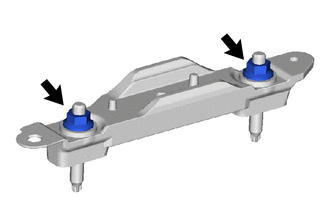
Remove the 2 nuts.
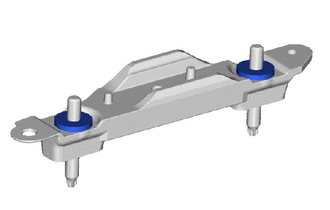
Remove the 2 No. 4 roof carrier seals LH.